Search this blog

Monday, January 27, 2025

Whatever, it is going to take some sorting!

In an effort to add a little more realism to the scene, I have added some earth type powders to the bases of the trees. Generally, the base around a tree is dry and therefore not much tends to grow unless it is in my garden where the weeds seem to flourish no matter what the ground conditions are like!

My Last Great Project

It is a subtle effect but with the tree trunk added it looks right to me.

My Last Great Project

Moving onto the barn, the mud area, created with acrylic mud, does look right. But, generally around buildings like this, the weeds, just like my garden, do tend to flourish. But, unlike my garden where Mrs. Woody directs regular weeding operations, places such as this barn don't benefit from a Mrs. W type regime of weeding!

My Last Great Project

Knowing I won't have to weed this model means I can go as wild as I like! So lots of glue and a variety of vegetational materials were applied. 

My Last Great Project

And just to make things a little more pleasing to the eye, a bit of colour in the form of the red flowers that I have previously used were added.

My Last Great Project

So, with all the green stuff done for the moment it was time to stand back and admire it all but also take note of the mess created!

My Last Great Project

My Last Great Project

As I have said before, great artists tend to work in a mess, and although I do not count myself as a great artist I think my mess is something a great artist could have produced! Whatever, it is going to take some sorting!


Sunday, January 26, 2025

Another job on the list!

It seems like a long time that I have been dealing with the vegetation of these scenic sub-bases but I am just about there now! No more dealing with green stuff for a while. That dream was shattered though when Mrs. Woody reminded me that it would soon be time to start planting seeds in the greenhouse! Another job on the list!

Anyway, forgetting about that job for a while until it returns to Mrs. W's mind, the last section on my layout to do at the moment is the one that runs up at the edge of the baseboard. Originally in one piece but due to the weight and weakness of the thin part of the structure it is now in two parts. Dealing with the smaller part first I had this bare patch of grass to work with.

My Last Great Project

Moving it to a more comfortable to work on position, it benefitted from some fencing and bushes done in the same way as described in recent posts.

My Last Great Project

Put back on the layout it looks good - to me anyway! Must put some track in place on that point. That's a job on my own list of jobs to do! 

My Last Great Project

Moving onto the second part, I had to use some masking tape along the length of the narrow part to stop the glue running down the back. I then added some ground foam.

My Last Great Project

The wider part was again treated to some fencing - the last that I have of this old Triang product - before general bushes, shrubs and unkempt vegetation were added.

My Last Great Project

My Last Great Project

With that done it was back on the layout.

My Last Great Project

With all the green sub-bases back on the baseboard it looks very different to a couple of months ago. I say green sub-bases as there is still one sub-base to make right at the back of that baseboard but that will be more of a civil engineering one in brick.

Another job on the list!

I just need to bed the barn and tree bases in and then that's it - for the moment anyway but no doubt there will be another job on the list - or maybe more!


Saturday, January 25, 2025

Hanging basket liner isn't just for hanging baskets!

A quieter day after the hard labour at the Rocks by Rail Museum. Lifting scenic materials for my 00 gauge Last Great Project Layout is far easier then lifting rocks and digging trenches!

Having moved to the back of the current scenic sub-base, I am vegetating the area along the edge of the tarmac area for the goods shed. My usual methods have been used and I ended up with this.

My Last Great Project

That area on the right didn't quite look rough and uncared enough in my view so out came the hanging basket liner. Now this is a great product for creating that uncultivated wild look where nature has run wild and isn't just for hanging baskets! Applying some of it gave me this.

My Last Great Project

A bit of yellow flock added a little colour and interest and the whole scene looks much better. Just hope that Mrs. Woody isn't thinking of having hanging baskets this year as there may not be much liner left!

Friday, January 24, 2025

Pointless, but progress is being made at the Rocks by Rail Museum!

I couldn't help but feel something was in the wrong place as I walked into the Rocks By Rail Museum.

Rocks by Rail Museum

A somewhat pointless point switch! Walking further down I could see that there were far from pointless works going on!

Rocks by Rail Museum

It was a bit of a shock to see rails and sleepers taken up but there is a reason.

Rocks by Rail Museum

The platform line is suffering from sinkage caused by the fact that the drainage system is either in sufficient or actually is not there! It has got to the point where something has to be done. The plan is to lift all that track including the point, dig a trench and install a drain.

Rocks by Rail Museum

That drain will then connect into the manhole under the point just to the left of the picture above. Why is the manhole under the point? Well, apparently many years ago the track was realigned and the manhole ended up partially covered. I guess it made some sense at the time but it is not the best of situations to have to deal with it now. However, with some hard work it should be done in a few weeks!

Rocks by Rail Museum

One interesting item of rolling stock that has appeared is this rather unusual falt wagon with barriers around it. Apparently it was a tippler at Corby where its body was removed and the chassis was used to rest engines from the Class 14s that were serviced there. You learn something every day!

Rocks by Rail Museum

Meanwhile, over the maintenance pit, work continues on the re-tube of 1931. Somewhere under there is John who is reaming out the tubes so that they can be pulled out once the ends are ground off.

Rocks by Rail Museum

What looks like a battery in the firebox is actually a workshop light so that John can see what he is doing!

Rocks by Rail Museum

Rocks by Rail Museum

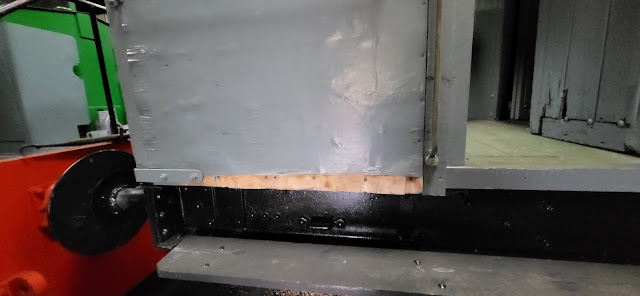
Moving over to the Exhibition Centre, John was pleased to show me that the timber from my kitchen Rocks by Rail Museum was now a floor in Mr. D! Good to know it has had a second life and it makes it look somewhat classy in there! Anyone for ballroom dancing?

Rocks by Rail Museum

Turning round I noticed that two of the brake vans have been moved in to dry out ready to be repaired.

Rocks by Rail Museum

Nothing to substantial but the woodwork has suffered being outside over many winters.

Rocks by Rail Museum

Rocks by Rail Museum

Moving onto my work, it was back to Gabions! But we are there!

Rocks by Rail Museum

Having run out of rocks we found some old bricks that broke up nicely and David is putting them in.

Rocks by Rail Museum

We think there is about eight and a half tons of rock material in the gabion baskets/cages and another ton and a half behind it - all moved by hand!

Rocks by Rail Museum

Moving to the other side this fence had to go and I soon had that gone with the use of a hammer!

Rocks by Rail Museum

That's a view I had not seen before!

Rocks by Rail Museum

This will be the way visitors get onto the viewing platform and we need to lower the area to match the path level behind so we first dug a trench that is level from the path.

Rocks by Rail Museum

With that done a scaffold post was placed from the trench to the top of the gabion.

Rocks by Rail Museum

And, miraculously, using my spirit level app on my phone, it is level! 

Rocks by Rail Museum

All that we need to do now is backfill from behind and put some barriers around the edge of the platform. Simples! At least we have a lot of clay and soil to backfill with!

Thursday, January 23, 2025

Planting bushes!

The green fingered work of WMD continues with yet more bushes and shrubbery appearing on the scenic sub base that I am working on at the moment. Although it is a bit long winded and to some degree repetitive I find it both therapeutic and fulfilling. You can just loose yourself without having to be too worried about accuracy after all there is no blue print for a bush! You also see rapid progress as a scene you have created from scratch comes together and forms part of the small World that you are creating. That is part of what the hobby is about!

Todays efforts have been concentrated around the edge of the cutting where the fence has been placed and then beyond towards the tarmac area that will be part of the goods yard. Luckily, bushes have decided to grow over the fence in places where two panels of fencing join therefore conveniently hiding the joints. Marvelous thing nature!

My Last Great Project

Where some of the PVA glue has run down the cutting face I used some of the scatter powders that I used for the bushes to rub into it giving the effect of vegetation growing in the cutting face from the bush above.

My Last Great Project

Beyond the fence, the bushes continue and this is a photo of the Woodlands Scenic Poly Fiber product cut to size, glued to the edge of the cutting and then covered in PVA glue before a variety of mainly green scenic products are scattered over it.

My Last Great Project

Leading to this which I am pleased with!

My Last Great Project

In fact I am pleased with it all so far!

My Last Great Project

And, in place on the layout, it looks great!

My Last Great Project

There is still more to go before it is all finished like that near six foot length to the right of the picture where it looks very mundane!

Wednesday, January 22, 2025

The WMD film crew have been at it again!

Yes, the WMD Film crew have been busy with a third video this year showing the scenic materials and methods I have been using to create my 50 shades or so of green on my 00 gauge Last Great Project Layout. So if anything I have written about in the last few posts doesn't make sense this video might!


Tuesday, January 21, 2025

50 shades of green - well almost!

Continuing with the nature theme from yesterdays post, some more green stuff has been added along with a fence to my Last Great Project Layout. Now although not being a particular knowledgeable person on plants and shrubs, as I do tell Mrs. Woody when she puts gardening jobs on the chore list for me, I do know that they are generally not just green but actually they are in many shades of green - possibly fifty or more or maybe less but a lot of shades of green. Looking at a real country landscape you will see many shades of green and that is what I am trying to recreate on my layout at the moment. Whether that is successful is open to debate as with many of my projects but I am quite pleased with the way things are going at the moment. Maybe the photos illustrate that ?

My Last Great Project

That fence is some old Triang line-side fencing that is over 50 years old and going strong - unlike me! I painted it as it was moulded in white plastic and that was mentioned in the very first blog post I made back in 2020 - click here to see that post. As you can see there are various shades of green in the vegetation I am adding but I have added a slight amount of other colour in the form of red flowers...

My Last Great Project

and mauve blooms on the bush. Just something to make life a little less like 50 shades of green!

My Last Great Project


Monday, January 20, 2025

Nature is rarely tidy!

It is all very good having a nice level grass effect on your model railway scenery and it certainly changes the look of a layout as I talked about yesterday. However, nature is rarely tidy and where left to its own devices it will do all sorts of things. Mrs. Woody has never let me experiment with letting the garden go wild so my chore list from her includes a number of jobs that in effect keep nature in check within the garden confines. But, when it comes to my model railway I am in sole charge of what happens on that so Mrs. W has informed me! With this independence established I am aware that parts of my series of scenic bases are areas that would have little interference from maintenance operations and so would be left to nature to do what it wanted. How you recreate that on a model is something that has many methods developed by skilled modellers over the years, but being Woody I do have my preferred ones. 

The WMD Stores have, over the years, built up a stock of scenic materials suitable for recreating the wilds that nature creates. Most of these are things that are glued down with neat PVA or dilute PVA spread from above using an old syringe.

My Last Great Project

I don't have any particular system of creating a wild look but just go along adding as I see fit.

My Last Great Project

It is one of those jobs where you do tend to go back over areas adding a little more. Usually it is a case of better to add a little than have to take off a lot!

My Last Great Project

This is what I finally finished with on this scenic sub-base. I like the look but will probably add a little more as I work my way around the other sub-bases.

My Last Great Project

On the layout it looks far more interesting and hopefully realistic then just plain grass.

My Last Great Project

I also managed to do another of the sub-bases - really handy being able to work on them on the work bench!

My Last Great Project

With both treated sub-bases on the layout things look even more different but hopefully good!

My Last Great Project

Once the track is ballasted it should really look the part!

My Last Great Project