Search this blog

Thursday, July 17, 2025

A deviation from the inmstructions!

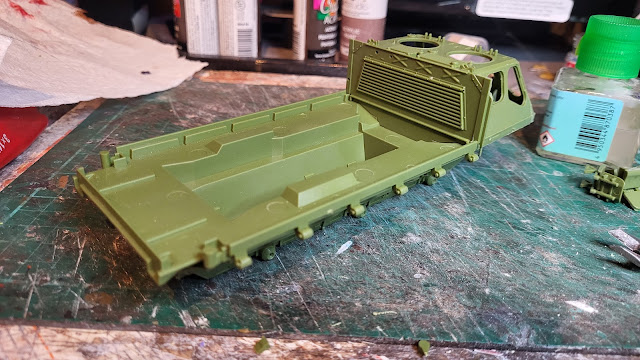
Now, I have in the past in this blog highlighted the pitfalls of not following the manufactures instructions to build their kit or indeed Mrs. Woody's instructions on tasks that she has lined up for me to do. In fact I have created problems for myself by doing the exact thing both with kits and Mrs. W! However, in this instance I am sure I can deviate from the Airfix instructions without issue but not so sure about Mrs. W! However, I will deal with the latter issue later. In the meantime, I have found out that it is possible to build the Stolly's cab separately to the chassis/hull and for it to still be able to be fitted into place. The significance of this is that I can paint the inside of the cab at any stage I like without having the worry of having to do it through the cab windows. Much easier!

With cab temporarily in place it already looks like a Stolly!

Airfix Alvis FV622 Stalwart Mk.2 1/35 scale,

Airfix Alvis FV622 Stalwart Mk.2 1/35 scale,

Right, better get some plant watering done as Mrs. Woody has instructed - always best to follow instructions, or is it???

Wednesday, July 16, 2025

This could be an early Tamiya kit!

Work on building the Airfix Alvis FV622 Stalwart Mk.2 1/35 scale or as I will now refer to it as the Stolly has started. This is the first Airfix 1/35 scale military vehicle that I have built by Airfix so the build will be a learning curve but initial impressions are that this could be an early Tamiya kit. Parts fit well and it is not over complicated but the jit dos lack the finess of say a Dragon or Miniarts kit. However, I like uncomplicated and simple as it reminds me of me!

So far it has been easy going ith the chassis or hull constructed and the cab started on. Unfortubnatly, for a brand new tooling, there is a sink hole mark either side of the cab interior.

Airfix Alvis FV622 Stalwart Mk.2 1/35 scale

Some filler has dealt with these, but not what I expected in a new kit.

Airfix Alvis FV622 Stalwart Mk.2 1/35 scale

Moving on, the cab interior is mostly done and I have left the seats unglued for he moment as that will make painting the cab interior easier. I will have to see how I do that painting before building the cab which the instructions instruct should be built around the chassis/hull or can I find another way?

Tuesday, July 15, 2025

More YouTube filming!

The station area street scene is the subject of the latest WMD blockbuster (not) and can be found for your viewing pleasure here!


Monday, July 14, 2025

It has come together!

The Dapol Booking Hall kit that I built some weeks ago is now in its setting and although there are a few things left to do it is all but finished and I am pleased with it! I will let the photos do the talking which makes a change for me!

My Last Great Project,

My Last Great Project,

My Last Great Project,

My Last Great Project,

My Last Great Project,

My Last Great Project,

My Last Great Project,


Sunday, July 13, 2025

Parts of a street scene.

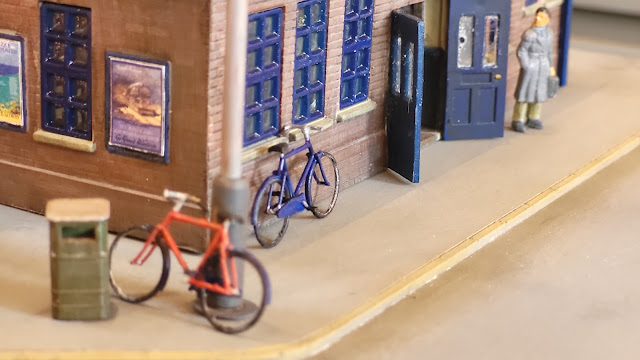
Getting towards the end of the road overbridge and station building area there is a need to add some detail to the street scene. Luckily, the WMD Stores had the necessary items in stock - telephone box, post box, bus shelter, cabinets, litter bin and bicycles.

My Last Great Project

All I needed to do was build and paint as appropriate.

The post boxes were a simple kit and I chose one of the six in the box.

My Last Great Project

Which built up into this.

My Last Great Project

The telephone box is also a simple small but effective kit.

My Last Great Project

Painting these and it takes you back to a pre internet/mobile phone era when you rushed to get a letter in the post box before the last collection of the day and when you stood in a phone box feeding it 2 pence pieces every time the pips went! You need to be of a certain age to understand that!

My Last Great Project

With some gluing and painting this is how the street scene parts look.

My Last Great Project

I am nearly at the point where I can add all these parts and see if it all comes together as a street scene I hoped for!


Saturday, July 12, 2025

Time for a Stolly!

Time for a Stolly is not what Mrs. Woody heard. She heard Time for a lolly! Whilst in this hot weather that might be a good idea, equally it being time for a Stolly is also a good idea!  

What's a Stolly Woody, you may well ask? Well, in this case it is a Alvis FV622 Stalwart Mk.2 which in many circles, including the military, is known affectionately as a Stolly for short. If you want to know more about this vehicle there are some details on the Wikipedia page available by clicking here.

That's all well and good but what has this to do with my blog? A new 1/35th scale kit by Airfix is what it has to do and yesterday saw delivery of one of the first kits in the UK to the WMD HQ. In fact it is the first kit I have bought this year!. Uniquely, this is the first 1/35th scale injection moulded kit of this vehicle made as far as I know. There have been resin versions in the scale and KFS do a fine 1/24th scale one in resin but Airfix have done a first!

Airfix Alvis FV622 Stalwart Mk.2 1/35 scale

It is a largish box with some weight to it although opening it up doesn't reveal a mass of parts just heavy ones!

Airfix Alvis FV622 Stalwart Mk.2 1/35 scale

I'm looking forward to building this as I have had a fascination for these iconic vehicles since my childhood. Mrs. Woody is of the opinion that I am still a child which may explain my continued fascination! It does look as though I may have help or probably hindrance in the build as Monty the cat is showing a keen interest!

Airfix Alvis FV622 Stalwart Mk.2 1/35 scale

Right, now its time for a lolly!

Friday, July 11, 2025

Reduced shade!

I was hot at the Rocks By Rail Museum yesterday. It was so hot that Thomas's paint app told him it was too hot for paint to be applied to metal so he decided that a day helping me with some vegetational butchery in the shade was the thing to do. Alex thought so too. Now, despite the heat waves and general lack of rain, bushes and shrubs still appear to have grown at a rapid rate so some heavy pruning was required. Thomas had brought in his mini chain saw which he gave his mother for her birthday but then decided to test at the Museum. To be fair it was a great aid and soon destructed vegetation was piling up to the point that something had to be done.

Rocks by Rail Museum

Cue the builders bag which allowed the vegetational debris to be bulked up and transported to the composting area.

Rocks by Rail Museum,

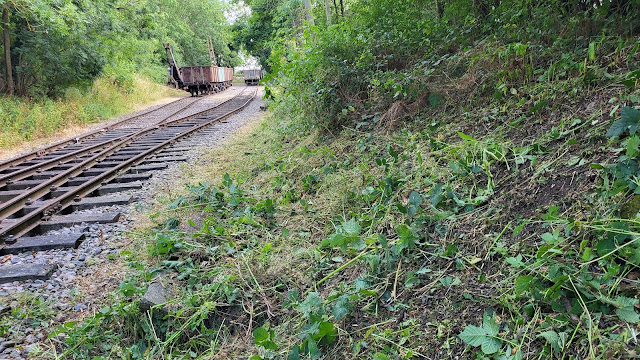
There was another issue with this mass vegetational destruction. That being that the shade that had been there was no longer there as we stripped back the vegetation! Being a bit crafty, I made my excuses and took the strimmer along the quarry tracks where it was still shady and cool and my strimming did nothing to reduce that! Cool! More to do on the cutting back side of the shrubs but that can wait for another day - hopefully when it is cooler!

Rocks by Rail Museum,

Whilst talking about vegetation, one of my bike rides took me pass the local canal which over the last few weeks has become a stream. This is how it looked a few weeks ago.

Canal

And now....

Canal

Maybe I should take the strimmer down there!


Thursday, July 10, 2025

An illuminating time!

I need some street lights for my current project so a search through the WMD Stores produced some plastic rod, tube and card  - just what I needed!

I built a 'proving' first one which looked OK.

My Last Great Project,

So, on that basis I built another two!

My Last Great Project,

With a brass wire insert, they should hopefully stand straight once in position. It will certainly be an illuminating time putting them in place! 

Wednesday, July 9, 2025

The Dirt Squad!

Time to call in the Dirt Squad and make that grey tarmac look worn and weathered. Having added white lines I then used a mixture of weathering powders and very dilute brown and grey paints to add dirt to the tarmac surfaces.

My Last Great Project,

Unless a road and pavement are newly laid then the tarmac will weather as it oxidises from that fresh black colour to a muted grey. Add to that the passage of vehicles and the weather and you get an added bonus of dirt on the tarmac. Given the passage of vehicles and the effect of rain much of this dirt accumulates around the kerb edge. 

My Last Great Project,

I'd say the Dirt Squad have done a great job! 

Tuesday, July 8, 2025

Lets ask Google AI "What is Woody's Modelling Diary?"

If you have used Google recently to find out about anything you may have noticed that its first result is an AI generated answer. Having looked at these a few times, the results appear to be reasonably accurate so just out of devilment I asked Google, " What is Woody's Modelling Diary?" and this is what came back.

Woody's Modelling Diary (WMD) is a YouTube channel and related blog where "Woody" documents his progress, challenges, and thoughts on building model railways, kits, and other related modelling projects. He shares updates on his layouts, including his 009 gauge layout "Chalkdon," and discusses various aspects of the hobby, such as materials, techniques like weathering, and even the use of 3D printed components for model railways. 
Key aspects of Woody's Modelling Diary:
  • Model Railways and Kits:
    The channel primarily focuses on building and detailing model railways, including specific gauges like 009, and various modelling kits, often involving detailed work like weathering and modifications. 
  • Sharing Progress:
    Woody provides updates on his ongoing projects and often reflects on the time and effort involved in completing them, humorously noting his usual slow progress. 
  • Specific Projects:
    Featured projects include his 009 gauge layout "Chalkdon" and detailing work on model trucks like the Italeri DAF Canvas Truck. 
  • Discussions and Tips:
    He discusses various aspects of the hobby, from the purpose of ballast and underlay in model railways to the benefits and costs of 3D printed parts. 
  • Blog Presence:
    In addition to YouTube, he also maintains a blog under the same name, woodysmodelingdiary.blogspot.com, for further content and updates. 
I'm impressed by that!