Search this blog

Friday, July 25, 2025

Weathering the cab!

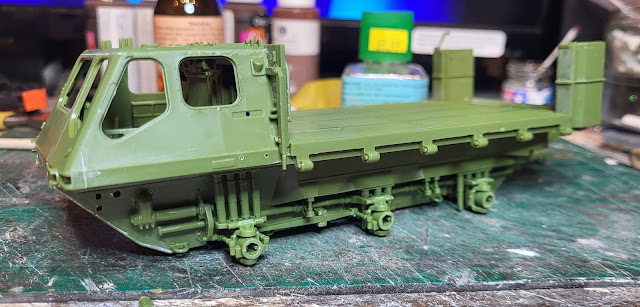
The Airfix Stolly is coming on with the cab now weathered using my usual dilute mix of earth brown paint along with some Tamiya weathering pastilles. 

Airfix Alvis FV622 Stalwart Mk.2 1/35 scale,

I like the way this has come together. 

Airfix Alvis FV622 Stalwart Mk.2 1/35 scale,

Once matt varnished I will mask from the inside the window and hatch aperture's and fit the cab to its base. With that done I should then be able to deal with any joint issues before painting the external parts of the vehicle.


Thursday, July 24, 2025

And in this photo I was 90!

You don't hear the phrase 'And in this photo I was 90.' very often. In fact I don't think I have ever heard it before. However, at the Rocks By Rail Museum we are lucky enough to have Ray as a volunteer. I have posted about him before - see that by clicking here -  and Ray is now 94 but still acts as though he is just 60! I walked in to the cafe at the Museum today to find Ray going through a photo album of his with some of the other volunteers. 

Rocks by Rail Museum

Some of the photos in there were over 100 years old but Ray could recall all the names and the detail behind them including this one of the pub that his family ran and in the 1950s they collected pennies to stick on the pub mirror before donating them to the local children.

Rocks by Rail Museum

Then there were photos of some of the ironstone quarry plant that he operated.

Rocks by Rail Museum

Then he turned a page and said 'And in this photo I was 90' in a very blasé manner as though there was nothing to it. I said, 'Ray I just hope I live long enough to be able to utter the words ' And in this photo I was 90!' and I do! And with that I went off to do battle with the grass!

Rocks by Rail Museum

And it was a bit of a battle given the rain over the last week!

Rocks by Rail Museum

AS I seem to be the expert on vegetational butchery we need a n expert on actually nuturing vegetation which is where Geoff comes in with his planting skills seeing some delightful colour along the platform area.

Rocks by Rail Museum

Meanwhile, in the Restoration shed, things are moving on with the re-tubing of loco 1931 but just not in ways that are visable as the work is de-rusting the lower part of the boiler. I had a long chat with John who has worked with steam locomotives and traction engines for much of his life and learnt a great deal about the stresses and strains a boiler goes throuh as it is heated to create steam. I can certainly understand why the steel plate is so thick and why inspections are important.

Rocks by Rail Museum

Over the over side of the tracks work was going on with the brakes for Graham the Sentinel. It seems like thick steel is required for that as well as John and Hazel struggle carrying this brake linkage part.

Rocks by Rail Museum

Having done whatever it was to it, John is now building himself up to refitting the part!

Rocks by Rail Museum

With all these locos out of the Exhibition Centre to allow Graham to come out...

Rocks by Rail Museum

...the middle road of the building was empty...

Rocks by Rail Museum

...there was suddenly the opportunity to admire some of the locos full side on which gives a different view.

Rocks by Rail Museum

Rocks by Rail Museum

Rocks by Rail Museum

Rocks by Rail Museum

Rocks by Rail Museum

Rocks by Rail Museum

Rocks by Rail Museum

Finally we should hopefully be ready for Sunday's running day with The Rutlander train taking guests on brake van rides along the line.

Rocks by Rail Museum

It would be nice to take this photo at the age of 90 but will Mrs. Woody and her list of chores for me thwart that ambition!

Wednesday, July 23, 2025

Stolly cab interior


Airfix Alvis FV622 Stalwart Mk.2 1/35 scale

The Stolly cab interior looks a lot more interesting now the various parts are fitted and painted. It just needs some dirtying up to replicate the state these cabs got into in real life!

Tuesday, July 22, 2025

Micro Sol for a micro job!

 Having previously primed the cab interior of the Stolly it was time to top coat it with Tamiya XF11 which is J N Green or also known as Bronze Green which is the shade of paint used by the British Army in the 1960s. The airbrush soon had the paint applied.

Airfix Alvis FV622 Stalwart Mk.2 1/35 scale,

Whilst that was drying I thought it was time to add the dashboard decal to the dashboard part! Airfix have supplied a nice set of decals but previous experience of other makes and dashboard decals has not been good for me. So with some trepidation I cut out the decal and dipped it in water.

Airfix Alvis FV622 Stalwart Mk.2 1/35 scale,

After a couple of minutes I slid it in place. Now the dashboard part has the various dials and switches moulded in place so the decal needs some Micro Soll applied to soften it so that it moulds to the shape of the dashboard part.

Airfix Alvis FV622 Stalwart Mk.2 1/35 scale,

You can see by the ruler that this is a small part! At this point the Micro Sol still has to do its job. However, once it had it all looked much better. I'm impressed by the decal and its general fit on a part so small as well as the powers of Micro Sol.

Airfix Alvis FV622 Stalwart Mk.2 1/35 scale,


Monday, July 21, 2025

Stolly cab interior starts to get some paint.

Just a quick update on the Airfix Stolly build. I am now at the stage where I need to attach the cab to the base which means the inside needs painting. First off a bit of preparation. I am painting the seats and a few other parts separately and then attaching them to the cab base once painted which means I need a paint free gluing surface. Now I could just paint the entire cab base and then scrape paint away but to save some possibility of damage to the paintwork I have used thin strips of masking tape to cover the required areas. Once painting is finished I should be able to remove them and have plain unpainted plastic ready for glue! That is the theory anyway!

Airfix Alvis FV622 Stalwart Mk.2 1/35 scale

Painting requires a primer and black is my go to choice as if I miss any parts with the top coat the black should at least act as a shading and hide my errors! So the primer has been applied. Left overnight it should be ready for a top coat tomorrow.

Airfix Alvis FV622 Stalwart Mk.2 1/35 scale


Sunday, July 20, 2025

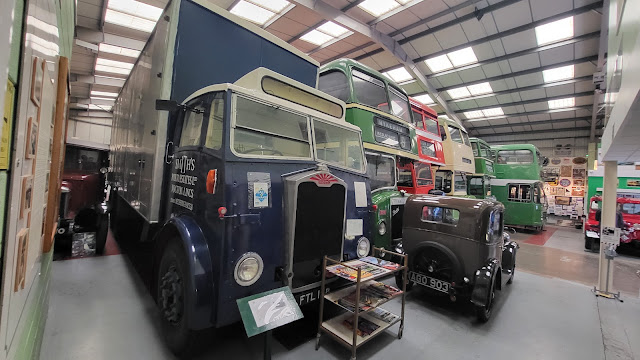
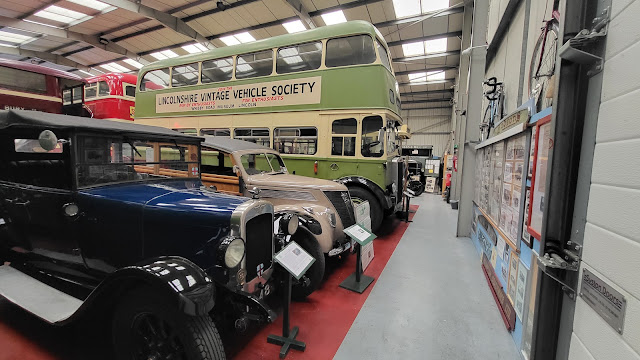
Mrs Woody really wanted to go to the Lincolnshire Road Transport Museum!

Following a post on Phil Parkers Blog about the Lincolnshire Road Transport Museum (click here for that) I knew Mrs. Woody would want to visit (possibly if there was nothing else left to do on a wet Sunday afternoon and if she didnt know where we were going) so creating a surprise for her I just said we were going out and off we went today! I must admit that I had never heard of the place before but it is one of those hidden gems tucked away but well worth hunting out!

Lincolnshire Road Transport Museum

It is not only full of buses, lorries, cars and motorcycles, but the walls and any free floor space have the most amazing display of memorabilia and information.

Lincolnshire Road Transport Museum

Lincolnshire Road Transport Museum

Lincolnshire Road Transport Museum

Lincolnshire Road Transport Museum

Lincolnshire Road Transport Museum

They carry out their own maintenance in the workshop which is very tidy and organised. Must mention that at the Rocks By Rail Museum!

Lincolnshire Road Transport Museum

Lincolnshire Road Transport Museum

There are a lot of bicycles around the walls with this being about the most modern but I recall it!

Lincolnshire Road Transport Museum

Equally I also recall this particular bus that I travelled on many times!

Lincolnshire Road Transport Museum

And I also recall as a lad wanting so badly to be sat behind the wheel of a double decker bus just like this!

Lincolnshire Road Transport Museum

I also wanted a Ford Capri and eventually had four of them over time!

Lincolnshire Road Transport Museum

There is so much I have not shown here and I will be taking Mrs. Woody back as I am sure I did not see everything and that Mrs. W will also definitely want to return! At £5 each admission what a great way to spend a Sunday afternoon - check out the website by clicking here.


Saturday, July 19, 2025

In suspense!

 I was in suspense about how easy or difficult it would be to build the Stolly's suspension. It is an important part of the vehicle and very visible so it has to be right. At the time of building the first side I was a bit bemused as to how Airfix had designed the suspension but by the time I finished I was actually very impressed by it. The important part is to follow the instructions precisely and to look hard before cutting the parts from the spru to make sure you don't leave behind any part of the part!

The first part is the torsion bar suspension and shock sbsorbers.

Airfix Alvis FV622 Stalwart Mk.2 1/35 scale,

The stub axles are added next.

Airfix Alvis FV622 Stalwart Mk.2 1/35 scale,

Then the steering linkages and some hoops .

Airfix Alvis FV622 Stalwart Mk.2 1/35 scale,

Just the other side to do now!

Airfix Alvis FV622 Stalwart Mk.2 1/35 scale,


Friday, July 18, 2025

I saw the sign!

I saw the sign is a line from that hit by Ace of Base (click here for the video) but has nothing to do with this post!  Rather, and this should please loyal blog reader Mrs. B, it relates to the sign at the entrance to the Rocks by Rail Museum. A mammoth vegetational butchery session by me has seen the sign regain some visability from outside of the Museum's gate.

Rocks by Rail Museum,

Meanwhile, back at the Exhibition Centre, there was space.

Rocks by Rail Museum,

Betty had gone up the quarry to do a filming stint (more of that another time) and Mr. D was over the pit where John and Hazel were dealing with various air leaks in the braking system.

Rocks by Rail Museum,

Across the way, in the restoration shed, Richard was de-rusting 1931 in readiness for the retube.

Rocks by Rail Museum,

And all this was being observed by this helicopter that was flying over the site!

Rocks by Rail Museum,

Must ber a sign of the times we are in!


Thursday, July 17, 2025

A deviation from the inmstructions!

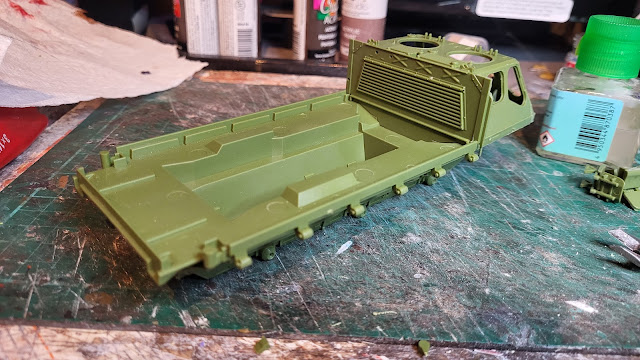
Now, I have in the past in this blog highlighted the pitfalls of not following the manufactures instructions to build their kit or indeed Mrs. Woody's instructions on tasks that she has lined up for me to do. In fact I have created problems for myself by doing the exact thing both with kits and Mrs. W! However, in this instance I am sure I can deviate from the Airfix instructions without issue but not so sure about Mrs. W! However, I will deal with the latter issue later. In the meantime, I have found out that it is possible to build the Stolly's cab separately to the chassis/hull and for it to still be able to be fitted into place. The significance of this is that I can paint the inside of the cab at any stage I like without having the worry of having to do it through the cab windows. Much easier!

With cab temporarily in place it already looks like a Stolly!

Airfix Alvis FV622 Stalwart Mk.2 1/35 scale,

Airfix Alvis FV622 Stalwart Mk.2 1/35 scale,

Right, better get some plant watering done as Mrs. Woody has instructed - always best to follow instructions, or is it???