Search this blog

Monday, December 9, 2024

Woody gets plaster and makes some good goo!

Time to put my impromptu 09 project to one side and get back to some work on My Last Great Project 00 gauge layout. With the wiring and point motors done it is now time to move back to the topside of the baseboard and get on with progressing the landscape.

I had already built the scenery sub-bases to a rough shape and these will need to be carved to their final shape before the next stage of construction starts. I have started off with the smallest sub-base first and risking my well being have used Mrs. Woody' bread knife to carve the landscape to shape. Must remember to put it back and I just hope she doesn't read this!

My Last Great Project,

With that done it was time to get the plaster impregnated bandage out of the WMD Stores. If you have been unfortunate enough to have had a broken limb this is what they use to put a cast around it so that the healing process can happen.

My Last Great Project,

Now plaster impregnated bandage can be messy to use as you need to wet the plaster. I was not going to end up looking like some form of mummy from the tomb or in this case Man Cave with bandage and plaster hanging from me so my plan was to cut small pieces from the roll and wet it in situ by brushing water onto it. Cunning but would it work? Time to find out so the first part of the bandage was cut and placed on the sub-base.

My Last Great Project,

By gently brushing water onto it the plaster liquified and could be brushed out over the bandage just as I hoped!

My Last Great Project,

Things progressed as more bandage was added and I stayed clean!

My Last Great Project,

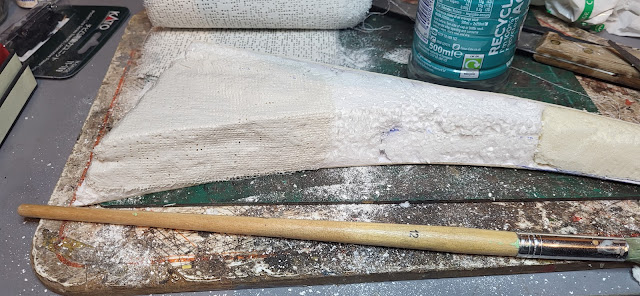
Finally all the sub-base was covered in bandage and being a quick setting plaster it was just about dry!

My Last Great Project,

This was fine but it looks a bit anemic! Time to add some colour and texture. Out came some ordinary plaster and some brown acrylic paint.

My Last Great Project,

Mixing that lot up and I ended up with this goo - it was not like the Goo desert that had been in the pot before the jar was requisition for this job but nevertheless this was a good goo! Having a brownish colour means that should the scenery get chipped it will show a brown instead of a glaring white colour.

My Last Great Project,

With the mix applied using a stiff brush I could get some texture to the supposed rock face of the cutting side.

My Last Great Project,

I just need to let it all fully dry and then move onto the next sub-base! However I have remained clean and that's the main thing!




Sunday, December 8, 2024

Caravan needs a chassis to sit on its own wheels!

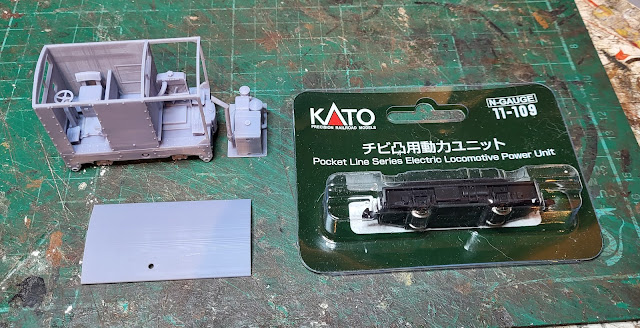
Caravan, or to be factually correct, the model of it, runs on a Kato 11-009 chassis of which have I already have several under the 3D printed 009 gauge locos that I have built over the past years or so.

09 3D print loco Caravan

Therefore, getting the couplings and top off the main chassis which is mentioned in the product description as necessary to make the chassis fit was a fairly quick job.

09 3D print loco Caravan

With that done, the supplied special motor keeper loop was added to the chassis.

09 3D print loco Caravan

With that done I just needed to cut off the two pieces on the underside joining the axle boxes together as a strengthener for the print whilst it was shipped to me.

09 3D print loco Caravan

The chassis then slid into its home nicely.

09 3D print loco Caravan

Once that was done I have a loco that can sit on its own wheels! Just needs painting and I need to find a driver figure for it. This could be an interesting project!

09 3D print loco Caravan


Saturday, December 7, 2024

Woody buys a caravan but not the holiday kind!

This arrived in the post the day, whilst Mrs. Woody was out. I could not have planned it better!

It is a 3D print, a form of model production that I am becoming increasingly impressed with the more I see how it is developing and the reasonable prices that are generally charged. 

09 3D print loco Caravan

Now this one is a caravan, just not the sort you go on holiday with. It is in fact another narrow gauge loco. Not to my usual 4mm to the foot running on n gauge 9mm track, but this one is 7mm 0 gauge, i.e. nearly twice the size of 009. However it does still run on n gauge 9mm track. This photo illustrates the difference with 7mm or 09 gauge on the left and 4mm or 009 gauge on the right.

09 3D print loco Caravan

The kit itself is based on a real loco and to quote Google - 'The Simplex Caravan is a small, unusual variant of the Motor Rail Simplex class of locomotive with an overall cab. The prototype was built in 1938 and is the only example to have been supplied to a UK company. It is currently preserved on the Leighton Buzzard Narrow Gauge Railway.' There is an interesting picture of it here in a very bright yellow paintjob. Not sure what colour mine will end up in but probably it wont be as bright!

Theses are the kit parts - all three of them so it is not a problem that there are no illustrated instructions to assist the model maker!

09 3D print loco Caravan

The level of detail achieved is remarkable with all the hand controls, foot pedals and other small parts all included in the print.

09 3D print loco Caravan

09 3D print loco Caravan

09 3D print loco Caravan

It should be fun getting this going and painted up and where am I going to run it? Well the answer to the last question is still in floating around in my mind but a plan from my initial idea when I bought this is beginning to come together and will involve what I talked about in a previous post here.! Stay tuned for further updates!


Friday, December 6, 2024

Man on a mission!

This is a man on a mission! 

Rocks by Rail Museum

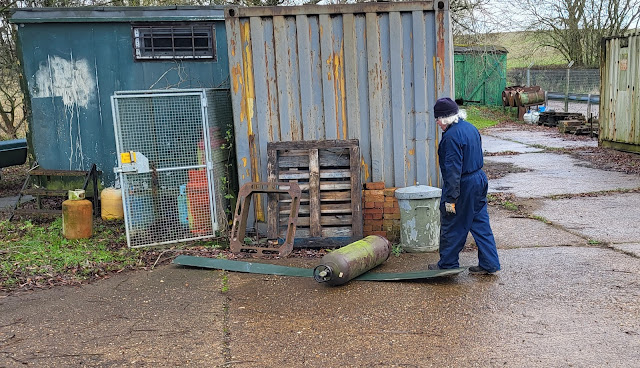
In the continued quest to complete the plant shed roof the last remaining major part is to fit the ridges to seal the centre of the roof. As I wrote last week the preformed ridges are angled too sharply so they need to be made shallower. The man on a mission is Andy who innovatively uses a large metal gas bottle to roll down the pre-formed ridge to flatten it!

Rocks by Rail Museum,

Rocks by Rail Museum,

This level of innovativeness is viewed with some amazement by some including Richard and Riley!

Rocks by Rail Museum,

However it works and two thirds of the roof is now complete. Harriot the JCB will be pleased especially as she is also due to get a new alternator to cure her ever flat battery problem!

Rocks by Rail Museum

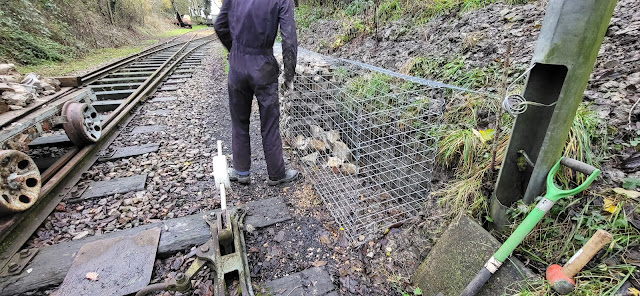
Meanwhile I continue my quarrying quest for more rock to fill the gabion baskets/cages that are part of a new viewing platform that is being built. The easy stuff has gone so I am having to dig down and under things to find more of the hardened cement bags to break up.

Rocks by Rail Museum

This is about a ton of material on the platelayers trolley.


I was joined by Alex and we pushed the loaded trolley up the line to the site where the third and last of the first level baskets/cages needed filling.

Rocks by Rail Museum

That ton or so of rocks took the level up to about two thirds so another load was needed.

Rocks by Rail Museum
After lunch and a rest another trolley load of material was quarried, loaded, pushed up the line and then deposited into the awaiting basket/cage bringing it to just about full! Alex poses inn celebration of the fact!

Rocks by Rail Museum

So there it is. The first layer is done - just about. A little bit of fine material is needed to top off all three baskets/cages and then the area behind them needs backfilling and then we can move onto level two with more gabion baskets/cages to fill! Given that they will be three feet higher it will be more difficult to fill them. That will see yet another man on a mission! A mission to try to make it easier to fill them!

Rocks by Rail Museum


Thursday, December 5, 2024

Up on a shelf!

Up n a shelf stands this....

Italeri Renault Magnum 1/25 scale

It is a 1/25th scale Renault Magnum truck I built from an Italeri kit about 20 years ago. I was and continue to be a big fan of the Magnum, both in truck and ice-cream form! When it was introduced in 1990, it was the first European cabover truck to have a flat floor making the cab easy to move around in. It had some USA influences with the access steps behind the front wheel rather than in front and in fact 6 of them went to the USA on tour - the so called 'La Route 66 en Renault Magnum'! There is a series of YouTube videos starting with episode one here. I don't think USA drivers were impressed given their condo sleeper cabs!

Meanwhile, back to my model.

Italeri Renault Magnum 1/25 scale

It was the first truck model that I weathered and I was and still am pleased with the way it came out.

Italeri Renault Magnum 1/25 scale

The dust grom being sat on the shelf adds to the realism - so I tell myself!

Italeri Renault Magnum 1/25 scale

Anyway, I brought it off the shelf, admired it, had some good memories, thought about building another one and now it is back up on a shelf!

Italeri Renault Magnum 1/25 scale


Wednesday, December 4, 2024

New YouTube video!

The WMD film crew have finalised and uploaded a video updating progress on my 00 gauge Last Great Project Layout. If nothing else it will cure your insomnia!


Tuesday, December 3, 2024

Changing!

The line up of trains on the My Last Great Project layout changes with time as I add a few new wagons or a loco and take some off. Nothing like a change of scenery to keep things interesting. However I have just spent a day changing most of the trains as there is a video for YouTube in the offing. So this changed.....

My Last Great Project

.....changed to this!

My Last Great Project

I also found my other class 58 so there is now a trio of them!

My Last Great Project

All this may not look like much but by the time you find the boxes and repack or unpack rolling stock a few hours go by - but so much fun!


Monday, December 2, 2024

Strike whilst the iron is hot!

Strike whilst the iron is hot, so they say. However, whilst my soldering iron was not initially hot I did decide that having uncovered the Hornby duo of Class 58's I might as well DCC chip the motored one otherwise it would be several months before it got done. 

First off was to get at the insides. Unusually the body does not separate from the chassis, you have to take the bogies out to get to the motor and wiring.

First bogie out.

Hornby R2411 EWS Class 58 duo pack,

Second one out. I used the 9v battery to test that the motor still worked! It did!

Hornby R2411 EWS Class 58 duo pack,

Next job was to unsolder the wires from the motor and dispose of the anti TV interference capacitor which was fitted back in the days of analogue television.

Hornby R2411 EWS Class 58 duo pack,

Wiring in a DCC socket I had to use a bull dog clip to hold two of the models existing cables together before soldering the harness wire to it.

Hornby R2411 EWS Class 58 duo pack,

The rest of the wires were connected up and heat shrinked at the joins to avoid any short circuits.

Hornby R2411 EWS Class 58 duo pack,

I tested the wiring with the battery which proved all was well. Most DCC chips will run on DC so the battery is a good way of testing without full DCC voltage which could blow the chip if the wiring was not correctly done! With that done the wires were coiled up and taped before being pushed into the body shell and the bogies refitted. Then the chip was programmed and the motored loco, with its dummy, was tested on the layout. 

Hornby R2411 EWS Class 58 duo pack

It runs well, just stutters on a couple of  points as not all the wheels pick up current. I may look at adding some more pickups in the future, but for now I am enjoying this pair running on the layout where they do look rather good - to me anyway!

Hornby R2411 EWS Class 58 duo pack

Hornby R2411 EWS Class 58 duo pack

Hornby R2411 EWS Class 58 duo pack

Sunday, December 1, 2024

A duo of Class 58s!

In my continued efforts, as Christmas approaches (and now it is the 1 December that word can be uttered!), to earn bonus points with Mrs. Woody for actually getting jobs crossed off her 'For me to do' list i have been doing flooring in the understairs cupboards. Whilst in there I came across this that I bought at the Spalding Model Railway Show last month.

Hornby R2411 EWS Class 58 duo pack 

I have been that busy I just have not got round to playing operating it and I do need to put a DCC chip in as well. However it is, unusually, a duo of locos, in this case Class 58's in EWS livery. These locos were very much the mainstay in hauling coal trains to the power stations when coal was king and much of the UK's power was generated by coal powered stations. In fact both these locos are numbered and labeled up as being based at Worksop depot in the middle of the East Midlands mining area back at the turn of this century.

Hornby R2411 EWS Class 58 duo pack

Opening the box revels the two locos. One is motored and the other is a dummy (a bit like me then!) as the Class 58's often ran in pairs such was the load that they were hauling. These two date from 2004 when Hornby released them and were discontinued in 2005. Again, unusually, they are both factory weathered and the mid 2000's is when Hornby and Bachman started to offer such models. To be honest I have never been a big fan of the factory weathered locos as they usually look to my eyes as though they have just been blasted with some dirt coloured paint. However, on these two it does seem to work. 

Hornby R2411 EWS Class 58 duo pack

Interestingly, loco 58024 carried the earlier EWS wording of EW&S which was quickly shortened to EWS as worn by 58037.

Hornby R2411 EWS Class 58 duo pack

I do like these two and given my weakness for the EWS livery, these two should be a useful addition to the fleet.

Hornby R2411 EWS Class 58 duo pack

Right! Back to the understairs cupboard flooring and more bonus points with Mrs. W!