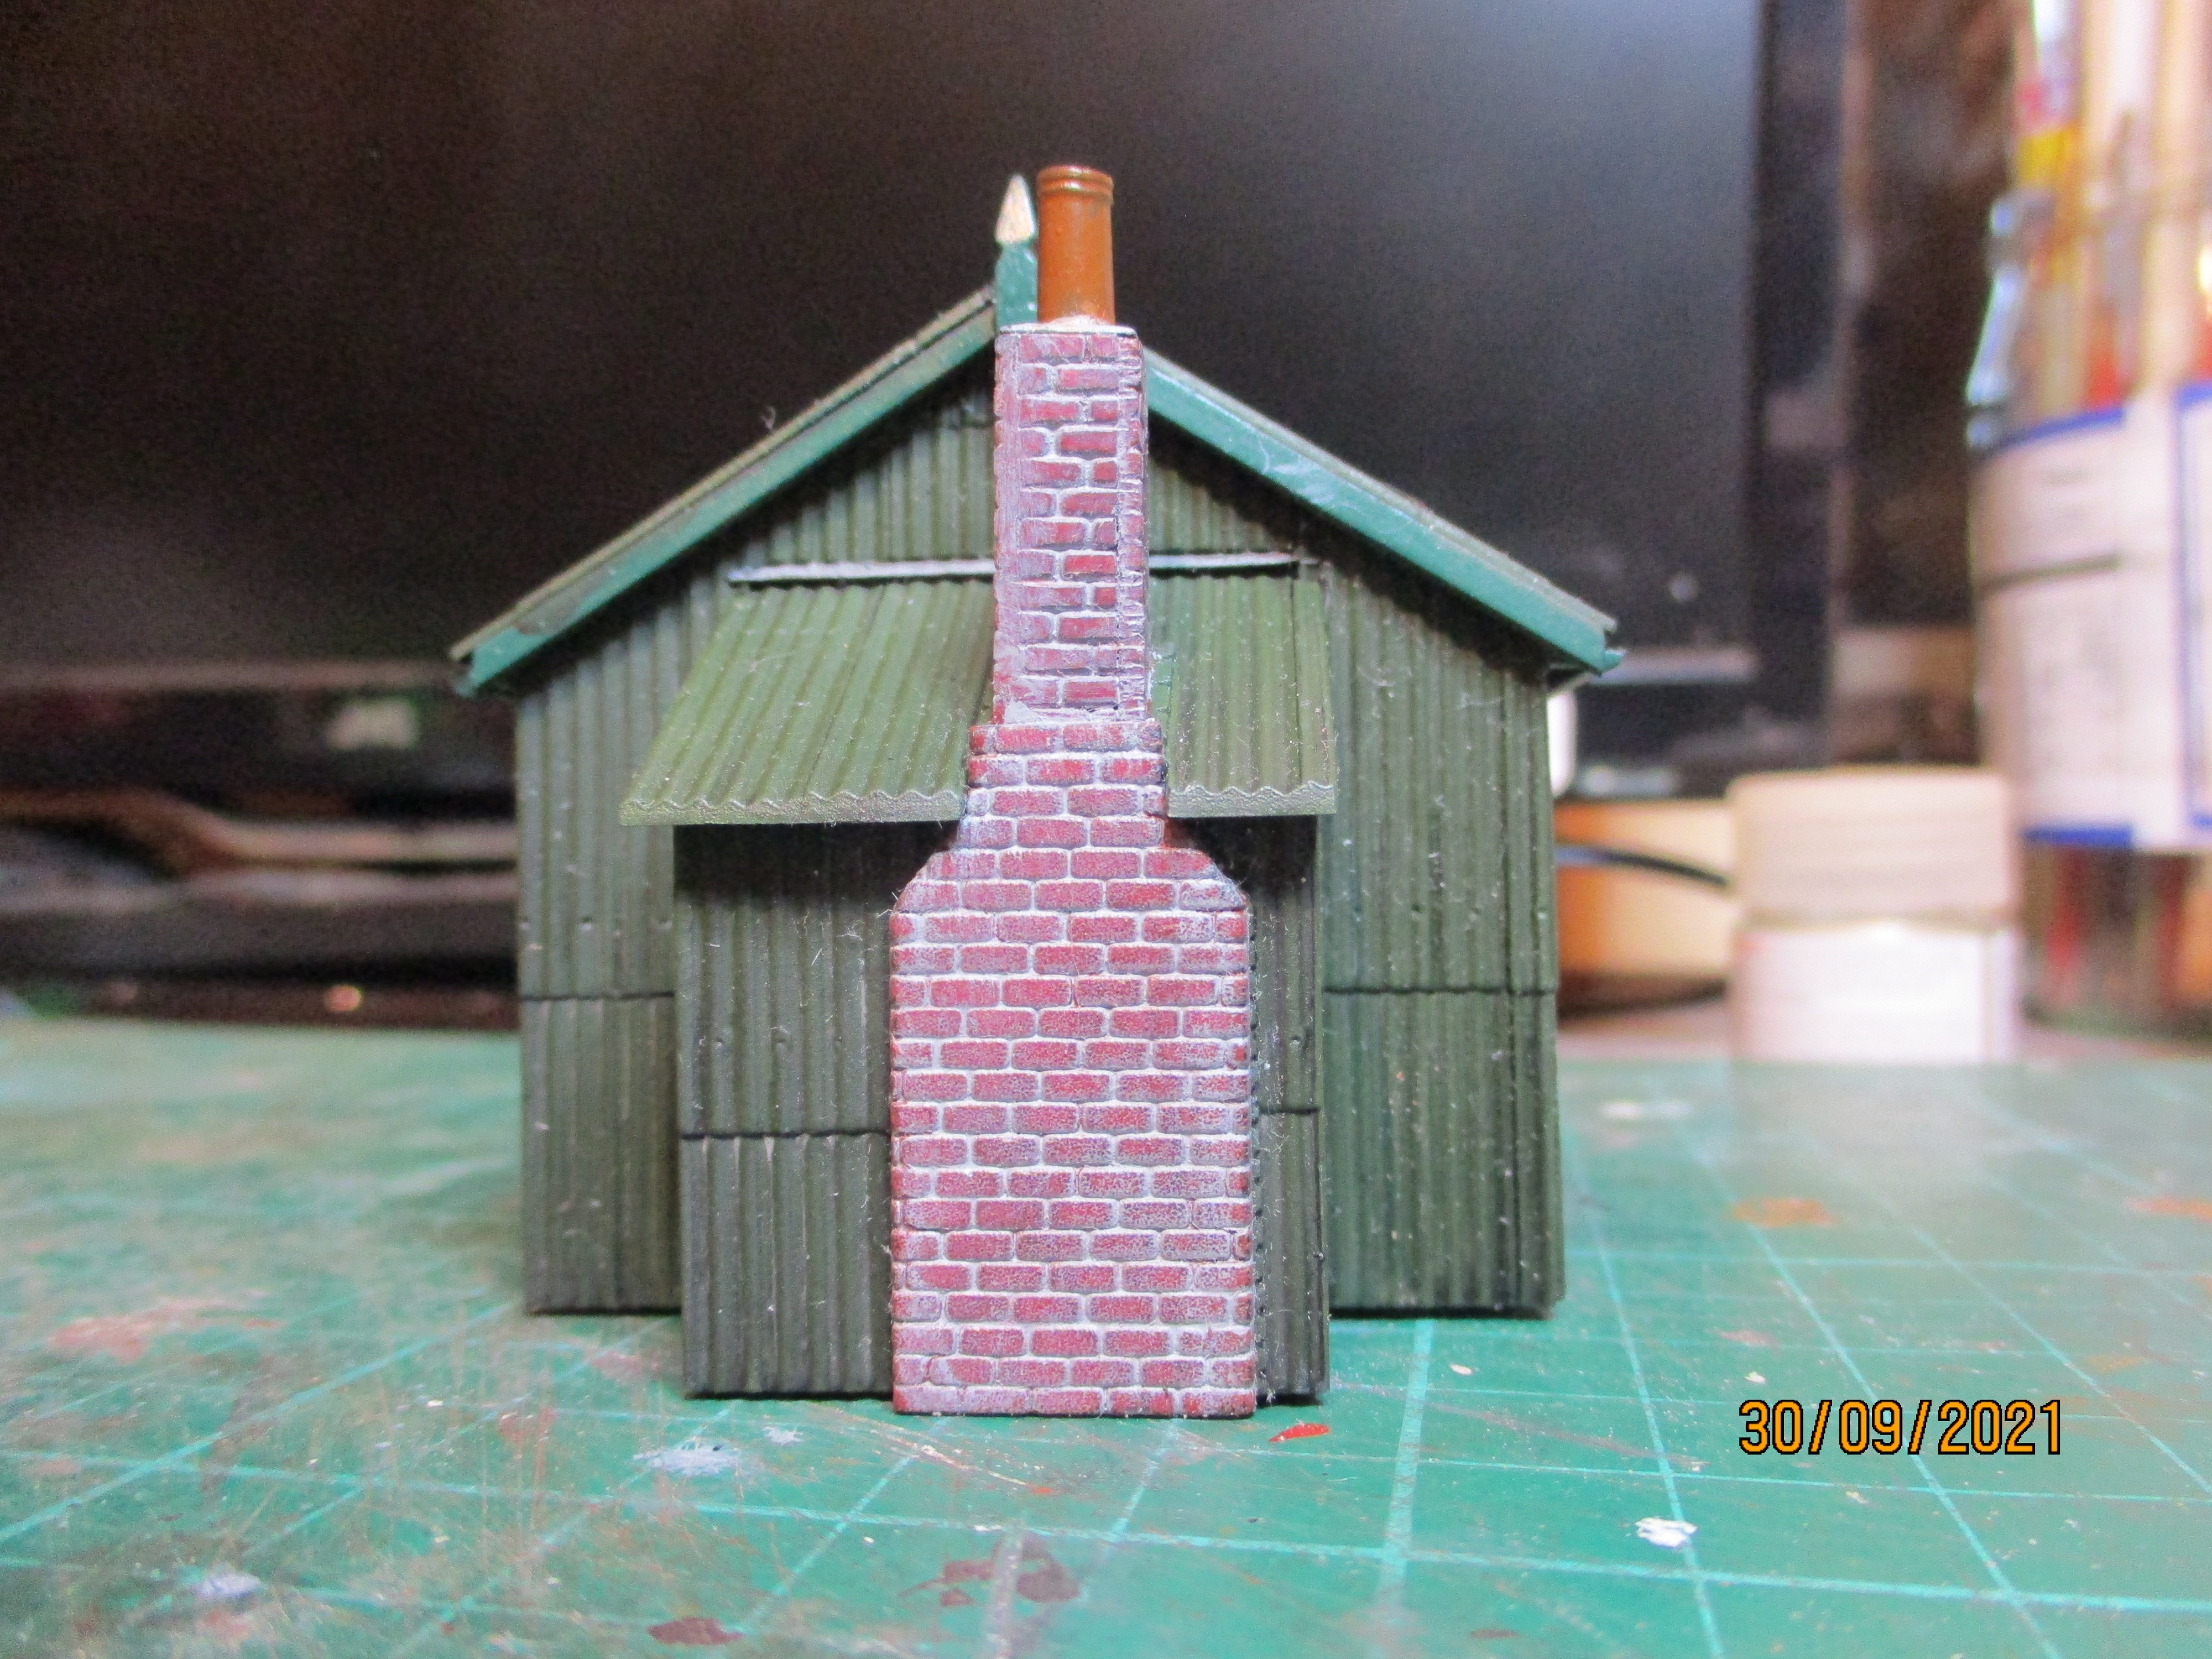
Having been distracted into fully building the Wills Corrugated Chapel kit I can say that the distraction has been complete. The kit is finished and painted. A wash of diluted black paint similar to that I did on a barn kit build at the start of the year - click here if you want to see more details - and fitting the chimney has taken the kit as far as I am going - for the moment at least! This is what it looks like.
Hopefully after this distraction I can get back to the main layout work and perhaps finishing the K5350 truck and then there is the T80 Light Tank, the five Russian tank crew, the My Last Great Project layout and mysteriously a canal barge kit has appeared on my work bench! Lots of other distractions!
I was only going to semi build the corrugated iron chapel for the 009 gauge layout but with a few minutes here and there I got distracted from other jobs and it ended up being primed and sprayed in green. A few more minutes saw the window frames painted white. Still more to do but this post is almost a bit like a wordless Wednesday as I have to go and finish Mrs. Woody's dinner which for reasons of self preservation I mustn't be distracted from!! I will let the picture do the talking - which makes a change from me talking so much!
As I am prone to do, an unusual title to this post but as the UK is still continuing the weekend activity of 'Find the Fuel' I was pleased to have completed 4520 miles on my bicycle this year so far - all fueled by me rather than any petrol or diesel!
The wriggly tin part of the title is more to do with having built the Wills Corrugated Iron Chapel to join the other buildings so far placed on the 009 narrow gauge layout. Corrugated iron is nick named wriggly iron in many places and industries.
I have had this kit a while and it was bought for this layout and its is just iconic of the type of building that once was seen in most parts of the country. Corrugated iron may not be the most pleasing material to look at but it enables someone to get a weatherproof building up fairly quickly and without specialist tools. The fact that being inside of it during a rain storm is probably akin to being inside the snare drum of the late and genius drum legend Buddy Rich (and if you want to see the great man in action please click here) whilst he was doing a drum solo was just a small drawback!
The kit itself is well moulded and went together fairly easily - no swear jar moments with this kit! I just did one thing with the gutters which was to cut down the mounting piece as shown in the photo below. No one will see the modification but it just satisfies me for some unknown reason!
The finished kit is ready for paint although I have left the brick chimney parts loose to paint separately as well as the wooden door.
This now joins the other two buildings along with some sheds near the canal wharf but more about those another time. I now have to turn my skills to the culinary delights of preparing Mrs. Woodys dinner. BLT's! Mmmmmm! Just hope I don't over cook the bacon turning it into a corrugated disaster but with my cooking skills just about anything could happen! Mrs W wisely does have a good stock of indigestion tablets in stock - just in case they are needed for emergencies you understand but for some reason she seems to buy them every week!
Anyway the layout is progressing so here is a picture of the buildings so far.
For those in the UK this weekend for many was taken up by the new past time of 'Find the Fuel' and that is fuel not fool. If you were actually looking for the fool you would have come to the right place reading this blog authored by a fool! However, back to the story. Mrs Woody's car was almost on empty and needing two thirds of a tank of diesel a week for work she needed fuel. No problem. At least one filling station near us would have some I proclaimed just like a fool. In a 15 mile radius we ended up trying 13 locations. At one we came within getting three cars away from the remaining pump before it ran dry. The last place we tried actually had some fuel - at £1.59 a liter! In normal circumstances I would have driven away to find somewhere a little more economical but needs must. At least Mrs Woody was happy even if my wallet was not!
Strangely enough my plan developed several years ago for my 009 narrow gauge layout has always had a service station as one of the buildings to be included. The service station will be definitely 1960s when petrol was plentiful, costing 3 and 6 a gallon (not like the £1.59 a liter I paid on Sunday), when you got quadruple green shield stamps, tokens towards the real genuine plastic beaker set and all served to you by an attendant who filled the car up and checked the tyres! Those of younger years will be scratching their heads but that was how it worked back then!
Anyway as I could sit more comfortably Sunday evening as my back pocket no longer contained a fat wallet but a much slimmed down version after paying for fuel, I took the opportunity to start on getting the various buildings together and placing them on the layout to get a feel for how they looked and where the other scenic items such as the road would fit.
The first two buildings are the Dapol General Store and Service Station kits.
The kits were originally produced in the late 50's early 60's by Kitmaster before becoming part of the Airfix range. Dapol then took on the moulds and have produced the entire original range as well as adding a few new ones. The kits are fairly basic but as my layout is set in that 50's/60's period the character of the buildings is just right. For moulds that are well over 50 years old now the parts are still coming out well with just a few areas where there is some flash that needs to be trimmed away.
The kits have been semi assembles with a mixture of glue and masking tape - I just need the basic building shell so that I can see the effect that each building will have. Full construction will come later. One thing I will highlight is that when gluing it is important to get parts square. When gluing the walls of the General Store together I looked for my set square but in my chaotic area of a workbench I could not find it. The next best thing was to use part of the roof moulding as that would be a right angel - sometimes you have to think outside of the box or in this case, as the kit came in a bag, outside of that!
Having got the basic structures together they are at the moment placed like this.
More buildings to come but I am getting a better sense of whether what I have planned for many years will actually work in reality or have I just been a fool!
If you have ever been into the county of Rutland you may appreciate the beauty of the area and how, if you are of a certain age, it reminds you of a bygone era - almost of a land that time forgot. You never know what you may find in the County as I found out recently. Driving along a back road listening to Mrs Woody's list of jobs that need doing around the house before Winter we suddenly came up to a level crossing. Level crossings themselves are not that uncommon. However in this day and age, where Network Rail have closed most signal boxes and control the signals and level crossings remotely from large central control centers, it was very unusual to find an old Midland style manned signal box next to the crossing. Just as we approached the red flashing lights started and we had to stop in front of the now descending barriers. As a railway enthusiast having to stop in front of the barriers is no hardship and as luck would have it I had a camera with me so snapped a picture.
Having done a bit of research the double track is the Leicester to Peterborough line and the signal box should have closed in 2017 but is still manned now in 2021 for reasons I don't know. The box itself had its balcony around the windows removed in 2009 when the wooden windows were replaced with UPVC ones. The style of the signal box is the same as the one at nearby Oakham which is famous for being the basis of the Airfix (now Dapol) signal box kit for 00 gauge railways as confirmed by clicking here.
Camera still in hand I got the train going through.
Then the barriers went up and the journey and list of jobs recommenced! Wish I could forget that list!
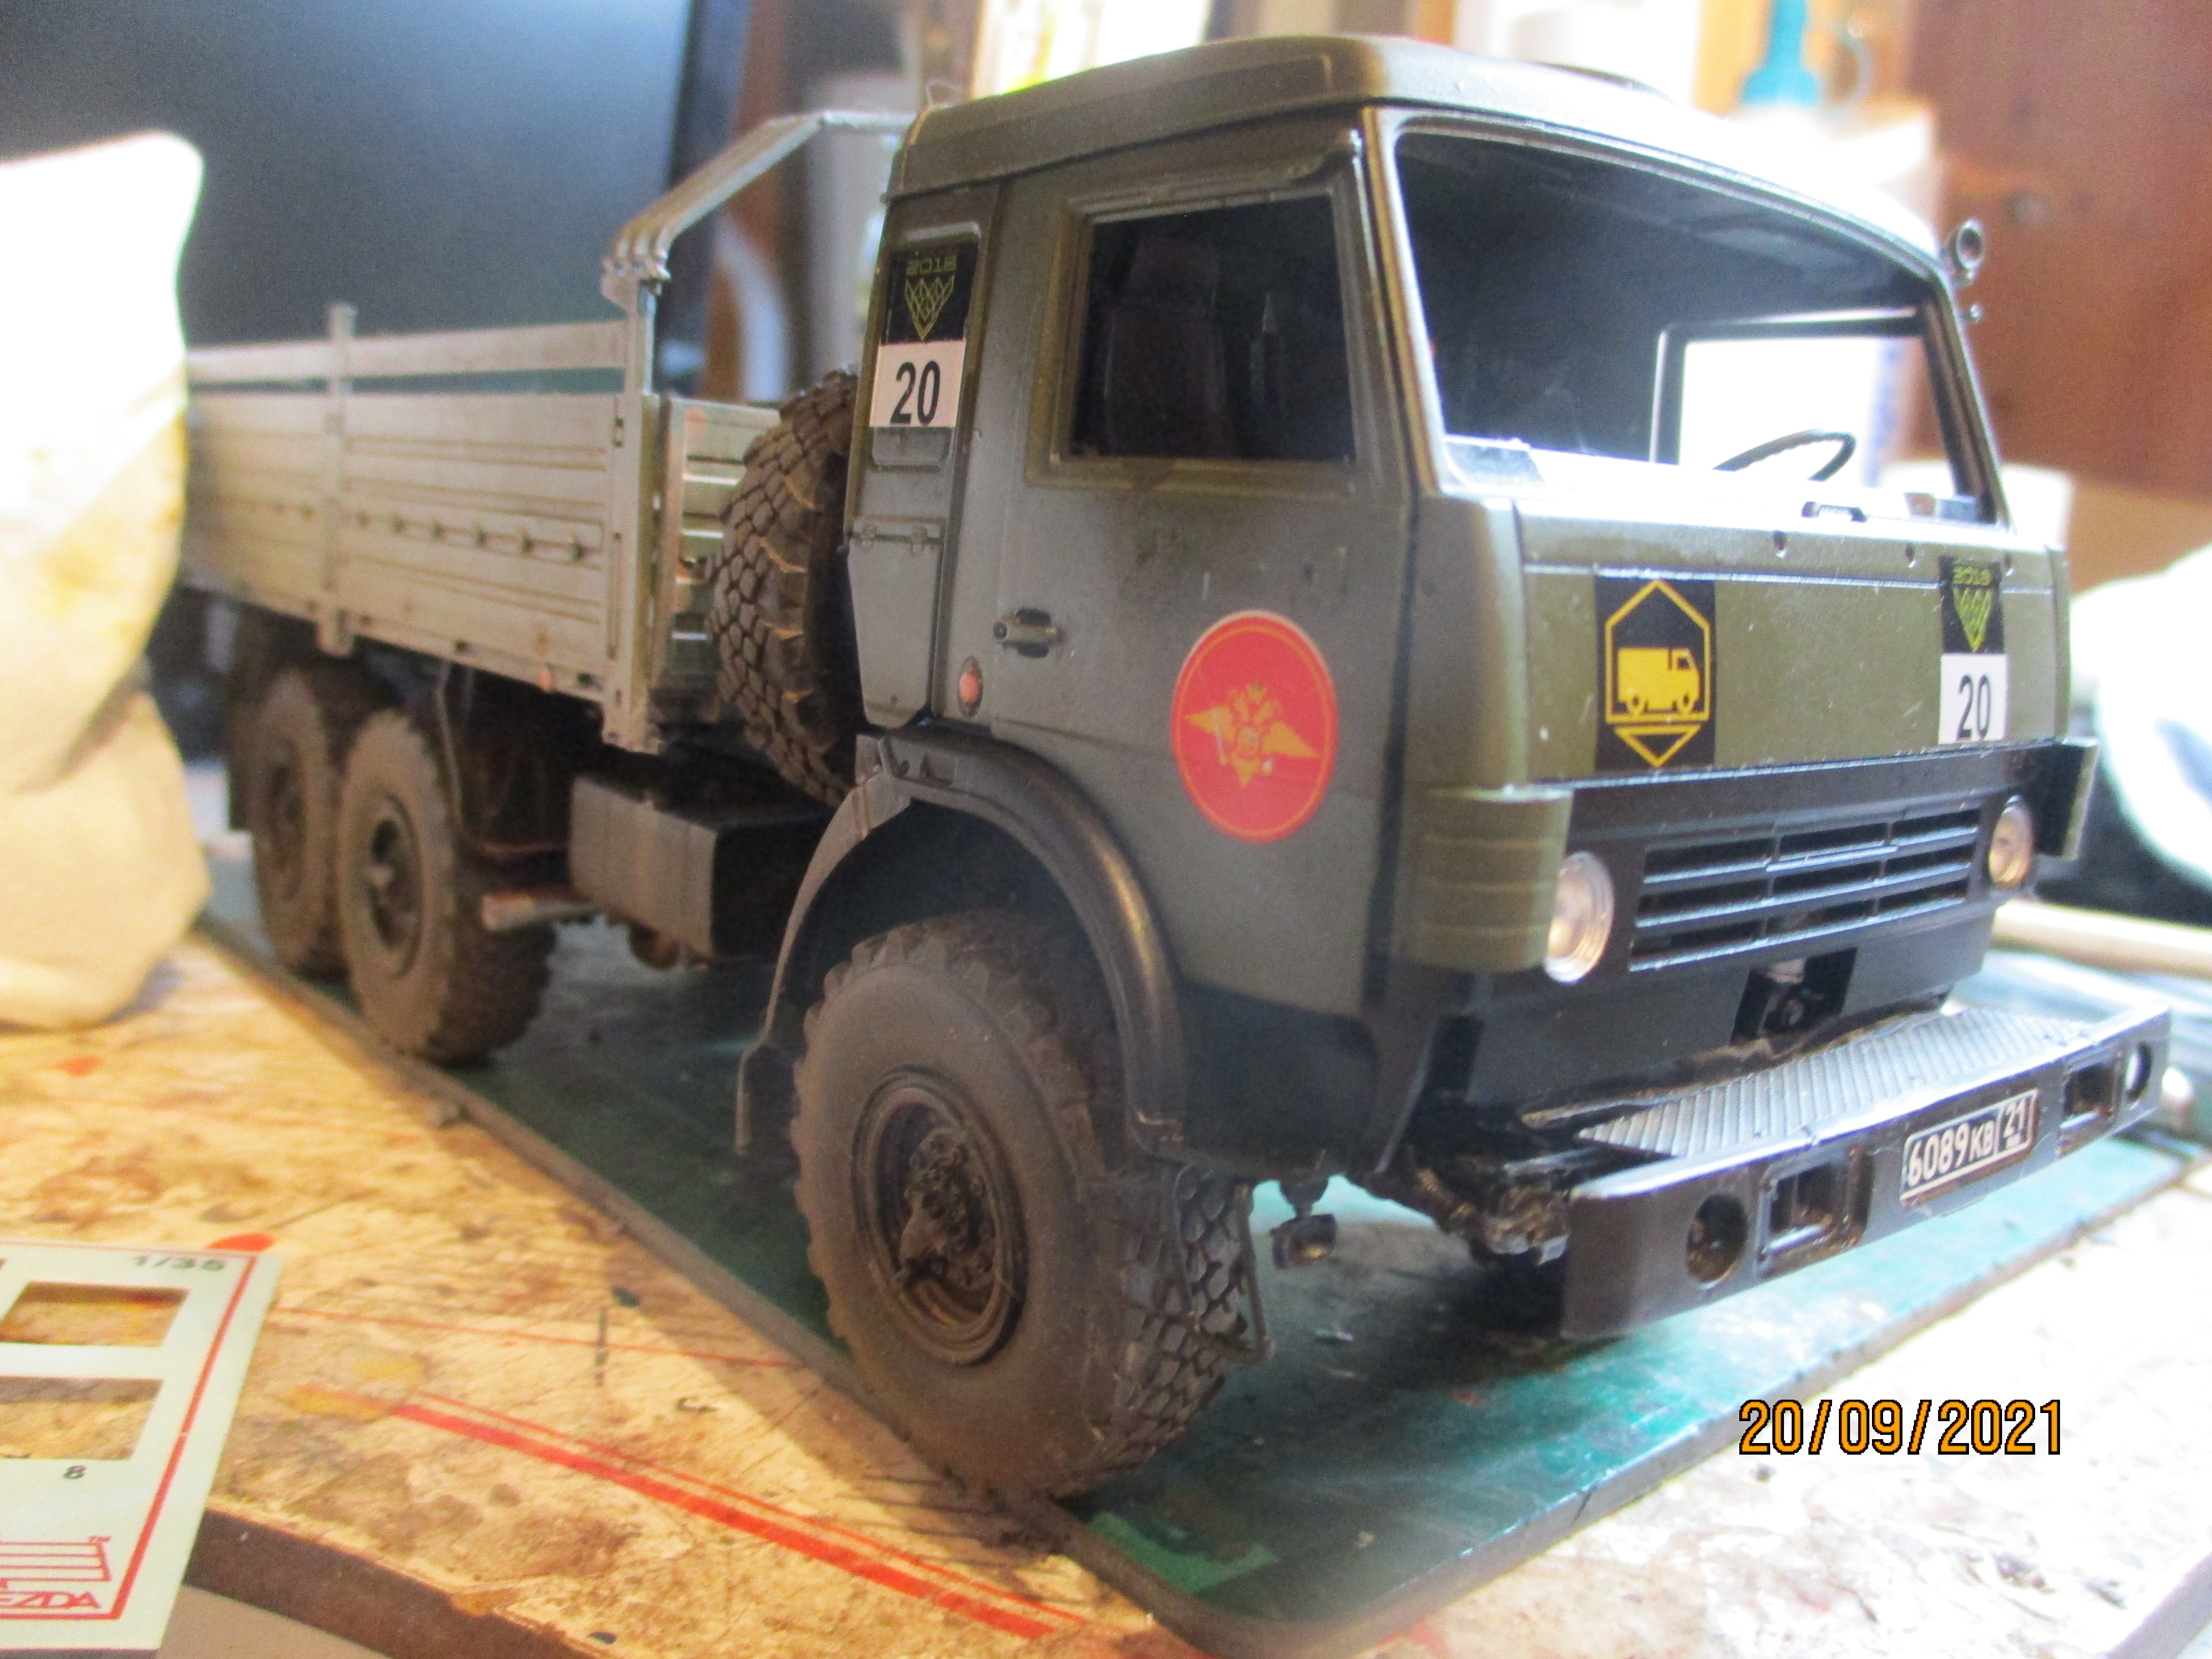
Light fantastic - well maybe not quite what you were expecting but some progress with the K5350 Mustang truck fitting the various light lenses (well there are a couple left to do but most have been done) and that is fantastic because it brings this build closer to a finish!
A couple of things happening in the picture above. Firstly is that I have masked up the door glass parts so that I can paint the metal support that separates the main winding window from the quarter light in the green body colour. It was only at this stage that I saw the level of detail with the hinges and clip to close the quarter light being incorporated into the moulding. Quarter lights were a common fitment on cars up to the early 1980s which shows my age as my first car had them! It also had a lot of rust! Secondly is that I am using Tamiya clear red paint to paint the inside of the light lenses which are the brake/side and fog lights. I would have used the clear paint in orange but despite a deep search of WMD HQ I could not find my jar of that paint although as always, I found a number of things I was looking for several weeks and month ago. I will probably find the clear orange paint in late December whilst looking for Mrs W's deeply hidden Christmas present that I will have forgotten where I stored it. However all was not lost as I had a jar of Tamiya orange paint. If you don't shake it and just unscrew the top you will usually find a very translucent part of the paint on the bottom of the screw cap. I was in luck and I used this to paint the indicators and various marker lights. I paint the inside of the mouldings which I have always found gives a good result but there is nothing wrong with painting the outside. To affix the lenses to the truck I could have used glue as there are special glues for clear type parts that are usually a PVA formulation. Ordinary plastic glues will just cloud the clear parts and it all gets very messy and a really good model can be ruined. There is another way that I use and that is to use varnish as the glue. A military modeler many years ago showed me a kit that he had built and told me that we tend to forget that varnish has adhesive properties. He had used it to his advantage in fixing many of the small components. On that basis I tried it and it works. With clear parts the varnish dries clear and does not 'cloud' or mark them unlike plastic glues or even super glue which some modelers use. Super glue may be tempting to use and in the right places it can do a great job but generally not on clear parts which it reacts with and marks them and turns them cloudy. For the K5350 truck I used Tamiya clear gloss varnish and painted it on around the area that the lens fitted into or onto and then placed the lens into the right place on the model. It now looks like this.
Just two more marker lights to fit to the side of the cab and two lenses inside the cab and that is done. The windows are next and if they go as well as the light lenses that would be fantastic!
One of those moments the other day when you finally see the results of the work you have done over many hours or in this case now months. In this instance it is all about the long ago constructed second baseboard for the 009 narrow gauge layout finally getting track laid in a plan that now makes operational sense and that track wired up and a loco actually successfully going round it. If I were a drinking man I would have had a pint in celebration but a swig of cola suited me fine! There are a couple of issues that need to be resolved though - in my World there are always a couple of issues that need to be fixed. If I were a drinking man I would be a glass half full person as I try to look on the positives. In this case the loco stutters on a piece of track on the original board where it joins onto the new board. Closer examination reveals a hump in the track probably caused by my bad workmanship! The hump is just enough to upset the loco and it stutters as you can see at the end of this post in the video shot by the WMD Film Crew who really need to improve their skills. It also stutters slightly at the other joint on the opposite side but that is a bit of dirty track upsetting the electrical pick up of the loco. Both are solvable!
With regard to the wiring it was nice to be able to work on this without having to bend over and whilst the manner in which the layout is supported whilst doing this may upset any one with an interest in health and safety it worked for me!
Almost like opening a car bonnet!
Chocolate Block joiners are used and the colour code wires of red and white follow the same pattern as on the original board which makes connecting things up very simple - a good job too with me in charge of this job!
Loco and carriages passing over the yet to be bridged and yet to be created river! I have some bridge ideas which will no doubt upset any bridge engineers who may see them!
Going round the far end of the new baseboard the canal wharf will be behind where the loco and first carriage are.
As the train is crossing back onto the original board it struck me just how long a run it is now for the train and secondly just how much work is ahead of me to get that second board matching the first one.
Next on the agenda is to sort out the couple of issues with the track and then weather it before probably starting with either he canal wharf or the river - that probably means I will do something completely different! For those who like such things here is a video of the train running round the whole circuit.
Whilst I am letting the decals set on the K5350 truck I got a little distracted by starting to lay the track for on the 009 narrow gauge layout (really must think of a name for it).
You may recall my ponderings regarding my failure to think my track plan through - click here if you want to read that post. Well I sorted that out without having to buy any new points - not that you can get hold of them at the moment! Without going into detail the track and wiring is almost finished on the second board. I am leaving my options open at the moment as to whether this will be a DCC or analogue operated layout - I am erring on the side of DCC at the moment but that could change - so the wiring allows the layout to be sectionalsied to create isolated sections of track should I go for analogue. In my bid to continue with my working smarter not harder as I get older ideology I have tried to avoid future problems and swear jar contributions by coating the point tie bars in Cotton Tree petroleum jelly (where Mrs W got that obscure brand from is beyond me but she will need another jar as it is now in my man cave) (usual disclaimer that other brands of similar natured petroleum jelly type products may also be available at your chosen emporium for the purchase of such things) to avoid them getting glued up when I do the ballasting. In addition I have cut the holes for point motors should I wish to fit them in the future - and put masking tape over them to avoid ballast and glue running through onto the floor. Not so much a problem in my man cave AKA The Room of Gloom but I having tried to remove set ballast from a carpet without Mrs W noticing has made me uber cautious!
Here are some pictures which probably explain better than my words!
At the joint between the two baseboards the track is reinforced to make a strong joint by soldering the track to sleeper sized copper clad strip. Note the cut in the middle of the copper clad sleeper. Without it there would be a short circuit as soon as power was applied to the track.
This is what the track layout will look like when finished. Notice the thinking ahead part of my plan in that my longest train fits the passing loop - avoiding a swear jar contributing moment!
The K5350 now has decals applied! Small steps but about 2 hours work for this job which seems a long time but sometimes you have to take your time. The areas where the decals were to be applied had been sprayed in a gloss varnish a few days earlier. The gloss varnish gives a smooth surface for the decal to sit on. Leave a matt paint finish and the decal, especially the carrier film around the edge of the decal, are likely to 'silver'. This is where air becomes trapped under the decal and shows it self as a silvery mark. Get a gloss varnish coat under the decal and you are well on your way to successful application! Famous last words! One of the other issues that can affect decals is where they have to conform to a raised or depressed surface. As the picture shows above the decals are not on a flat surface. Decals are not very good at doing much else than laying flat. If you want to get them to settle around the contours of the model you really need a decal softener. Apply this to the decal once in place and leave alone to do its work you will find that the decal almost magically molds itself to the surface contours. My softener of choice is Micro Sol but there are are others about which no doubt work equally well.
.
Another thing that I have learnt over the years is to make sure you have a fresh blade in your modelling knife when you cut the decals from their sheet. Use a metal straight edge as well and keep fingers out of the way - I talk from the experience of not following this advice!
There are many different thoughts on the best way to wet the decal to break the bond with the backing sheet. Some people leave the decal in a saucer of water and wait for the decal to almost float off. That is one method but if the decal does float off the backing sheet it becomes a job worthy of several swear jar contributions to then actually get it on the model in one piece and without it folding under itself. My preferred method is to just dip the decal and backing sheet nito some water for a few seconds and then just leave it on the workbench. The water will still do its job and after a few minutes the decal will be loose of the backing sheet and ready to apply.
I will let the decals fully set and then apply some matt varnish to give them some protection.
For several reasons WMD found itself on a road trip to Foxton Locks in Leicestershire. It is a wonderful place to visit and as Mrs Woody was off work it was a good excuse to visit again. From a modelling view I am going to be modelling a canal wharf on my 009 gauge layout extension so some research was required including whether the ice cream shop at the top of the flight of locks still sold the same mouth watering ice cream. It did! That means I will need to include some form of ice cream selling establishment on my model although Mrs W is of the view that all of the visit was just an excuse to have an ice cream!
The locks themselves are a fantastic piece of Victorian engineering that still operates as it did today. The Canal and Rivers Trust have a short video which is far better than anything I can do!
Here are a few photos that I took. Everyone on the barges and around was so relaxed - a great way to escape everyday life! The lady at the helm of this barge said it took about an hour for her husband to get them down the 10 locks whilst she did the important job of steering! Mrs W seemed to think that this was the way in which barges should be run.
The white building at the top of the hill is where the ice cream is sold. A good incentive to walk up what is quite a steep hill.
A cargo barge that sails the canals and sells coal, wood and gas to people living full time on barges.
A wonderful bridge - the lines are just perfect.
There is a Museum, mainly open at the weekend and there are some interesting old signs and other canal related items dotted about.
A horse drawn ice breaker. Drawn by a team of 8 horses this was towed through the canal to break ice during the winter.
The site is also home of an old disused canal incline. To avoid the 10 locks and the time taken to traverse them an incline was opened in the early 1900s. Basically a barge sailed into a large water filled tub that then went up rails to the top of the hill where the barge sailed out into the canal. It only operated a few years and I do not know the full history to it but it s now scheduled as a historic monument. More details at the Foxton Inclined Plane Trust website located here.
The pictures below show just what a sizable piece of construction this was and just how steep the hill was that the incline went up.
Well worth a visit if you are in the area of Market Harborough and Mrs W and myself even discussed the possibility of a canal holiday - I suspect if we do I will be the one opening the lock gates though!
There has been a bit of a gap since my last post dealing with other matters. A couple of friends of mine are going through some life changing issues at the moment and my thoughts and hopes are with them.
It has been a case of Take 5 for me for the last few days in model making terms. For those wondering what Take 5 is it is a term that is used to tell someone to take a rest for a few minutes. There is also the Dave Brubeck jazz classic that is Take 5 here.
I did, however, this evening do my own version of Take 5 by completing the build of 5 MiniArt Russian Tank crew members that came with T-80 tank kit. I don't just throw these posts together you know! They just need fettling now and painting.
As you can see they are resting in the shadow of the K5360 Mustang truck that still awaits finishing! What will get finished first? Think I will Take 5 whilst I figure that out!