Search this blog

Monday, December 16, 2024

Neaarly there!

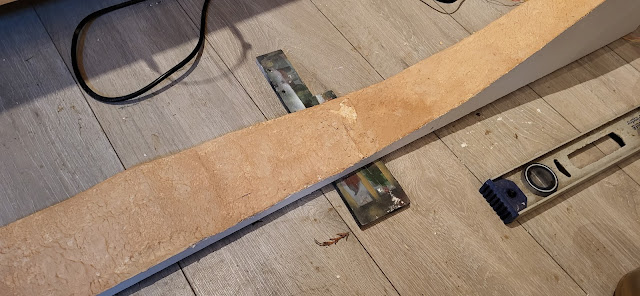
Just like the wait for Christmas, which I need to reassure Mrs. Woody if she is reading this will be worthwhile for her gifts, the landscape sub-bases are almost done! Just a slight problem in that the long section on the side which I wondered if it would hold together - well it didn't! However a quick decision to cut it in roughly half means I should still be able to use it.

My Last Great Project,

My chosen cutting implement for this delicate and precision work? A saw! It did the job though!

My Last Great Project,

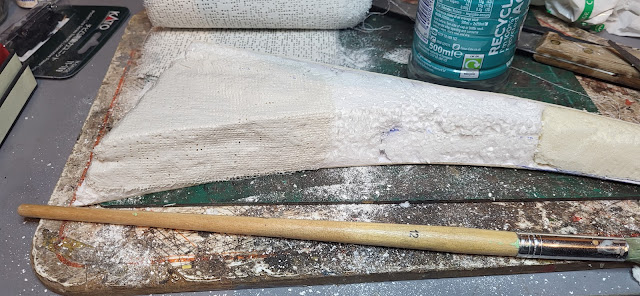
With the sub-base seperated the remaining plaster impregnated bandage was applied followed by more goo and left to set on the floor with a small weight just to stop it warping as it dried.


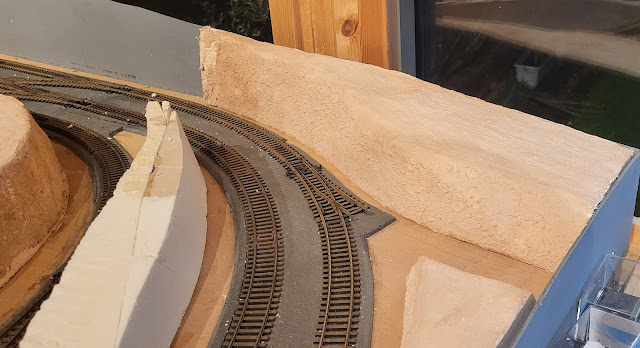
One part in place......

My Last Great Project,

Both parts in place with just that central piece left to go! Hopefully, given the smallish size there should be no issues so I can say 'nearly there' - famous last words!
My Last Great Project,

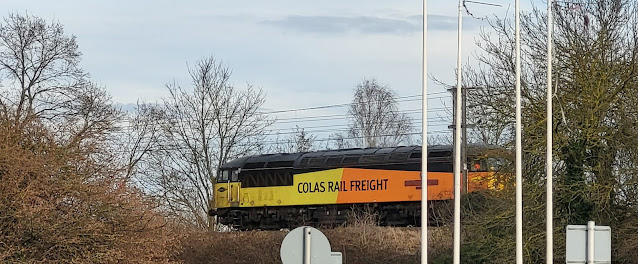
Whilst shopping for Mrs. W's gifts I was able to catch a quick couple of pics of this Class 56 loco in Colas livery which is one you cannot really miss but I nearly missed the opportunity! Obviously I was too busy pondering upon Mrs. W's gifts........

Colas Class 56


Colas Class 56


Sunday, December 15, 2024

It is a bit of a catching up with Christmas tasks day at WMD  so not a lot of model making taking place! However, such a day is always useful to look back on some of the achievements over the years. For instance this Italeri 1/24 scale DAR XF 105 tractor unit that I built in about 2013/4.

It was more or less a straight from the box build but I did convert the front axel to be steerable as the kits original was fixed in the straight ahead position. It was also an unusual kit in that Italeri used the mid roof cab version rather than there normal high roof version which visually makes a lot of difference. I do recall the decals were difficult to fit in place and the swear jar would have received a number of contributions whilst that task was undertaken! However it was worth it as with that bright orange paint job it does look good - well to me anyway!

So lets see this archive from the WMD vaults from about 10 years ago!

Italeri DAF XF105 mid roof 1/24 scale

Italeri DAF XF105 mid roof 1/24 scale

Italeri DAF XF105 mid roof 1/24 scale

Italeri DAF XF105 mid roof 1/24 scale


Saturday, December 14, 2024

Natural goo!

Mixing more goo for the scenery sub-bases on my Last Great Project layout has reminded me that I have not talked about cycling much this year. And why did the goo remind me of that? Well, my bike is well and truly splattered with the natural stuff!

Cycling,

As I always say, I prefer to use the time to ride it rather than clean it. It all the muddy back roads that cause the issue and I guess I really need to do something before it literally becomes part of the natural landscape at the moment! I will leave it to your imagination what I look like after going out for a ride!

Cycling,

Back in the mud less WMD Man Cave, work progresses on the scenery with the 'gooing' of the large sub-base that I blogged about on Thursday now complete. I have now moved onto the large sub-base along the side of the baseboard. First off some carving of the foam/polystyrene has taken place with more to d later but this has allowed me to apply plaster impregnated bandage to one side first. The picture below probably explains it better than my words!

My Last Great Project,

This time I applied the goo mix before all of the sub-base has been plastered. Not sure why I did this but it seems to have worked! With the sub-base temporarily back in place it is looking good to me!

My Last Great Project,

I still have the other side to do.

My Last Great Project,

Taking a wider look at the scene it is beginning to come together. Once the sub-bases are all plastered and gooed, it will be time to start adding some vegetation which really will bring life to the scene. In the meantime I will keep on plodding along - just like plodding on riding my bike. Which ever one I do I seem to end up with the same goo result!

My Last Great Project,


Friday, December 13, 2024

The yoyo trolley!

It may have been a damp, misty and grey day at the Rocks By Rail Museum yesterday but that did not dampen the enthusiasm to get things done!

For me that involved yet more rock bashing to create more fill for the gabion baskets/cages which was made a lot easier by the fact that metal container that had stood near to the middle of the picture below had disappeared. Not sure where it went but no doubt that will be discovered another time!

Rocks by Rail Museum

It was back to piling some of the finer material quarried from the rock pile onto the platelayers trolley and then wheeling it up to site where this finer material was used to top off the gabions.

Rocks by Rail Museum

There is probably about 5 to 6 tons of stone there! That trolley has come in very handy but it must feel like a yoyo going back and forth!

Rocks by Rail Museum

With the gabions completely full it was time to backfill behind them. Luckily, there was a source of material just down the line so the trolley was wheeled down and excavation began!

Rocks by Rail Museum

Then, like a yoyo, it was back up the line to unload the trolley! 

Rocks by Rail Museum

Just about there as Alex and Gary rest after a hard days work! They probably need to rest as the next job is the set of gabions to go on top of these! 

Rocks by Rail Museum

Meanwhile, The darkness looking into the plant shed reveals that the roof is finally finished with the ridges now all in place. 

Rocks by Rail Museum

Just a few bits on the front and that project will be done. It may not look pretty but it does the job!

Rocks by Rail Museum


Thursday, December 12, 2024

More goo Woody?

The landscaping work on My Last Great Project 00gauge layout is progressing with the latest sub-base of scenery completely covered with two layers of plaster impregnated bandage and I have now been able to comence the process of adding some texture. This has involved mixing more of the 'goo' type filler and paint mix and applying with a stiff brush to get a rock effect on the cutting part of the scenery.

My Last Great Project

Hopefully the top part can be textured in the next day or so and then it is onto that big piece of sub-base in the upper right of the picture. That will require a lot more goo Woody!

Wednesday, December 11, 2024

Leaf it out!

A day of small but satisfying jobs today. The type that take a n hour or so to complete but you can see a big difference after finishing them. Well that is what I thought as I raked, swept and bagged the leaves that have fallen onto the front garden thinking Mrs. Woody will be impressed by this major clean up which has resulted in six large sacks of sweepings that need to go to the recycling centre.

Gardening

Not so! Mrs. W, when informed of my hard work and the resultant vast visual improvement, announced she could see no difference whilst looking at the back garden! Leaf it out please! Even when turned 180 degrees I don't think the improvement was noted by her despite the six sacks being in her view.

Back in the sanity of my leaf and Mrs. W free Man Cave, work continues on the scenery with more plaster impregnated bandage having been applied to the currently worked on sub-base. Hopefully that part of the work may het finished tomorrow if I don't have any more leaves to sweep up! Leaf it out!

My Last Great Project,


Tuesday, December 10, 2024

Bonus points earnt but still the stairs to do!

More landscaping in the Man Cave as I tackle one of the large scenery sub-bases. First thing was to carve the final shape into the foam and polystyrene - the bread knife was used again!

My Last Great Project

Then it was onto the plaster impregnated bandage .

My Last Great Project

It is going to take several days to do this sub-base but at least this is progress!

My Last Great Project

As you would expect with my multi-tasking the 09 Caravan project is still in my mind and it does now run on the oval of compact Kato track I got some weeks ago. All that was needed was a 9 volt battery and away it went as this short clip shows.


Of course it needs something to haul and todays post saw this kit of three tipper wagons arrive from the same source as Caravan and they look really good 3D prints. Just need time to build them and paint Caravan!

09 3D print loco Caravan

Finding the time is difficult at the moment. For the last month in a bid to earn even more bonus points with Mrs. Woody I have been painting the hall, stairs and landing. The hall is just about finished and today saw the last of the landing done. This was the situation this morning.

Hall repaint,

By the afternoon normality returned and bonus points earnt!

Hall repaint,

Just the stairs to do now - oh joy, ladders on stairs with a paint pot in one hand!


Monday, December 9, 2024

Woody gets plaster and makes some good goo!

Time to put my impromptu 09 project to one side and get back to some work on My Last Great Project 00 gauge layout. With the wiring and point motors done it is now time to move back to the topside of the baseboard and get on with progressing the landscape.

I had already built the scenery sub-bases to a rough shape and these will need to be carved to their final shape before the next stage of construction starts. I have started off with the smallest sub-base first and risking my well being have used Mrs. Woody' bread knife to carve the landscape to shape. Must remember to put it back and I just hope she doesn't read this!

My Last Great Project,

With that done it was time to get the plaster impregnated bandage out of the WMD Stores. If you have been unfortunate enough to have had a broken limb this is what they use to put a cast around it so that the healing process can happen.

My Last Great Project,

Now plaster impregnated bandage can be messy to use as you need to wet the plaster. I was not going to end up looking like some form of mummy from the tomb or in this case Man Cave with bandage and plaster hanging from me so my plan was to cut small pieces from the roll and wet it in situ by brushing water onto it. Cunning but would it work? Time to find out so the first part of the bandage was cut and placed on the sub-base.

My Last Great Project,

By gently brushing water onto it the plaster liquified and could be brushed out over the bandage just as I hoped!

My Last Great Project,

Things progressed as more bandage was added and I stayed clean!

My Last Great Project,

Finally all the sub-base was covered in bandage and being a quick setting plaster it was just about dry!

My Last Great Project,

This was fine but it looks a bit anemic! Time to add some colour and texture. Out came some ordinary plaster and some brown acrylic paint.

My Last Great Project,

Mixing that lot up and I ended up with this goo - it was not like the Goo desert that had been in the pot before the jar was requisition for this job but nevertheless this was a good goo! Having a brownish colour means that should the scenery get chipped it will show a brown instead of a glaring white colour.

My Last Great Project,

With the mix applied using a stiff brush I could get some texture to the supposed rock face of the cutting side.

My Last Great Project,

I just need to let it all fully dry and then move onto the next sub-base! However I have remained clean and that's the main thing!


Sunday, December 8, 2024

Caravan needs a chassis to sit on its own wheels!

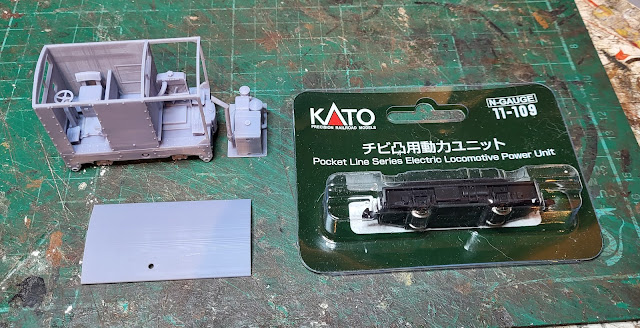
Caravan, or to be factually correct, the model of it, runs on a Kato 11-009 chassis of which have I already have several under the 3D printed 009 gauge locos that I have built over the past years or so.

09 3D print loco Caravan

Therefore, getting the couplings and top off the main chassis which is mentioned in the product description as necessary to make the chassis fit was a fairly quick job.

09 3D print loco Caravan

With that done, the supplied special motor keeper loop was added to the chassis.

09 3D print loco Caravan

With that done I just needed to cut off the two pieces on the underside joining the axle boxes together as a strengthener for the print whilst it was shipped to me.

09 3D print loco Caravan

The chassis then slid into its home nicely.

09 3D print loco Caravan

Once that was done I have a loco that can sit on its own wheels! Just needs painting and I need to find a driver figure for it. This could be an interesting project!

09 3D print loco Caravan


Saturday, December 7, 2024

Woody buys a caravan but not the holiday kind!

This arrived in the post the day, whilst Mrs. Woody was out. I could not have planned it better!

It is a 3D print, a form of model production that I am becoming increasingly impressed with the more I see how it is developing and the reasonable prices that are generally charged. 

09 3D print loco Caravan

Now this one is a caravan, just not the sort you go on holiday with. It is in fact another narrow gauge loco. Not to my usual 4mm to the foot running on n gauge 9mm track, but this one is 7mm 0 gauge, i.e. nearly twice the size of 009. However it does still run on n gauge 9mm track. This photo illustrates the difference with 7mm or 09 gauge on the left and 4mm or 009 gauge on the right.

09 3D print loco Caravan

The kit itself is based on a real loco and to quote Google - 'The Simplex Caravan is a small, unusual variant of the Motor Rail Simplex class of locomotive with an overall cab. The prototype was built in 1938 and is the only example to have been supplied to a UK company. It is currently preserved on the Leighton Buzzard Narrow Gauge Railway.' There is an interesting picture of it here in a very bright yellow paintjob. Not sure what colour mine will end up in but probably it wont be as bright!

Theses are the kit parts - all three of them so it is not a problem that there are no illustrated instructions to assist the model maker!

09 3D print loco Caravan

The level of detail achieved is remarkable with all the hand controls, foot pedals and other small parts all included in the print.

09 3D print loco Caravan

09 3D print loco Caravan

09 3D print loco Caravan

It should be fun getting this going and painted up and where am I going to run it? Well the answer to the last question is still in floating around in my mind but a plan from my initial idea when I bought this is beginning to come together and will involve what I talked about in a previous post here.! Stay tuned for further updates!