Search this blog

Monday, March 31, 2025

Chipping the Lima Class 117 DMU

I talked about the Lima Class 117 DMU a few days ago and said that I wanted to fit a DCC chip to it and amazingly this is a project that has now been completed rather than sat on a bench for days/weeks/months/years/decades!

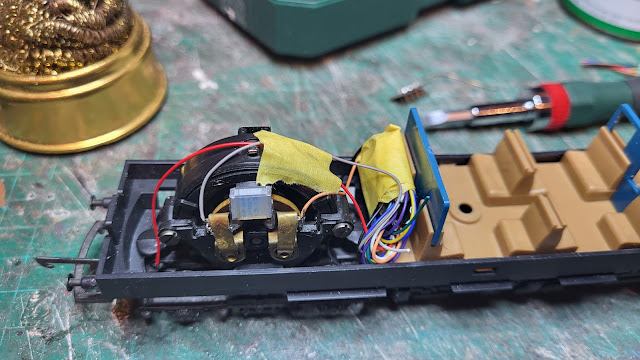
With the body off the motor was once again revealed and a suitable DCC chip by Lais brought out of the WMD Stores..

Lima Class 117 DMU,

The actual fitting of the chip went quickly with no complications.

Lima Class 117 DMU,

Once the wiring had been soldered it was time to wrap the wire up and locate the chip in a discrete place within the body. It was at this point that I could very easily been drawn into a rabbit hole of a project as I could add additional electrical pickups, lighting both external and internal and detail the interior with a repaint and driver and passengers. However, I have resisted leaving that for another day/week/month/year/decade!

Lima Class 117 DMU,

With the body back on it was time to test on the layout and given that I had cleaned the wheels a few days ago there were no issues. It will never run as well as the current Bachmann models but it runs fine for what I want and given that the motor growls there is no need to add a sound DCC chip!

Lima Class 117 DMU,


Sunday, March 30, 2025

Missing the obvious!

Back to some model making matters. On my bench for some weeks has been the Central Trains Class 156 DMU, a Hornby model that suddenly stopped running for no apparent reason. In true Woody style, I just put it to one side pending further investigation when I had time! That is never a good prospect for a model but it has only taken me four weeks to ge round to looking at this which is almost an unheard of short time for me!

My first thought was that the DCC chip had failed as I could not get any noise out of the motor in either DCC or DC mode. The body had yo come off and I replaced the chip with a blanking plug which should have allowed the motor to run on DC power. Nothing!

Hornby Central Trains Class 156

Taking the bogie out of the chassis I went as far as actually getting the motor out of its housing and testing it. It worked which was good but putting it back and applying power to the wheels was meet with silence.

Now it might be obvious in the photo below but for some reason it was not obvious to me at the time of looking at the actual bogie that the wires from the wheels and electrical pickups were no longer connected to the motor! It took me about 40 minutes to finally realise this rather fundamental issue was the cause of the problem!

Hornby Central Trains Class 156

With that fact finally in my head the soldering iron came out and the wires were soldered back in place. With the DCC chip refitted it was ready to put the body back on.

Hornby Central Trains Class 156

Back on the layout all was back to normal which was great!

Hornby Central Trains Class 156

Meanwhile as we now have lighter evenings although my body clock is still not aware of the hour lost, I did manage to get out in the greenhouse planting out some tomato, pepper and cucumber plants that I have germinated in the warmth of the house and I also planted some lettuce, spinach, onion and sunflower seeds. Hopefully their growth will be obvious so I don't miss it!

Greenhouse


Saturday, March 29, 2025

Ballast washing - YouTube video.

In yesterdays post I briefly mentioned ballast washing at the Rocks By Rail Museum. I have written about it in this blog before with a post nearly three and half years ago available by clicking here, but for an animated visual explanation of what goes on, the WMD film crew has been hard at work to produce this YouTube delight!


Friday, March 28, 2025

Progress, progress, progress!

It was a progress, progress, progress day at the Rocks by Rail Museum which was a great moral booster! First off, the viewing platform that I have been working on over the past five months is now finished! That is major progress! 

The day started with a workout as David and me unloaded another platelayers trolley worth of surplus material from the ballast washing process that has been also going on. It is a workout as we have to shovel it up over the six foot of gabion wall.

Rocks by Rail Museum

There is about a ton in each load!

Rocks by Rail Museum

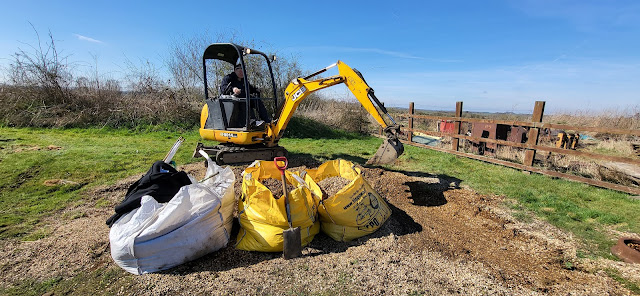
To top that material off we found some pea gravel which was ideal to surface the top of the viewing platform. Unfortunately, as is usually the case, the gravel was some distance from the platform. We hatched a cunning plan to use a builders ton bag and fill that up, get the CAT to pick it up and take it over to the platelayers trolley which would at least save some work. We hand filled the first bag and then Nigel turned up with his mini digger and filled two more bags for us.

Rocks by Rail Museum

We ended up only needing one bag of the gravel but that was another workout!

Rocks by Rail Museum

Whilst we were doing that Martin was testing the face shovel which reminded me that if only the track was not in the way we could have made good use of that machine in this project!

Rocks by Rail Museum

However, with the gravel unloaded and raked out, the final elements of the viewing platform came together.

Rocks by Rail Museum

We have had some signs made up to confirm the generous financial contribution made to the project by East Midlands Railway....

Rocks by Rail Museum

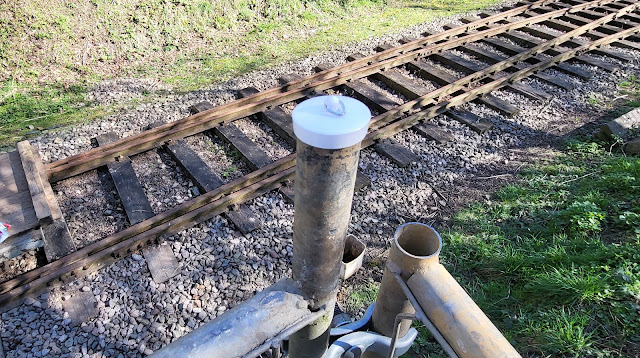
....and David added the finishing touch of these sink plugs to cap the tops of the Haras fencing tubes! 

Rocks by Rail Museum

All done! Not bad for the three of us doing this project as we moved somewhere in the region of about 18 tons of material all by hand.

Rocks by Rail Museum

With that project complete I was back on the never ending project of grass cutting but I am making progress!

Rocks by Rail Museum

I did have some wildlife to keep me company with the pheasants seemingly enjoying the better weather.

Rocks by Rail Museum

Pete and Pam were busy painting with the modesty fencing outside the ladies toilet benefitting from a good clean up and paint. Yet more progress!

Rocks by Rail Museum

Meanwhile, the major drainage and tracklaying project has also progressed considerably.

Rocks by Rail Museum

A great deal of ballast washing has been going on - I first wrote about that activity nearly three and a half years ago and that post is here - enabling the first elopements of track to be re-laid. 30 foot of track is back in the platform line and next up is getting the point back in place. a layer of ballast is now in place so hopefully progress will continue!

Rocks by Rail Museum


Thursday, March 27, 2025

A bridge to a bargain!

Well, the bridge in question is that rather strange one in a place called Crowland on the edge of the Fens in England. Many years ago two rivers converged to become one in the centre of the town. The bridge therefore had a triangle of spans which makes it fairly unusual. However, more unusually is that there are no longer any rivers flowing under it!

Crowland

The rivers were diverted several hundreds of years ago leaving the streets for this very old town somewhat wider than would be the norm as the old river channels have become roads.

Crowland

You can tell this is an old structure just by how it is built - certainly not very accessible with those slopes.

Crowland

So what has this interesting view of a bridge got to do with a bargain Woody you may well ask! Well, I took Mrs. Woody out for the day and we ended up at Crowland. After a walk and something to eat it was time to go home. Looking at where we were I realsied we were not that far from Peterborough and the model shop Trains4U. Not been there for a while and I needed some Metcalfe brickpaper, some Woodlands polyfibre and some balsa wood. Course set for home via Peterborough and the shop had all that I wanted. - Nice!

Proto 1000 UP GP15

However in looking around, as you must if you visit a shop like this, I came across this in the second hand/pre owned/pre-loved cabinet....

Proto 1000 UP GP15

Now I love the Union Pacific livery and the loco is a great looker which was tempting but when I looked at the end and saw this that meant this was coming home with me for my USA switching layout!

Proto 1000 UP GP15

£45 and DCC fitted! Bargain! And all because we visited that bridge! Hence A bridge to a bargain!

Out of the box it is like new.

Proto 1000 UP GP15

Proto 1000 UP GP15

On the layout it really fits in and runs well!

Proto 1000 UP GP15

Proto 1000 UP GP15

I must take Mrs. W out more in the future if there are more bargains like this!


Wednesday, March 26, 2025

A hesitant runner!

Having got one of my Lima Class 117 DMUs out the other day which featured in this post - click here to see that - I thought I really ought to give it a run just to make sure it was OJK before fitting it with a DCC chip. Placing it on the track and turning up some DC power resulted in a somewhat reluctant movement from the DMU. It was then that I seem to recall that the last time I ran this DMU was probably before the pandemic! It now needed some attention to get its decades old mechanism running smoothly again!

First job was to actually get it on the work bench.

Lima Class 117 DMU

Then it was trying to figure out how to get the body off. There were two screws under the chassis which came undone easily but the clips at either end of the body took some locating and undoing but eventually the body was off the car with the motor bogie.

Lima Class 117 DMU

Having got into the body the motor bogie comes out easily. It was very clean so just a few drops of oil on appropriate places was needed.

Lima Class 117 DMU

The wheels were cleaned (being brass they were both dirty and corroded) and the back to back measurements were checked and adjusted.

Lima Class 117 DMU

I then moved onto the trailing bogie which also collects power through one side of the wheels. Again the wheels were dirty and corroded and the back to back measurements needed adjustment.

Lima Class 117 DMU

With that done I put the chassis on my USA switching layout as my dual DC/DCC controller was hooked up to it and performance was restored.

Lima Class 117 DMU

I can now think about fitting that DCC chip!

Tuesday, March 25, 2025

Relaxing times?

Finally! It is done! The rebuild of the bathroom is finished! Phil the builder has done a fantastic job and Mrs. Woody is most pleased with it which makes my life so much easier even if the WMD coffers are much depleted! I can now have a relaxing time in the bath in the future, preferably after a bike ride or some model making activities which I can hopefully now find some time to do again.

Cloak and bathroom rebuild,

As you might note from the pictures, Mrs. Woody has moved us and the cats into the newly finished facilities! By the way, that odd looking thing next to the toilet is not a cat loo but a cat water dish that replenishes itself from the reservoir above. It cost £3.99 and is probably the best and most useful cat related item we have bought!

Cloak and bathroom rebuild,

Whilst I may think that I am going to have a relaxing time from now on there is of course the matter of Mrs. W's chore/job list for me that doesn't appear to have been flushed away and is very much still in existence! Oh well - you can't have everything!

Monday, March 24, 2025

The Lima Class 117 DMU - still sought after even when it is over 40 years old!

This is the Lima Class 117 DMU in BR blue. 

Lima Class 117 DMU 2 car

Lima introduced this model in 1980 and at the time it was a sought after model for its detail and quality and sold for around £20 which was a reasonable price at the time. Come the year 2000 and Bachmann introduced their Class 117 DMU model which totally out did the Lima model both in terms of detail and mechanically. Selling at the time, again reasonably, for around £70, many modellers ditched their Lima models and bought the Bachmann model. Being the age before eBay had really taken off, the result was that model shops were full of second hand Lima models that they had taken in part exchange but with very few buyers for them. I picked this two car set up for £15 and I have a three car set which cost me £20 at around the same time. I do like these models for their simplicity but still capturing the character of the original. 

Strangely, if you look at eBay, these old Lima models, now getting on for forty fives years old in some cases, are selling for anything upwards of £70 to £80. That may appear a bit strange given how they compare to the modern Bachmann rendition. That is until you search about for the current price of a three car set made by Bachmann which has, at the time of this blog post, a recommended retail price of, £459.95! You can see that on the Rails of Sheffield website by clicking here. Whilst Rails, in common with most shops, are discounting the price it is still a lot of money.

 There is no doubt that the Bachmann model is a fantastic model but in its own way so is the Lima one. It is just that you can get an old Lima model for about a sixth of the price of the new Bachmann one and in these times that will make a lot of sense to many modellers which is why theses old models still command good second hand prices. 

I am hanging onto my models but I do need to DCC chip them which will make them even better and hopefully keep them running for a few more years as well as add to their value - at least that is what I will tell Mrs. Woody!

Sunday, March 23, 2025

Half the time!

I did manage to sneak an hour in the Man cave to create another length of cable trunking. Whilst the first length I built took 2 hours to make this latest length was less than an hour! That's half the time for the job!

My Last Great Project

And talking about halves and time and jobs, Mrs. Woody was pleased to note that the previously half painted bathroom door featured a few days ago...

Cloak and bathroom rebuild,

has now been painted....

Cloak and bathroom rebuild,

and on both sides!

Cloak and bathroom rebuild,

Just wish that job had taken half the time of when I only painted half of it!


Saturday, March 22, 2025

An unusual DMU!

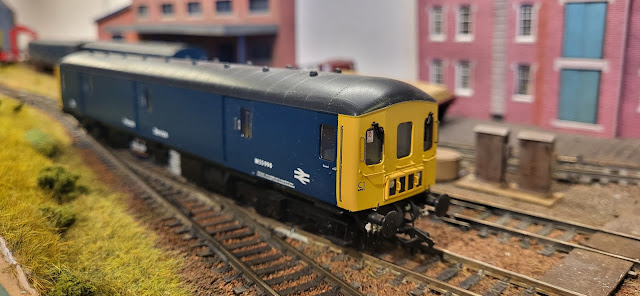
Getting to know the Class 37 that I posted about yesterday brought me back into contact with another model that its prototype is officially described as a DMU (diesel multiple unit) but is a bit of an unusual one in that it was never designed to carry passengers! 

Heljan Class 128

The Class 128 was introduced in 1959 and was built by the Gloucester Railway Carriage and Wagon Company specifically for parcel work. The interior was racked out for parcels and it also had bicycle racks at either end. Powered by two 230hp diesel engines it was no slow coach with a top speed of 70mph. Only 10 were built and the last one being scrapped in 1990

My model is by Heljan and I got it around 2013/14. I think the yellow ends suit the blue and it was also, in its later life, liveried in post office red.

Heljan Class 128

Heljan Class 128

Incredibly for such a small numbered prototype it has been available in model form in all three of the major scales of n, 00 and 0 gauge.