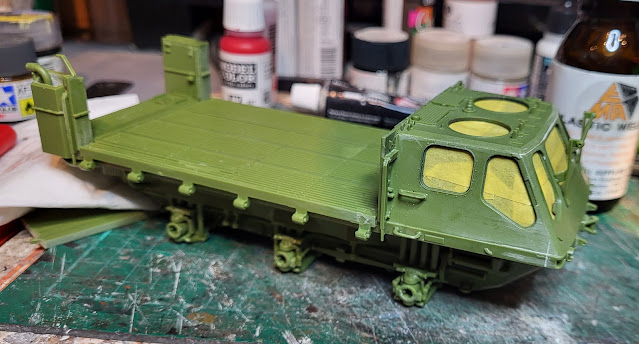
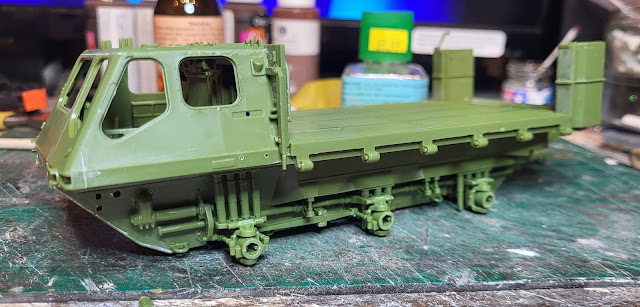
The build of the Airfix Solly was documented by the WMD film crew and uploaded to YouTube and if you are interested in the visual delights of Woody's model bodgery just click on the video below!
Recording my progress, or usually the lack of it, in building kits, creating model railways and other related and sometimes unrelated matters!
Search this blog
Monday, August 11, 2025
Sunday, August 10, 2025
The Airfix Stolly is finished!
The Airfix Stolly is finished! Well, just need to add an aerial when I find my small drills, but otherwise finished complete with base to display it on which now has some greenery added to add a bit of interest. All in all I am very pleased with the way it has turned out and hats off to Airfix for producing this long awaited kit.
So, here are a few photos to record the Stolly.
Saturday, August 9, 2025
Just like making a pizza!
Time to think about a base to put the Airfix Stolly on. My traditional method is to cut a piece of Styrofoam to a standard sized rectangle to match up with the other bases I have made. Indeed, this is what I decided to do in this case to! The Styrofoam comes from a time when shop pizzas came with base made out of that material. Long gone to be replaced by more environmentally friendly cardboard, I did, as is my way, keep a box ful of these pizza bases so I have stock for many years to come and fond memories of consuming the pizzas that said bases supported!
I do tend to add a piece of mounting card to the underside of the foam to add to the strength so first job was to cut foam and card to size for the base.
Thursday, August 7, 2025
Wednesday, August 6, 2025
Windscreen wiper masks!
With the few parts still be fitted to the cab now weathered...
...it was time to think about putting some glazing in the cab. First off I needed to remove the masking tape from the inside of the cab which went remarkably uneventful!
With the masking out of the way I painted the inside of the glazing with Tamiya Clear Green to simulate the tinted windows that I have seen on the real vehicles. Before fitting though I cut suitably shaped masks for the windscreens to simulate the wiper coverage so that when I mist a coat of dirt over the vehicle I will get that clear area on the glass where the windscreen wiper blade would keep the glass clean.
This is just a test fit and I will test fit all the glazing before gluing - just in case!
Monday, August 4, 2025
Time to get dirty
With the Airfix Stolly in green and the wheels painted up it is time to get dirty!
Sunday, August 3, 2025
During August the Rocks By Rail Museum opens every Sunday and on non-event days visitors can walk around the museum and just enjoy the delights of the exhibits. These days are usually fairly simple to run as the cafe is not open so there only needs to be two volunteers on site. Somehow I managed to be asked to be one of those two for today! So, I arrived, having also picked Geoff up and whilst John was happy enough to speak with visitors as they arrived, Geoff and myself took the opportunity for some site maintenance. Geoff got a lot of weeding done whilst I tool out Sammy Strimmer and butchered vast areas of overgrown vegetation!
Saturday, August 2, 2025
Now in green!
The Airfix Stolly build has now reached the stage of being all green!
Thursday, July 31, 2025
It's all grey!
It is strange how getting a model into a uniform colour changes the way it looks, especially when that colour is grey! However, that is what has happen to the Airfix Stolly which is now in grey undercoat awaiting its top coat of green. Having a number of separate parts yet to be fitted makes the painting a bit more of a challenge but it is certainly easier in the long run then trying to mask them or paint them in situ. Anyway, it all has to dry off now so I will have the delight of seeing it all grey for a while!
Monday, July 28, 2025
Just about ready for paint!
Well, the Stolly is just about ready for paint. Just a couple of parts to attach and then its time for some primer before a top coating.
I 'm impressed by this kit - I just need to get the painting right though! That is also what Mrs. Woody says to me!
Sunday, July 27, 2025
Some extra detail would be nice!
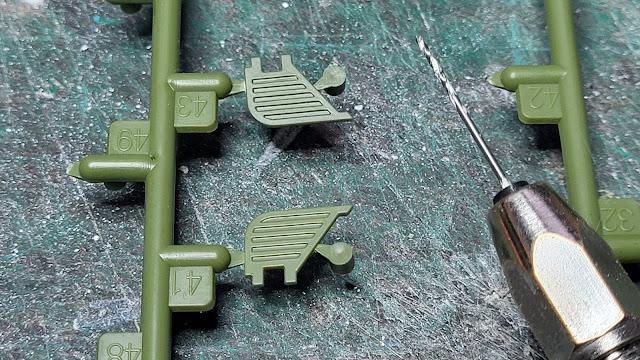
I have to admit to enjoying the build of the Airfix Stolly. I have said it before but will say it again, it does remind me of the early Tamiya kits, simple but detailed. Unfortunately there are always the odd parts where that extra detail would have been nice. On this kit, these are the mouldings for the headlight protectors. In real life a frame with slats that should deflect any large rocks or such like that could damage the headlight. In model form, Airfix have moulded the part as a solid so that the headlight that will be behind it will be invisible. Not exactly a good moulding.
Saturday, July 26, 2025
Crashed and bashed!
Crashed and bashed today and I am not talking about some new weathering technique on the Airfix Stolly build! It is me who is crashed and bashed having come off my bike on a corner in the rain. I just know that the front wheel slid out and before I knew it I was on the ground looking at the lady in the car following me who must have had more of a shock than me! Amazingly no bones broken, no ripped clothing and minimal damage to the bike. I seem to have taken the main damage with gravel rash and a very sore left hip and shoulder which will heal whereas any damage to the bike won't heal! Anyway, after a minute or two I was back on the bike and continued home to present my bloodied self to Mrs. Woody who said not to make a mess!
Right, crash or not, work on the Stolly continues with the interior of the cab masked in readiness for painting.
Friday, July 25, 2025
Weathering the cab!
The Airfix Stolly is coming on with the cab now weathered using my usual dilute mix of earth brown paint along with some Tamiya weathering pastilles.
I like the way this has come together.
Once matt varnished I will mask from the inside the window and hatch aperture's and fit the cab to its base. With that done I should then be able to deal with any joint issues before painting the external parts of the vehicle.
Wednesday, July 23, 2025
Stolly cab interior
The Stolly cab interior looks a lot more interesting now the various parts are fitted and painted. It just needs some dirtying up to replicate the state these cabs got into in real life!
Tuesday, July 22, 2025
Micro Sol for a micro job!
Having previously primed the cab interior of the Stolly it was time to top coat it with Tamiya XF11 which is J N Green or also known as Bronze Green which is the shade of paint used by the British Army in the 1960s. The airbrush soon had the paint applied.
Monday, July 21, 2025
Stolly cab interior starts to get some paint.
Just a quick update on the Airfix Stolly build. I am now at the stage where I need to attach the cab to the base which means the inside needs painting. First off a bit of preparation. I am painting the seats and a few other parts separately and then attaching them to the cab base once painted which means I need a paint free gluing surface. Now I could just paint the entire cab base and then scrape paint away but to save some possibility of damage to the paintwork I have used thin strips of masking tape to cover the required areas. Once painting is finished I should be able to remove them and have plain unpainted plastic ready for glue! That is the theory anyway!
Saturday, July 19, 2025
In suspense!
I was in suspense about how easy or difficult it would be to build the Stolly's suspension. It is an important part of the vehicle and very visible so it has to be right. At the time of building the first side I was a bit bemused as to how Airfix had designed the suspension but by the time I finished I was actually very impressed by it. The important part is to follow the instructions precisely and to look hard before cutting the parts from the spru to make sure you don't leave behind any part of the part!
The first part is the torsion bar suspension and shock sbsorbers.


