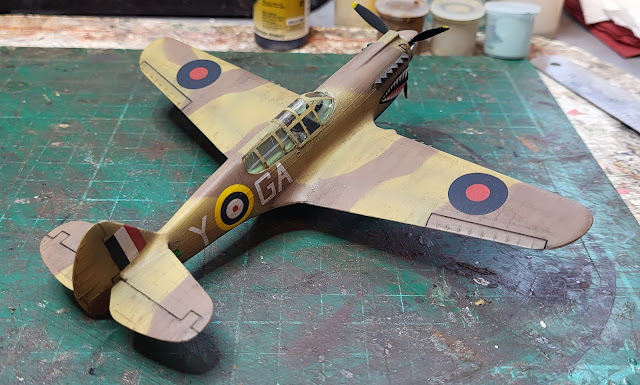
Its finished!
Recording my progress, or usually the lack of it, in building kits, creating model railways and other related and sometimes unrelated matters!
Search this blog
Thursday, October 24, 2024
Seeing double!
Wednesday, October 23, 2024
A moment of panic!
Sometime you doubt yourself and a moment of panic struck me as I applied some panel line to the Airfix Curtiss Tomahawk. Basically panel line is an enamel based product that is thinned black paint. The idea, like my home made washes, is that the dilute colour collects in the recesses of the model to highlight the details, in this case the various panel lines that make up the aircrafts superstructure. The idea is that you paint your model in acrylic paints and apply the enamel panel line over it. Being a different product the enamel being oil based should not harm the acrylic water based paint and so you can use enamel thinners to clean off the excess panel line. It just looks horrible when you apply it first and so that moment of panic strikes as to what happens if the two products react or the enamel thinners don't clear the excess off!
Tuesday, October 22, 2024
Canopy capers!
As I said yesterday the canopy to the Airfix Curtiss Tomahawk needs fitting but before that can happen it also needs to have the frame parts painted. Now the last time I did one of these I probably painted the frame with what would have been like a tar brush as a young lad with lots of imagination and keenness but no skill or patience! Things haven't changed much then in the passing years as Mrs Woody would no doubt say!
However, with this caper I did take my time and thought about the issue of painting fine lines on a clear canopy moulding. You can, if you hunt about on the internet, find firms who sell self adhesive masks that you can mask up the clear parts of the canopy with and from what I have seen most are really good. However my wallet is empty, I am not patient enough to wait for delivery and in my typical way I am sure I can manage without. Hence the mass of masking tape in the picture below. I did the vertical lines first and then masked off the horizontal once the paint had dried and....

Monday, October 21, 2024
Today I haver mainly been doing the undercarriage!
After the excitement of the finishing the last event for this year at the Rocks by Rail Museum yesterday it was time to get back to trying finish the Airfix Curtiss Tomahawk kit. The decals have been applied so it was time to think about adding the parts that I would, through clumsy hands, break off whilst putting the decals in place had I of already fitted them! These parts are mainly the undercarriage. I have been wise enough (can you use the word 'wise' and Woody in the same sentence?) to already have painted them so fitting would be easier.
Saturday, October 19, 2024
More decals!
Work on the Airfix Curtiss Tomahawk11B carries on with the last of the decals being applied to the undersides of the wings....
Thursday, October 17, 2024
Decal delight!
I don't normally get anywhere near this stage of a model build in such a short time so I was delighted to be decaling (is that a word???) on the Airfix Curtiss Tomahawk model First off though a coating of gloss varnish was airbrushed all over the model. This gives a smooth surface that the decals can be applied to which avoids the possibility of 'silvering'. This is the phenomena where applying the decal to a rough matt surface traps air between the decal and the surface which results in the decal having a silver colour around its edges in certain light conditions.
Wednesday, October 16, 2024
Lots of Wows!
Mrs. Woody and me had a day out - it was her birthday after all! We ended up at Burghley House just outside Stamford in Lincolnshire. We had never been before and it was to say the least a Wow property. You jus kept saying Wow!
First thing that made me go Wow was the house itself.
Going inside the kitchen is another Wow with all the copper pots.
Theses were just some of the bells that would ring in the servants area when assistance was required - Wow!
The day really was a Wow day and after a birthday meal out it was back to WMD HQ where I was onto more painting of the Airfix Curtiss Tomahawk. This time the underside using the provided paint which looks like that classic duck egg green that was used during WW2. First off though was a bit of masking.
Tuesday, October 15, 2024
Seat goes up, seat goes down! Or how to amuse a simple mind!
Following on from the kitchen rebuild, Mrs. Woody has decided that the 1993 bathroom needs updating. For an easy life I have agreed (I am learning in old age!) so we are now touring bathroom showrooms. Surprisingly I was informed that bathroom suites in those old favorite colours of yellow, chocolate brown, burgundy and powder blue are no longer available with white being the in colour! Apparently it has been the in colour for some years now. Mrs. W is not surprised that fact bypassed me noting my fashion sense over the years!!
Now the choice of bathroom suites is enormous and you become blind to the differences after seeing several dozen of the things but occasionally something stands out and for me it was this automated toilet seat! Now as Mrs. W would tell you simple things amuse my simple mind and this is just one such thing! Had to video it and love the way it rises as you approach.
As Homer Simpson would say, Seat goes up, seat goes down!
This bathroom perusal is going to take some time so I hope there are more items like this to amuse my simple mind!
Back at WMD HQ the Airfix Curtiss Tomahawk is progressing with the second part of the camouflage now applied - almost the same colour as those chocolate brown bath suites of old! I did manage to break one of the machine gun barrels off the wing but luckily found it and reaffixed it. Somehow I think I might be having to do that again with my clumsiness in painting the model!
Monday, October 14, 2024
Gravy or paint?
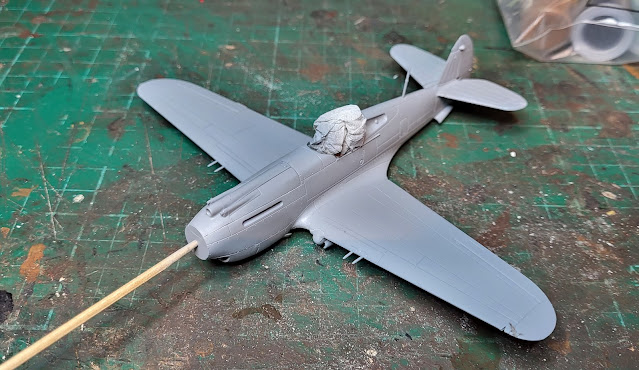
That cocktail stick did its job though and all the model got a good coating of primer.
Whilst the primer was drying I was looking at top coat options. I could search through the WMD HQ paint store to find suitable colours or I could use what was supplied in the kit. The supplied paint did not exactly look inspiring, in fact it looked more lumpy than any gravy I have ever made without the close supervision of Mrs. Woody. However, I decided it was worth a go to see if I could thin it out and actually have something workable unlike my gravy! Mixing some of the lumps with some thinners and stirring like mad for some time actually produced a paint like substance so it was time to see if it actually would come out of the airbrush or just clog it.
Sunday, October 13, 2024
In the flying seat!
Just a finishing touch to the cockpit with the application of some panel line wash to highlight the detail. It probably will be unseen but it was something I thought worthwhile doing as I would know it was done!


