Search this blog

Showing posts with label Wills SS32 Occupation Bridge (Double Track) and Stone Abutments. Show all posts

Tuesday, December 14, 2021

Glacial progress!

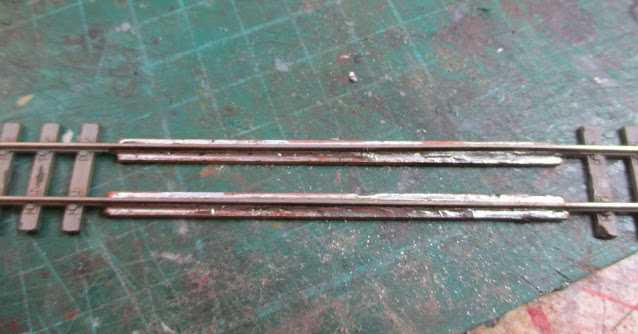
In light of various things going on with the climate I am sure there are actually glaciers that are moving one way or another faster than my progress on the narrow gauge layout. You think you will have time to do a few hours and then find yourself getting pulled into other jobs. The good weather the other day meant a too good a chance to catch up with tidying up the garden so that was most of the day taken up. However at least there has been some progress with the layout with the two river crossings more or less structurally complete. On the bridge with the wood deck I had to take the sleepers off the track. In real life the rail across most open deck or wooden bridges is supported by a sub-structure which holds the rail in place. If there were only sleepers then there would be no ballast to hold the track firm. In model terms taking the plastic sleepers off is fairly easy - a little action with a craft knief and they are gone. However the remaining rail does need some support to retain rigidity and avoid the track warping. Therefore I soldered some copper clad strip under each rail. The copper clad strip is plastic sheet covered with a layer of copper which makes it useful for all sorts of things including circuit boards in most electrical appliances. However as with many items people find uses for products which were far from the minds of the original creators as in this case.

009 gauge layout bridge build

The copper clad strip cut to length.

009 gauge layout bridge build

Now soldered into place giving rigidity to the rails. I am going to have to recess the rails into the bridge deck which is something my original plan did not envisage but that plan also did not take account of my miscalculations on levels! Say no more! 

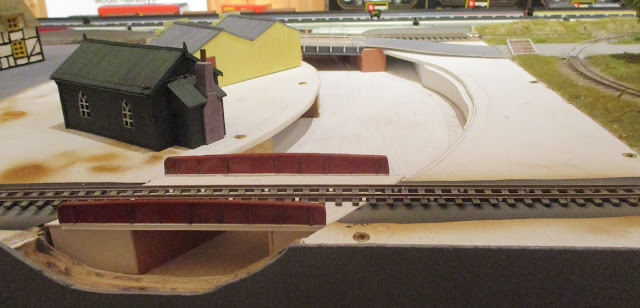
With some of my woeful geometry calculations for angles, the abutments for both bridges are done and it is mow looking like this.

009 gauge layout bridge build

The unusual looking item on the right of the picture is supposed to be a cattle grid. Made from some off cuts of plastic sheet and rod it is my idea to disguise the joint in the road between the two baseboards of the layout. How good it works out is another matter!

009 gauge layout bridge build

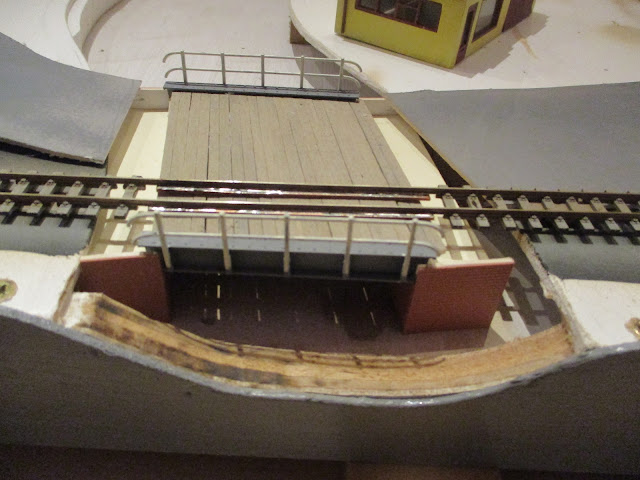
The second bridge is much more conventional in style. The steel girders have been hanging around in my scrap box of bits which "may come in handy one day" for over 30 years. However despite not having seen them for most of that time I still remembered that I had them. Now if only I could remember what Mrs Woody was saying the other day - that would be progress!

Wednesday, December 8, 2021

Starting over!

Sometimes you have to admit defeat and go back to the drawing board. That was the case with the bridge on my narrow gauge layout. Originally it looked like this.

Wills SS32 Occupation Bridge (Double Track) and Stone Abutments,

It was a nice build but didn't fit the curve of the river. I hummed and hared, tried bending parts of the abutments but soon came to the conclusion the bridge deck and abutments needed to be on an angle. So that journey has started and its looking like this at the moment.

Wills SS32 Occupation Bridge (Double Track) and Stone Abutments,

Wills SS32 Occupation Bridge (Double Track) and Stone Abutments,

I will have to get some of my wood butchery tools out to reprofile the edge of the baseboard so that should be fun and generate some income for the swear jar! However the project is moving on, slowly but it is at least progressing a little faster than glacial speed!

Tuesday, November 9, 2021

More wood butchery - but on a much smaller scale!

Anyone who may have had the mis-pleasure to read this blog will know my modelling activities are a bit butterfly like! I do one thing one day and then suddenly spring onto something else. A trait that Mrs. W has pointed out on occasions. In my defence I do usually come back and finish things - eventually and I will at some stage finish the floor in the lounge but that is another story! 

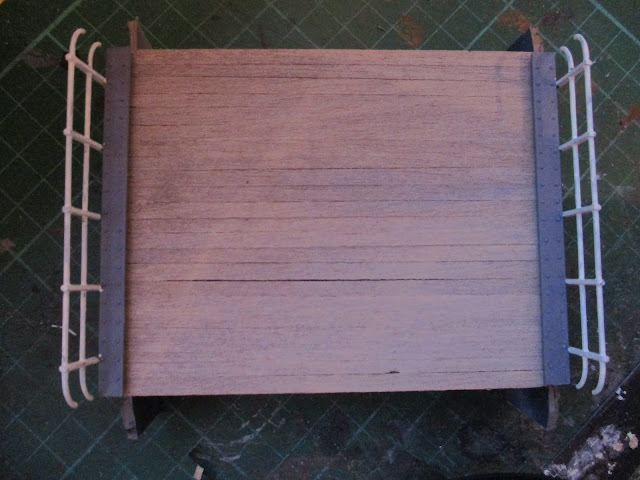
Today saw me put the bridge deck on the road bridge for the narrow gauge layout as started back here. In that post I said the bridge deck would be unusual and would you know it - its a wooden deck. Not the most often used material in this country for bridge decks on public roads but not unheard of and that is as good an excuse as I need to validate my choice!. In my usual manner of wood butcher, I cut a sheet of 3mm balsa into approximately 4mm wide strips and having measured the width of the bridge proceeded to cut these to length and attached the planks to two stringers that run under the bridge. UHU general purpose glue was used as I have only just realised I have some balsa glue in stock as used to make the narrow boats - which still need finishing! Anyway, following a dilute wash of acrylic brown/grey this is what it looks like. 

Wills SS32 Occupation Bridge (Double Track) and Stone Abutments,

Wills SS32 Occupation Bridge (Double Track) and Stone Abutments,

As to what I will be getting up to in the next few days is anyone's guess but I suspect lounge floors may not be on the agenda!

Thursday, October 14, 2021

Many paths to be followed.

As I have become accustomed too, another few days of distractions and projects taking me on different paths but hopefully they all end up at the same destination which is an overall finished project!

On the 009 gauge road bridge I have given the stone work several washes of a very dilute black acrylic paint. The picture below shows one half of an abutment has received this treatment showing just how simple it is - well it would have to be for it to work for me!


Painting one face at a time and letting gravity do its work means this process can take a long time especially as the temperatures outside fall and my man cave, AKA The Room of Gloom, is not as warm as it was in the summer meaning paint tends to take longer to dry. I did think about bringing it into the house but given my ability to spill paint and stain carpets and other soft furnishings with it, I thought that for harmonious relationships to continue with Mrs W it would be best to just wait! At the end of the various waits this is what the bridge looks like.


So what did I do with the time I had whilst waiting for the paint to dry? Well give me a few minutes spare in the Room of Gloom and I am easily distracted! It has been some time since I did anything with My Last Great Project - the 00 gauge layout that I am building. The 009 narrow gauge layout is at the present resting on the baseboard to the 00 gauge layout and it all looks untidy, unloved and most of all unprofessional to anyone stepping in to the room. There are various items that need to be sorted but unfortunately I am not a tidy builder of projects! I tend to need everything that I need out even though I contribute to the swear jar when I cannot find things but that is just the way I model. When I am cooking, completely different with things washed up and put away as soon as possible. No idea why the different approaches but it confuses Mrs W!

My decision in light of the above was to try to get the basic track laying done (it was just some lengths of track thrown together some months ago to allow me to run trains) on the 00 gauge layout so that I could then at least tidy all the track laying items away. It is a long process and it will take some time but at the moment I have the two outer circuits complete and the third inner one getting there. Next stage will be a few sidings. As the layout is still open to alteration the track is secured in a few places with double sided adhesive carpet tape which is strong enough to hold the track but weak enough to allow the track to be lifted washout making significant contributions to the swear jar. 


The track boards have progressed from this...


to this......


Still somewhat messy but the track is looking more like a railway than a roller coaster!

Mrs Woody's birthday tomorrow so hope she likes her gift or I might be spending more time in a cold Room of Gloom!

Sunday, October 10, 2021

Winter thoughts.

A day where today's duties were focused on cleaning up the greenhouse in preparation for Winter as per Mrs Woody's list of such like jobs that I almost forgot about as outlined in my post here. It is amazing how much accumulates and it was a chance for a bit of a clear out as well amd with some nice weather it was a pleasant way to spend the day.

The oncoming of Winter is something I have mixed feelings about. The Summer means warmth (well usually) and light evenings when you can enjoy the outside. All that goes with Winter but the upside is that time for model making increases! Well in theory unless Mrs W finds a list of inside jobs which she will no doubt already have in preparation! However I will hopefully make some additional progress on my various model making projects.

At the moment the 009 narrow gauge layout is the focus and having butchered the Wills kit into something that it wasn't designed for, it was time to start the job of painting. The stone retaining walls have been given a coat of various stone coloured Vallejo paints mixed together randomly and hopefully looking something similar to what such a wall should look like in real life.  The hand rails were given a coat of the same manufacturers cream coloured paint which always looks more realistic than the starkness of pure white. All this has to dry and then a wash of my favorite diluted black paint needs to be applied to highlight the stones and their mortar courses. The bridge deck is still in the making and will perhaps not be the usual type of deck that you may expect but more on that in another post. In the meantime I am awaiting the arrival of Mrs W's list of Winter jobs which is likely to include painting jobs but not of my models!

Wills SS32 Occupation Bridge (Double Track) and Stone Abutments


Saturday, October 9, 2021

It wasn't designed to do that!

In my trademark way I have been distracted with another project on the 009 narrow gauge layout! The two narrowboats - I was put right on the RM Web that these vessels are narrowboats and not barges as barges have to be at least 7 foot wide - have got a little bit closer to being finished, but only a little bit!

CraftLine Models Canal Barge Kit

What has now distracted me is whilst looking through the multitude of unmarked, disorganised and chaotic storage boxes of things 'That will come in handy one day' in my man cave, AKA The Room of Gloom for some plastic card for some parts on the barges - Ooops! I did it again! - I mean narrow boats, I found the Wills Double Track Occupation Bridge kit. This set my mind going - always a worrying thing especially for Mrs Woody! I had used the same manufacturer's single track bridge to take the road over the railway on the original and first board of the layout as described here. Could I use this double bridge to take the road over the river on the second board? It certainly wasn't designed for that purpose! However that is one of the great things about model making - you take something that was designed for one purpose and then repurpose it. There was only one way to tell if this kit could do the job with modifications and that was to get the parts out of the packaging and start measuring and construction. So here I go again. Distracted with this project! However it has actually progressed and looks as though it may well work - again unusual with anything I do! This is what I started with and the packaging shows how the kit designers envisaged the finish product to look. They didn't take me into account though!

Wills SS32 Occupation Bridge (Double Track) and Stone Abutments,


The width of the bridge as governed by the steel girders and railings provided in the kit fitted well with my cut out river base in the base-board. Good start! The retaining walls however were too tall. In my use of the kit on the original baseboard the retaining walls were too low so I had to make my own higher ones. This time all I had to do was cut down the kit walls to the right height. Firstly though the main retaining walls were constructed as there are four parts to each one. Left over night to fully harden, this evening saw some carful measurements taken and then the retaining walls cut with a small Xacto saw to the measured height and you know what? They actually fitted! 

Wills SS32 Occupation Bridge (Double Track) and Stone Abutments,

Wills SS32 Occupation Bridge (Double Track) and Stone Abutments,

Wills SS32 Occupation Bridge (Double Track) and Stone Abutments,

Wills SS32 Occupation Bridge (Double Track) and Stone Abutments,

As you can see I cut down the wing walls and joined them at right angles to the main retaining wall to give a more normal construction for a river bridge. More work to be done on this and who knows when that may be done if there are any other distractions that come about!