Search this blog

Tuesday, November 12, 2024

Woody goes for a walk with Mrs. Woody!

As it was a bright day Mrs. Woody persuaded me to break away from the never ending list of her jobs for me to do and go for a walk with her. Much as I did not really feel  doing like that (the walk that is - not being with Mrs. W) and was keen to continue completing her task list chores, I must admit the weather and the views along the walk and Mrs. W's company made it all worthwhile. I think this one picture sums up the why....


Back in the Man Cave and having deposited autumnal leaves on the floor - wonder where they came from? - I had some more wheel cleaning to do on rollingstock for My Last Great Projet layout. This time a rake of TTA tankers that had a tendency to derail at random points on the layout.. 

My Last Great Project

IPA or rubbing alcohol and cotton buds soon had the wheels cleaned and a few of the couplings were adjusted. Back on the layout running had improved immensely but still the occasional derailment so further investigation is needed - most probably into the wheel set back to back measurements - i.e. that the wheels are at the right gauge width..


Back on the layout itself, there has been an issue at one of the baseboard track joints where a small sag in the viaduct board has caused a hump in the trackwork both sides of the join. It is not really that noticeable visibly but put a straight edge on it and it is clearly there is a problem which also explains one or two derailments¬

My Last Great Project

Luckily I was able to break the glue joints of the track and the supporting plywood piece so that I could thin down the plywood reducing its height.

My Last Great Project

On the bench it was a case of cutting one ply off the plywood using a scalpel to cut through the glue join between the plys and then clean up the main surface.

My Last Great Project

The thinned strips were super glued back on the baseboard and then one side of the track at a time

My Last Great Project

Although ending up not bowling green flat there is a massive betterment to the track as the straight edge shows which should reflect in more reliable running of trains which means more time for playing trains going for a walk with Mrs. W and doing more on her chore list for me!

My Last Great Project


Monday, November 11, 2024

Wheel cleaning

There has been a fair amount of playing operating trains on my Last Great Project 00 gauge layout and with good reason. Firstly I need to test the new wiring and track that it powers but secondly and more importantly, I am building the layout to run trains and that is what it is doing! However, and there is always a however in Woody's World, it also shows that I need to do maintenance of the rolling stock.

I have a rake of LNER wagons that ran reasonably well but would occasionally derail. Those derailments got more frequant and knowing that other rolling stock ran the same tracks without problems the issue had to be with the coaches themselves. Examination showed that there was a large build up of dirt on the wheels which is enough to cause derailments. The red arrow shows one particularly dirty wheel.

Wheel cleaning

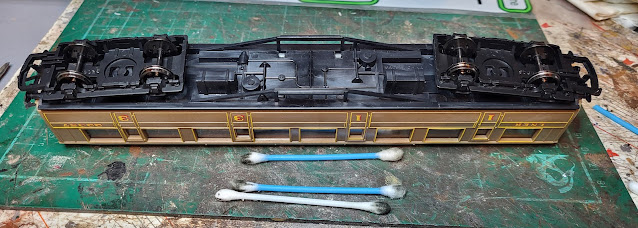
Some IPA or rubbing alcohol and cotton buds were enough to get the dirt off but with 6 carriages to do that took some time.

Wheel cleaning

Was it worth it? Yes! Once the wheels were cleaned and the rake back on the tracks the W1 Hush Hush pulled them round for an hour or so with no derailments. 


Sunday, November 10, 2024

Finding things out!

A day of finding things out before starting a project is something I don't really do - ask Mrs. Woody! However in this case I have some old Bachmann DMUs which were manufactured in the days before DCC was seen as the way forward and everything now comes at least DCC ready. I knew there would be some complexities to adding DCC to these DMUs not least because they came with directional lighting which is nice but can add complexity to the DCC conversion process. Anyway first off to be examined was this Class 170/6 in the very smart Central Trains Livery which was so very modern when introduced over 20 years ago!

Bachmann Class 170/6 DMU Central Trains,

It is a three car set with the motor strangely in the centre car.

Bachmann Class 170/6 DMU Central Trains,

Two screws and a four clips get the body off - I do like the old style simplicity!

Bachmann Class 170/6 DMU Central Trains,

Interesting to se that even at that age the model has twin flywheels which made it a really good runner back when it was introduced and even today that is true. In terms of DCC chipping it, it will be fairly simple - my famous last words!

Moving onto the outer cars, they are both the same so I only dismantled one which again had two screws and four clips holding the body on.

Bachmann Class 170/6 DMU Central Trains,

Bachmann Class 170/6 DMU Central Trains,

No motor obviously but I was interested in the lighting unit at the front. Whilst it looks as though there are just two wires so there are actually four. I was originally thinking of just extending the lighting wires to the DCC chip in the centre car using mini plugs from one car to another so that I only needed one DCC chip. However looking at this proved to me that I was not going to find a five pin mini plug or that it was feasible to run five wires between the cars anyway. Therefore I am going to have to install three chips in this DMU"

Bachmann Class 170/6 DMU Central Trains,

Having got over the shook of having to fit three DCC chips in the Class 170/6 I took a look at a class 158 that is of a similar age to the 170. I had an inkling of what I was going to find given the comparable age to the 179.

Bachmann Class 158/6 DMU Central Trains

Again the body was held on with two screws and four clips so came apart easily. I knew that the powered car would be similar to the 170 but with lights at the cab end and my suspicions that the dummy car lights were the same as the 170 proved correct to! 

Bachmann Class 158/6 DMU Central Trains

So that is two DCC chips needed for this and another two for the other one that I have! Seven DCC chips for three DMU's - that's going to be a strain on the WMD Stores when I get round tro doing the work! However, that might be a while after all it is me who is doing it!


Saturday, November 9, 2024

Testing the layout is really an excuse for a leisurely day!

After several weeks of wiring baseboards and trying to fool Mrs. Woody into thinking items on her to do list are actually being done - just hope she doesn't read this - I took the day a bit more leisurely with some running of trains on My Last Great Project layout.

My Last Great Project,

Nothing like watching the trains go by but my excuse for this leisurely activity, should Mrs. W notice my resting posture in the Man Cave and enquire as to why, is that I am testing the newly wired baseboard! This is, to some degree, actually true! I have found a couple of small jobs that need attending to so I will note those down and get them sorted - eventually! Now back to the trains.....


Friday, November 8, 2024

Is Woody caged up or just a basket case?

Is Woody caged up or just a basket case? No doubt Mrs. Woody will have a view on that statement but I will avoid asking her! The cages or baskets that I am talking about are actually gabion cages or baskets depending upon which term you prefer. The end result is the same in that you put together a steel mesh cage or basket and then fill it with hardcore, rocks, stone or anything else that provides a stable and strong foundation for whatever you need to put on top of it.

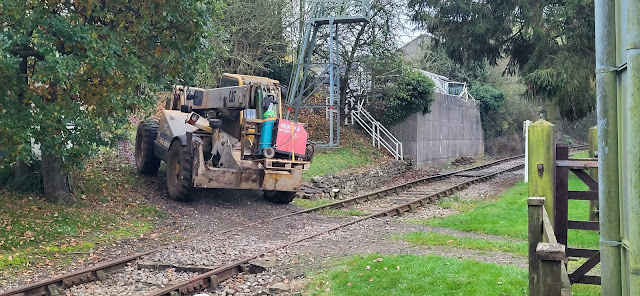
At the Rocks By Rail Museum we are creating a viewing platform so that visitors can get a better view up the quarry line of the shunting action - or inaction if I am doing the shunting! I posted last week that David had started to dig out the embankment where the platform is to go and this week rather than my usual vegetational butchery, I swapped mower and strimmer for a spade which in my hands can equally be a tool of vegetational butchery! Not sure if David was pleased with my assistance but this is where we started from.

Rocks by Rail Museum

This Robin seemed appreciative of our digging going through the spoil to find food.

Rocks by Rail Museum

After a couple of hours we had both fed the Robin and created the space we needed for the cages/baskets.

Rocks by Rail Museum


 Rocks by Rail Museum

The cages/baskets themselves come flat packed and they are assembled using these curly inserts that are wound in.

Rocks by Rail Museum

I'm not the only one who takes pictures!

Rocks by Rail Museum

We assembled three cages/baskets and once filled with suitable material another three will be mounted on top, slightly stepped back, and then probably another three to get to the required height. That is going to be quite a lot of material!

Rocks by Rail Museum

Meanwhile, else where on site, John was continuing his painting of Mr. D which is beginning to look really smart.


Andy had been busy working on the plant shed with the welding station which is handily on a pallet so can be moved by the CAT.

Rocks by Rail Museum

Richard and Steam John had been busy de-rusting the smoke box of 1391 in readiness for the re-tubing work. Using a needle gun to de-rust is a noisy business even in the open air, but put yourself in a smokebox and use it really tests the ear defenders! Must be like being at a heavy rock concert!

Rocks by Rail Museum

Rocks by Rail Museum

I note that the saddle water tank must have been loosened as it now is supported with jacks either side. 

Rocks by Rail Museum

Just another day at the museum!


Thursday, November 7, 2024

Profiling!

A day of profiling but not the type of profiling the law enforcement agencies do! This was creating the scenery profile boards for the current baseboard that I am working on for My last Great Project Layout.

3mm plywood is my chosen material, the same as other parts of the layout's profile boards. It was a case of measuring up and cutting and trial fitting which took time.

My Last Great Project


Once done it was out with the paint - good job it was a dry day!

My Last Great Project

Once dry the boards were attached to the baseboard which was on the floor by this stage - much easier!

My Last Great Project

And there it is! Just needs the scenery now! It does look like progress though which is something I don't see a lot of with my projects - just ask Mrs. Woody!

My Last Great Project


Wednesday, November 6, 2024

More video offerings on YouTube!

The WMD film crew have been at it again with a couple of new YouTube videos uploaded featuring parts of the work on wiring and point motors that I have been carrying out on My Last Great Project layout.

If you suffer from insomnia, viewing these could well be the cure!


Tuesday, November 5, 2024

Stranded boat on the canal!

Lets start today with a bike ride which took me past a certain canal that I have posted about previously. My last post highlighted that the canal was back to normal with water filling it from bank to bank. I was therefore somewhat taken aback, as no doubt loyal blog reader Mrs. B will, that the previous trickle of a stream had returned leaving an expanse of mud and a stranded boat!

Canal

Canal

Canal

I have no idea why this has happened again as I thought that all the repair works had been done. I will visit again!

Meanwhile my visit to the Man Cave saw the wiring of  the baseboard that I am working on just about finished!

My Last Great Project

Whilst not being over pedantic about neatness in the wiring I have tried to keep it organised and tidyish!

My Last Great Project

This is where all the wires will join onto the control panel when it is eventually built! There are a lot of wires and there are three other baseboards so that control panel will need to be fairly large!

My Last Great Project

The point motors all have their own wiring using a 3 cabled ribbon wire that has made that job a lot easier!
My Last Great Project

I need to finish a few jobs on the rail alignment up top and then I might just run some trains - if it all works of course!


Monday, November 4, 2024

Spalding Model Railway Exhibition 2024 part 2

Carrying on from yesterdays post, where Mrs. woody was enjoying her day out (!!!!), there a few more layouts of the many that were on display worth highlighting. 

Spalding Model Railway Exhibition 2024

Zeedijk was a Dutch layout and whilst being simple in that it was just two mainlines with no sidings and flat scenery, what else for Holland, it had a certain charm with longish trains running as you would see them in real life.

Spalding Model Railway Exhibition 2024

Spalding Model Railway Exhibition 2024

Of course there had to be a windmill!

Spalding Model Railway Exhibition 2024

Interestingly, off stage, the return curves to the rear fiddle yard were just the width of the track which saved weight and materials - nice!

Spalding Model Railway Exhibition 2024

The fiddle yard itself was a large one to keep a constant parade of trains.

Spalding Model Railway Exhibition 2024

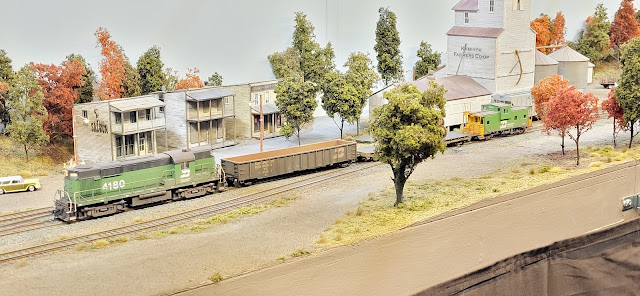
Crossing the Atlantic, in layout terms anyway, Kamiack Falls was the opposite in that this was very much a switching layout where everything was done slowly but with realism. 

Spalding Model Railway Exhibition 2024,

Thye autominal scenics were done to a very high standard.

Spalding Model Railway Exhibition 2024,

You could almost think this was a photo of a real railway or should I say railroad as it is the USA!

Spalding Model Railway Exhibition 2024,

Spalding Model Railway Exhibition 2024,

Finally Loch Dour was another Scottish themed layout but unlike Loch Syd that I highlighted yesterday, was a large layout. Being large did not mean cramming it with track, just a single line with a passing point at the atation and a few sidings just like the real thing in the Scottish highlands.

Spalding Model Railway Exhibition 2024,

I was particularly taken by this snow plough train with a pair of class 20s.

Spalding Model Railway Exhibition 2024,

Spalding Model Railway Exhibition 2024,

It was a great day and there were a few purchases that no doubt will feature here soon!