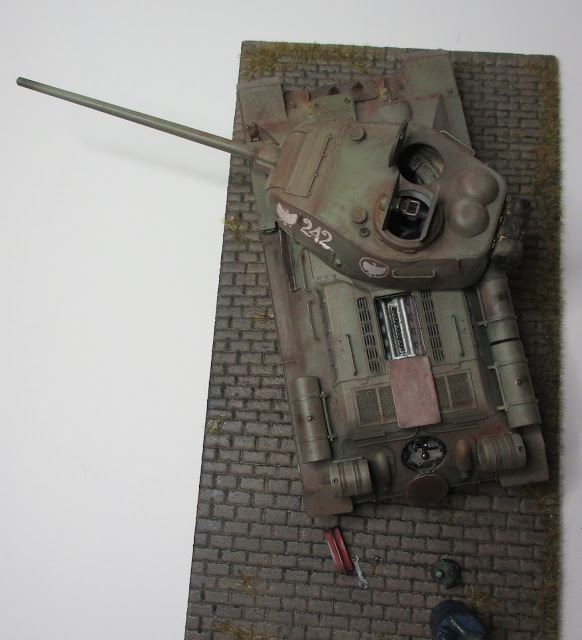
Something unusual for me in that I have finished something - must be a subconscious New Year resolution although I did start this kit in January 2020!
Although revealed in the last post here are some, I hope better pictures - click on the pictures to see a larger version.
Inside the Chieftain's Hatch T34/85 episode 1 does an external walk around https://www.youtube.com/watch?v=BRtj_TSOHjw
episode 2 covers the interior
https://www.youtube.com/watch?v=rTnS0XS2al8
I have no connection with this site but I learnt so much about this tank from these two videos.
From a build point of view not too much to note and there are a number of reviews on the net by far better modelers than me. However I would highlight that the rear engine hatch will not fit into its opening unless it is reduced in size - I left mine in the open position as the tank is supposed to be undergoing maintenance. The other thing is that there is no mention in the instructions regarding the turret rotation ring. It is a self evident fit and without it the turret cannot be located properly into the hull. The kit does include either molded tracks or the rubber band type. I went for the molded ones and they seemed to work well. The base is a piece of Styrofoam pizza base ( I have a stock of these as it seems pizzas in the interests of the environment now come on a cardboard base - good job I like pizza!) with the road stones scribed by using the end of a round file. Painted and with some static grass I think it looks good. The oil drum, oil can and tools come from the Italeri Field Workshop kit 0419S which is a great source of diorama accessories and as mine cost 50p from a club stand at a model railway exhibition great value!
With no connection to any of the firms involved the photograph below shows most of the products used to finish the model. I do like the Tamiya Extra Thin Cement and it is less aggressive on the plastic parts than other solvents if you get too much around the part. Paints from Vallejo with the main colour being 71017 Russian Green. The interior was painted during construction and was masked off for the final painting. I did not prime the model which is unusual for me but sprayed the green straight from the bottle which is a great advantage of the Model Air paints. A second coat which was lightened with white was sprayed over the horizontal areas to give a contrast. After a coat of matt varnish weathering started with coating the lower parts of the hull where mud would accumulate Mig Turned Earth Ground acrylic mud Ref A.Mig-2103. This was then followed up by weathering powders from MIG and Ammo once the decals had been added. The canvas roll on the back of the turret is a piece of kitchen towel painted, rolled up and fastened with some very fine wire.
I think the kit is a good one and with some care in building and painting you can create a model to be proud of. Have you built this kit and if so how did it go? Tell me in the comments section.


No comments:
Post a Comment