Search this blog

Showing posts with label Conservatory rebuild. Show all posts

Thursday, July 6, 2023

Don't do this at home!

Well I think I can just about say, after seven months, that the conservatory rebuild exterior work is now complete! Mrs. Woody will be pleased to cross that off her list of jobs for me to do. It is indeed a rare occasion that she can tick a job off so it may be time to have a slice of lemon drizzle cake to celebrate!

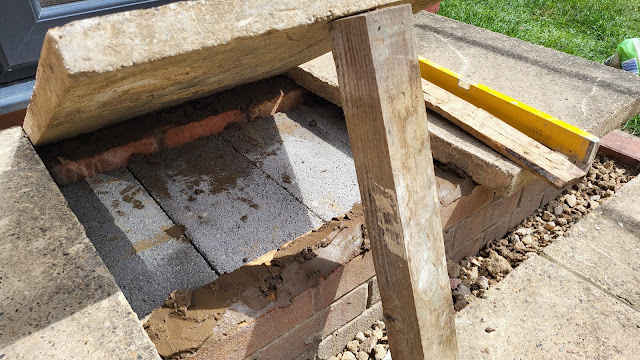
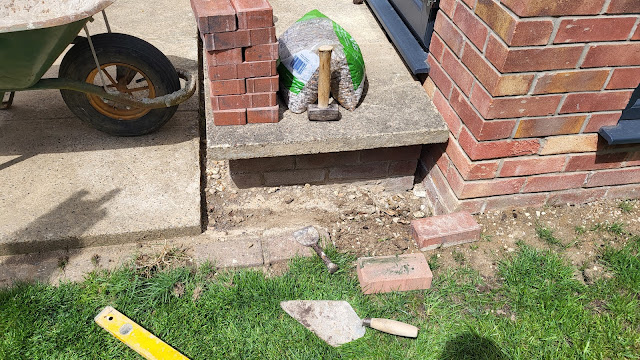
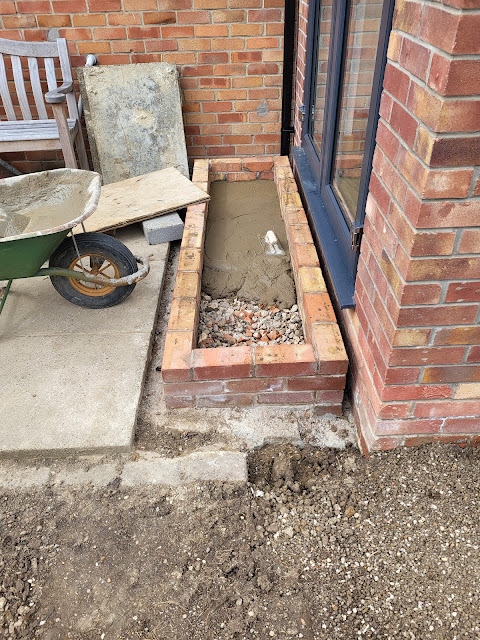
The job that brought it all to a completion was the setting of the step slabs on a bed of cement and then the final gravel surround. The slabs weigh a lot. I used to be able, many years ago, to lift and carry these but these days I am more limited to lifting a slice of lemon drizzle cake and carrying it to the lounge to eat! I really did not fancy trying to give myself a bad back by lifting the slabs on and off the bricks so my ingenious if somewhat safety challenged solution was to raise one end of the slab and hold it up with a stout piece of timber whilst I put the mortar on the bricks. With careful and consistent application of the mortar the slab should, when lowered be level. It was whilst putting the mortar to the back of the slab that my mind kept worrying about the slab falling on my arms and whether this ingenious idea was indeed as ingenious as I thought.

Conservatory rebuild

Well the fact that I am writing this post is confirmation that no accidents happened but my advice is, don't do this at home!

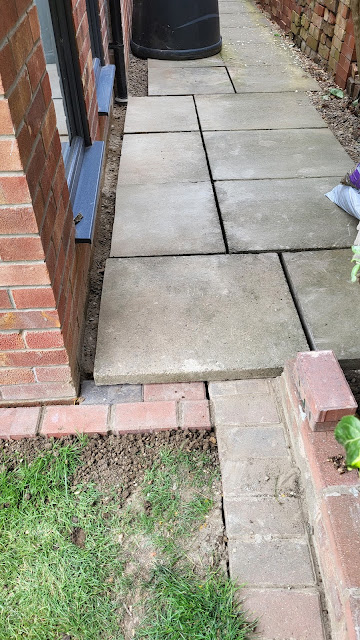
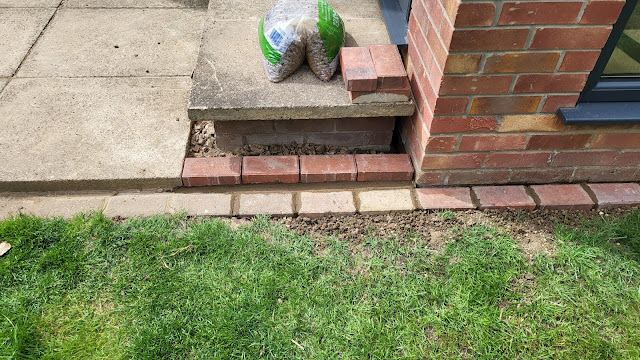
With the slabs bedded on mortar and the surrounds graveled up it is finished!

Conservatory rebuild

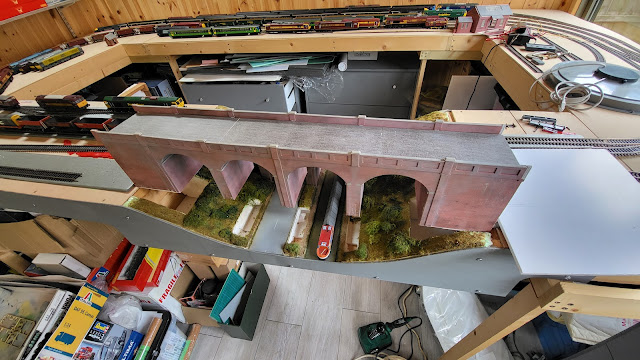
To celebrate I cut the grass and then had an hour in my Man Cave where I did some more work on finishing one of the viaducts. The job required the end brick piers to be fitted which I left off when I first built the viaducts as I needed to adjust the height of the viaduct in relation to the track level. Now this is where another don't do this at home warning comes in. When I built the viaduct back in November last year I made up the stone capping stones to go on top of the piers. I put them somewhere safe awaiting the moment that I would need them. Where that place is is beyond me! So, if you do stop building something to come back to it later make sure you put the remaining parts somewhere safe but leave a note of where that is with whatever you are building! 

However I have replaced the first viaduct which is now level with the track following the addition of some card to the foundations and has the end piers are fitted. I will find the capping stones sometime!

My Last Great Project

Next up is the second viaduct.
Wednesday, July 5, 2023

Woody's mad cap idea actually works!

Back on Saturday I was talking about the issue with the Hornby DCC Sound chip and the Ringfield powered Hornby HST train. Basically, put the sound chip in and it is not capable of providing enough power to run the Ringfield motor so the HST (high Speed Train) becomes a SST - Slow Speed Train! I am no expert on electronics with two wires being about my limit of understanding! However I knew the train ran fine with a standard DCC chip. Substitute it with the sound DCC chip and it ran slow. So in my mind the obvious answer was not to re-motor it or sell it and buy a more expensive modern model. In true Woody style, which will probably make anyone who has expertise in electronics roll their eyes or shout at their screen if they read this, my mad cap idea and solution was to run the motor and light from the standard DCC chip and add a second DCC socket in parallel to plug the DCC sound DCC chip into. There was certainly room in the body of the power car even with the Ringfield motor and I had a socket in stock at the WMD HQ Stores.

Hornby Swallow Livery HST

Handily, on the reverse of the socket it was conveniently labeled up as to what each pin connected to making soldering the two wires from the pickups simple to the point that even I could not go too far wrong!
Hornby Swallow Livery HST

Having unsoldered my previous connection to the first DCC socket that I installed I then added two more wires and soon the additional socket was soldered in parallel. The standard and sound DCC chips were then plugged in.

Hornby Swallow Livery HST

Putting it all back into the chassis I just left it loose for the moment just in case I needed to carry out further work on this as yet untested solution.

Hornby Swallow Livery HST

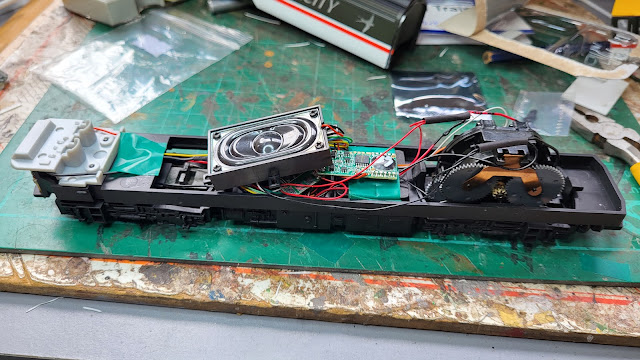
With trepidation it was put back on the track along with the other power car and the controller was turned on. 'Guess what', as I usually say to Mrs. Woody when I have broken something! It worked just as it should do! The Ringfield motor controlled by the standard DCC chip ran the train at HST speeds whilst the DCC sound decoders in each of the power cars provided the noise. Brilliant! I will do a video of it running in a day or so just to prove it does actually work! However that will have to wait until I get the viaduct back in place which I am finishing off from when I first built it last November! More on that later in the week.

My Last Great Project

Having mentioned Mrs. W, I better add, just in case she reads this, that today I did finish cementing in the slabs that I cleaned up last week ready for the moment when, as I informed Mrs. W, the conditions were right for cement work. I never actually told her what those conditions were just so I could keep my options open! However that job is now done tidying up the slabs but highlighting I need to clear up the rubbish at the side of the house. Another job on the list!

Conservatory rebuild


Wednesday, June 28, 2023

Relaxing?

It has been a busy few weeks at WMD HQ and it is catching up with me. I need to relax a bit I said To Mrs. Woody as she inspected the latest work I have done on finishing off the conservatory rebuild. Marty the cat certainly knows how to relax - maybe I should take some lessons from him?

Cats

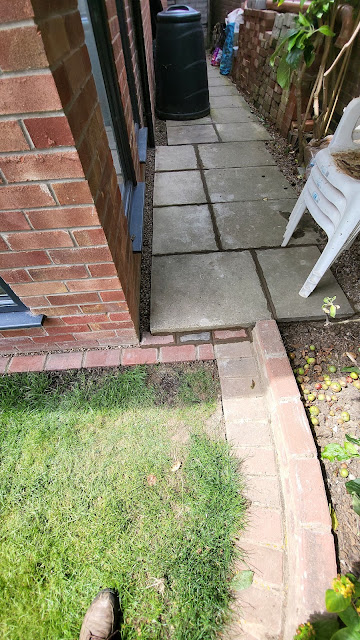
Anyway I think Mrs. W didn't hear me but is pleased with progress! Todays work was supposed to see the slabs at the side of the conservatory cleaned up and re-bedded in fresh cement. However they were that coated in mortar the builders let drop on them whilst bricklaying they took several hours of working with a hammer and chisel to clean them up. However they are much neater and lighter in weight and the bits of mortar that remain will weather off over winter.
Conservatory rebuild

With the surfaces cleaned off the slabs were lifted and all the muck under them cleaned out so that there is space for cement to re-bed them  Looks a bit neater already.

Conservatory rebuild

Those two bags on the left contain the stuff removed from on top and under the slabs!

Conservatory rebuild

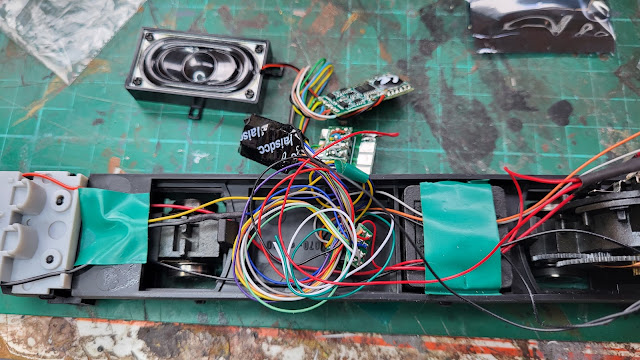
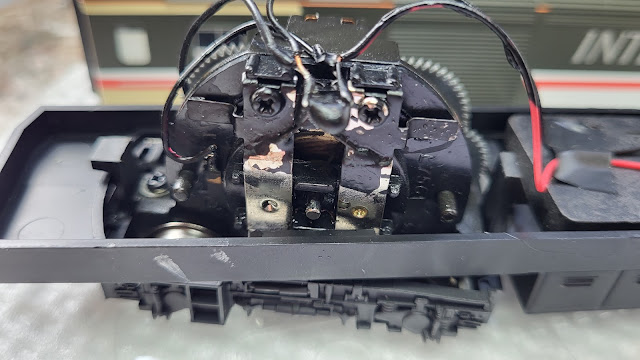
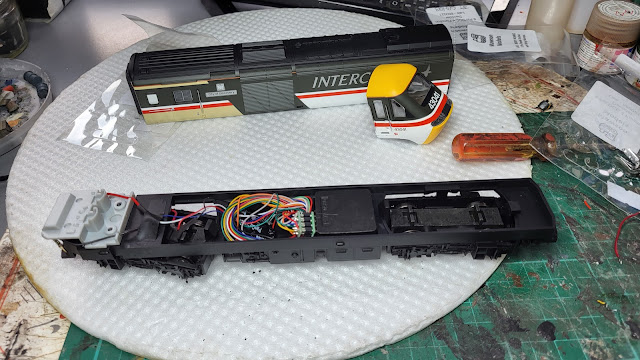
Back with the Hornby Swallow Livery HST I dealt with the spaghetti wiring. Getting the body off the driven power car revealed this. There are wires to the motor and the headlight from the pickups on both bogies..

Hornby Swallow Livery HST

This is the motor end. For some reason there is black paint on most of the wiring around the motor. In amongst the wiring is a capacitor that needs to come off. 

Hornby Swallow Livery HST

Disassembly saw the keeper plates for the motors removed and cleaned up and the capacitor removed.

Hornby Swallow Livery HST

Cutting the various wires allowed me to solder in the 8 pin socket. Basically the socket fits between the pickups taking power from the track and the wires to the motor enabling the DCC chip to take its power from the track and then run the motor in accordance with the instructions it gets from the DCC controller which in this case is controlled by me!

Hornby Swallow Livery HST

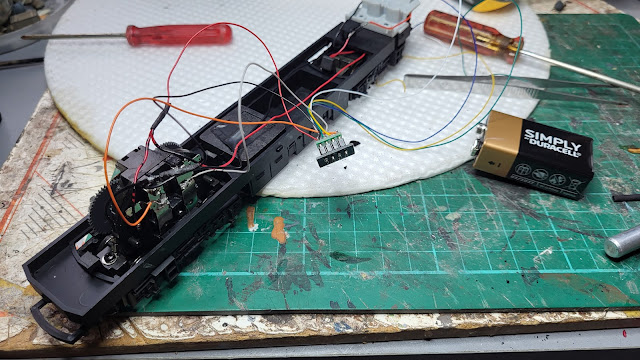
The 8 pin socket is wired in to the motor and headlight. The 9 volt battery is a handy way of testing things. There is enough power in it to run the motor. In this case I plugged a blanking plate into the socket which allows the motor to run on DC power and used the battery to test that the motor still ran. It did!

The wiring was tidied up and with that done it was time to plug a DCC chip in.

Hornby Swallow Livery HST

Meanwhile the rear un-motored power car needed a DCC chip in it to control the headlight. It was a simpler job then the motored power car as there was no motor to wire in.

Hornby Swallow Livery HST

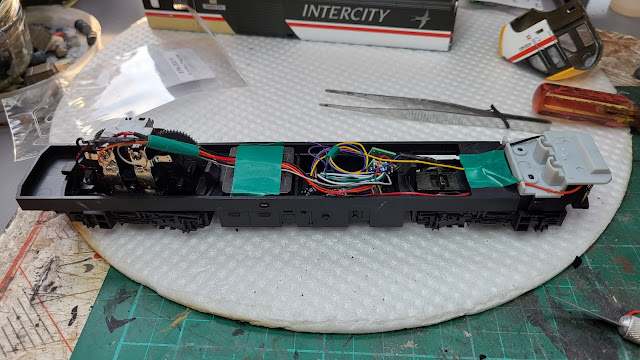
There is certainly enough room for the wiring.

Hornby Swallow Livery HST

With all that done will it run? I feel fairly relaxed(in my mind but not body!) that it will but stay tuned to find out!

Tuesday, June 27, 2023

Dealing with Spaghetti!

Much as I enjoy spaghetti, especially when the meal is spaghetti bolognaise (which Mrs. Woody does so well!), I do sometimes get that nervous twitch when looking at it as to me most wiring is like spaghetti especially in most model trains these days. I recall my old Traing locomotives which had a live chassis directly feeding one part of the motor and just one wire leading from the isolated wheels to the other side of the motor. Easy to work out and easy to work on - just like me! Well that is what I tell Mrs. Woody!

Modern day locos are slightly more complex in the wiring department and opening up the latest models will reveal wires, circuit boards and possibly DCC chips which looks more like the internals of a computer. However if you want DCC that is what you need, Luckily you buy the loco ready wired and in many cases chipped. In the case of my Hornby Swallow Livery HST whilst not being an old model it is however not a modern model so does not have a circuit board to plug a DCC chip in. Wanting to convert it to DCC meant that I had to get involved in some wiring work. Basically I needed to install a harness for the DCC chip and wire that to the models pickups on the wheels and then to the motor. I also needed to wire in the headlights on the model in such a way that they only came on whilst the model travelled forward. 

First stage was to assemble what I needed and luckily, as ever, WMD stores had the necessary parts in stock - almost like I planned it!

Hornby Swallow Livery HST

There are two power cars for the train and whilst only one has a motor the other one does have headlights and therefore I need to install a chip in both cars. How will it go? Will I get spaghetti bolognaise for dinner? Will it all blow up? I will let you know in a day or so!

In the meantime I have been enjoying the slightly cooler weather to finish my block work as started yesterday. 

Conservatory rebuild

I just need to let it dry then put some gravel between the blocks and the main wall and level up the grass with some soil and grass seed. It is not over however as round the corner I need to reset these slabs which were lifted by the builders! It never ends - just like a piece of spaghetti seems to be when I try to wind it round my eating utensil!

Conservatory rebuild


Monday, June 26, 2023

Small jobs and bigger jobs!

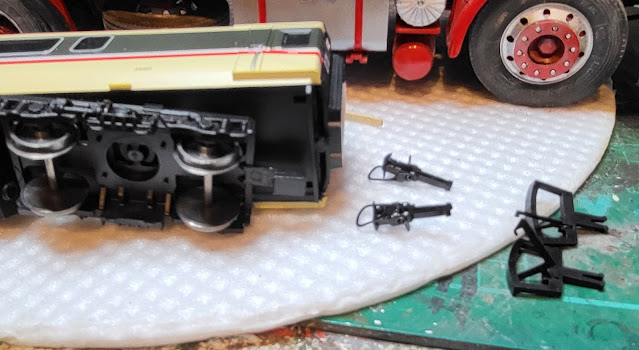
A nice small model railway job today, changing the coupling on one of the coaches for the HST set. The coach for some reason had couplings that look more like 009 couplings. The problem was that it did not couple up with the other coaches. The solution was to change the couplings for conventional Hornby type ones. Luckily the coach is a modern one fitted with NEM coupling pockets that mean standard compatible couplings can just be slid into the NEM slot. Equally luckily was that within WMD stores suitable spare couplings were in stock!

The old couplings on the left easily came out.

Hornby Swallow Livery HST

The replacement Hornby type couplings now attached.

Hornby Swallow Livery HST

With the replacement couplings in place the coach could be put into the train and coupled to the ther coaches. I just need to convert the power car to DCC but more about that another time.

Bigger jobs see me returning to the conservatory rebuild that happened at the end of last year. The garden was devastated by the building work and I am only just getting grass to grow back where mud was spread by the digger. Having at last got a surface where I can walk without sliding or sinking I now need to reinstate the edging blocks that got dug up when the foundations were dug. They disappeared with the spoil dug out so I have bought replacements and today started the job of replacing them. 

Conservatory rebuild

Conservatory rebuild


About half way through so hopefully tomorrow will see the blocks in place. 


Conservatory rebuild

Conservatory rebuild

 I also need to finish the step and reset some slabs on the far side of the conservatory so still much to do! As long as Mrs. Woody doesn't make this job any bigger I should be OK though!

Thursday, April 13, 2023

One small step but one giant leap for Woody

The Airfix Dodge 1 1/2 Ton Personnel Carrier is almost finished! The masked up windscreen was unmasked having had a coat of dirt airbrushed on it yesterday.

Airfix Dodge 1 1/2 Ton Personnel Carrier,

Airfix Dodge 1 1/2 Ton Personnel Carrier,

It was fitted with some PVA glue to avoid  any damage or smears on the clear parts. In addition the tool rack for the rear tailgate of the truck was painted and fitted. The two remaining figures were also glued into the back of the truck and a few items of cargo were placed in the trailer. Small steps but leaping forward!

Airfix Dodge 1 1/2 Ton Personnel Carrier,

Airfix Dodge 1 1/2 Ton Personnel Carrier,

A few jobs to do on the base and then it will be fully finished! 

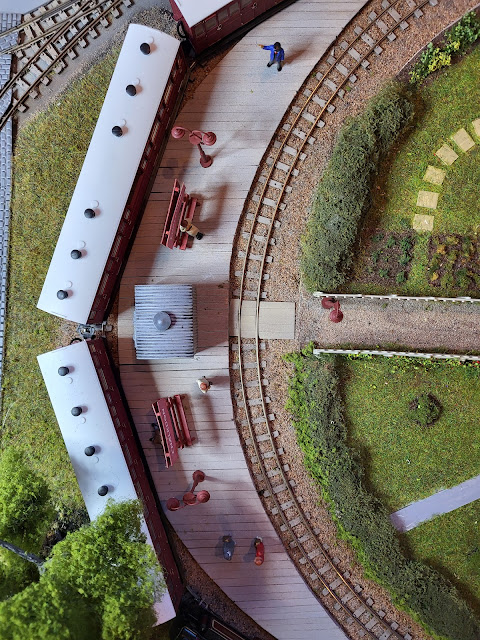
On Chalkdon my 009 narrow gauge layout, the walkway onto the platform I made and painted yesterday have been fitted making it safer for the 4mm passengers to get to the platform with their small steps rather than leaping!


009 gauge layout

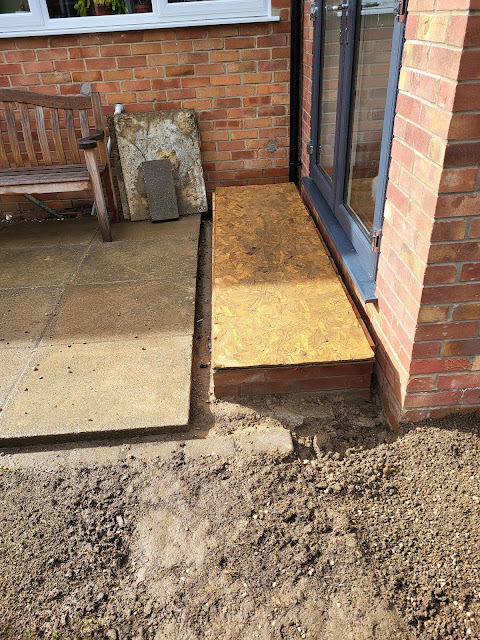
On the step project the blocks are in and the slabs have been placed on the brickwork awaiting setting into a cement bed. However they are at least in place as they are not the easiest things to move and lift! 
Mrs. woody seems impressed which is a major plus point! 

Conservatory rebuild

'One small step but one giant leap for Woody' to badly misquote Buzz Aldrin! However it does at least look a lot better then 3 months ago! Hopefully that grass seed will grow soon - how can it not with all the rain!

Conservatory rebuild


Wednesday, April 12, 2023

A mixed bag!

A mixed bag of things done today including an incredible bike ride of two halves. Firstly heading into the brick wall of a wind and then, secondly, on the way home feeling as though I am about to take off! The weather appears to be so unpredictable that even the weather forecast seems to be a best guess at what might happen! Today started sunny but cold. At least it was dry and that was enough for me to mix up some concrete for inside the brickwork of my step into the rebuilt conservatory. I had already put a base of hardcore inside the brick base.

Conservatory rebuild

The idea is that seven of the concrete blocks just by the lump hammer in the picture above will be cemented in the base and provide support for the slabs that will span the bricks and form the top of the step. The blocks need a base to sit on hence the concrete base inside the brick work. I do try to think these things out - not always logically though as Mrs. Woody would say!

Conservatory rebuild

Mid way through above and the finished job below - just as the temperature really dropped, the wind blew even harder and the rain started!

Conservatory rebuild

Conservatory rebuild

Luckily although the rain bothered me as I got wet, the concrete was nice and snug under cover from the wooden temporary step. Hopefully I can get the blocks cemented in place tomorrow and then the slabs for the step installed on Friday - weather permitting!

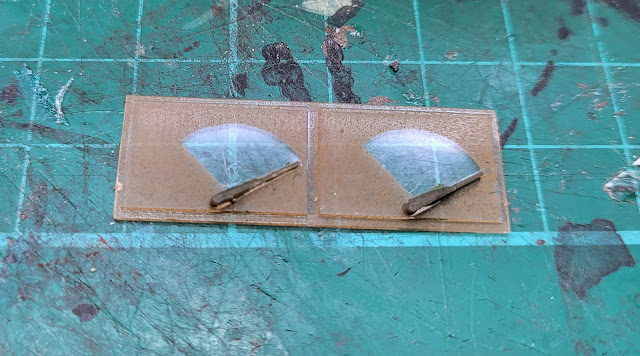
In the dry of the Man Cave I had a mixed bag of small but important things to get on with. First off I need to finish the Airfix Dodge 1 1/2 Ton Personnel Carrier. One of the few parts to fit is the windscreen which is a one piece moulding including the windscreen wipers. As the truck is fairly heavily weathered a clean windscreen was not going to look right. Therefore I used my compass cutting on some masking tape to cut out a mask for the sweep of the two windscreen wipers. I will spray some 'dirt' coloured paint to simulate the grime thrown up on the glass and then remove the masks which will reveal clear glass where the wipers wipe. That's the theory!

Airfix Dodge 1 1/2 Ton Personnel Carrier

For my 009 narrow gauge layout Chalkdon, I need to have a walkway across the tracks to the platform. I also need some packing cases, sacks, cable drums and oil drums to place around the canal wharf. These have been made up and have been sprayed with an initial coat of paint so should be in place soon.

009 gauge layout


Monday, March 27, 2023

Growing grass!

My day has mainly been spent growing or trying to grow grass.

On Chalkdon, my 009 narrow gauge layout, it was time to apply some grass after having done some ballasting yesterday. PVA glue was spread in the required areas.

009 gauge layout

Then my puffer static grass applicator was used to apply the grass.

009 gauge layout

Once the grass was applied it was left for a few minutes then I vacuumed up the loose fibers leaving what I think is a pleasing result. 

009 gauge layout

009 gauge layout

009 gauge layout

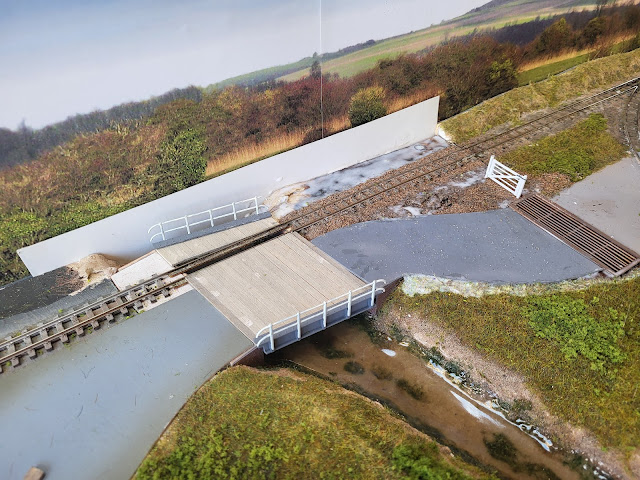
I still need to add some bushes and undergrowth but I like the way the cattle grid looks and is something not often seen these days.

In the garden I have been trying to grow grass! Still suffering from the aftermath of the builders my lawn is still looking like a battlefield. I have been seeding areas having raked the clay off as far as possible. Using sieved soil I am trying to get it back to a smoothish surface too. The one area that required some digging was where the soakaway for the drain from the rebuilt conservatory. It had been left with a hump which I thought would be an easy job of just removing the turf, taking a few spadefulls of soil out and put turf back. I should have known by the fact I found a brick (they are used tro create the soakaway) sticking out above the grass that this was not going to be easy. The spade went in about three inches and hit brick. Taking the turf off there was a sea of bricks. No use to allow the grass to grow as it will just die in the warm dry weather that we will hopefully have a few days worth of this summer! 

Conservatory rebuild

So out came about 12 inches in depth of bricks.

Conservatory rebuild

With the brickless void backfilled I used sieved soil to get some element of grass friendly growing media for the seed that will hopefully be through in a few weeks. It will need more levelling as the backfill compacts over time but at least I don't have a hump in my lawn looking like I have buried something. Now, where is Mrs. Woody?

Conservatory rebuild