Search this blog

Tuesday, December 28, 2021

Hillside development.

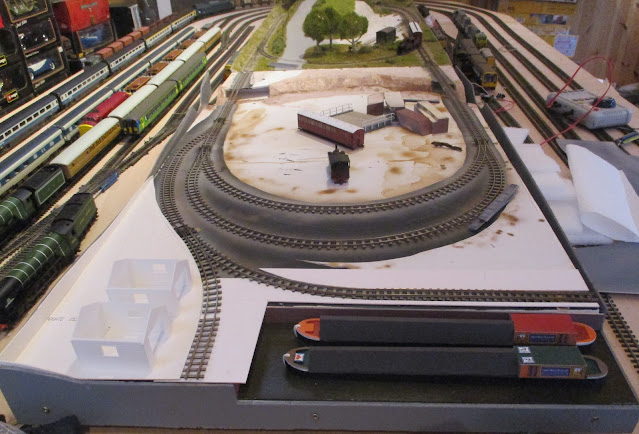
Having escaped to the man cave AKA The Room of Gloom, for a second night thanks to the delights of umpteen TV channels that keep Mrs. Woody's interest in Murder Mysteries satisfied (apparently the current favorite is one called Vera) there has been further progress made on the narrow gauge layout. This time on the landscape at the end of the canal wharf. This will be a small hill with two small sheds in front of the railway siding that goes along the end of the wharf. I have constructed the whole area of this hillside development on a sub base of 2mm mounting card. It makes it easier to work on as I can bring it to the workbench and work in seated comfort. The hill itself was constructed with mounting card profiles with an infill of the same foam that I used for the river banks. The usual choice would be polystyrene which would result in the recreation of Santa's Grotto in my man cave as I carved it to shape and all those spheres of that make up the material would fly everywhere. I guess though it might not be The Room of Gloom if that did happen! 

The profiles are being added.

009 Narrow gauge layout

The sub-base being taken off the layout....

009 Narrow gauge layout

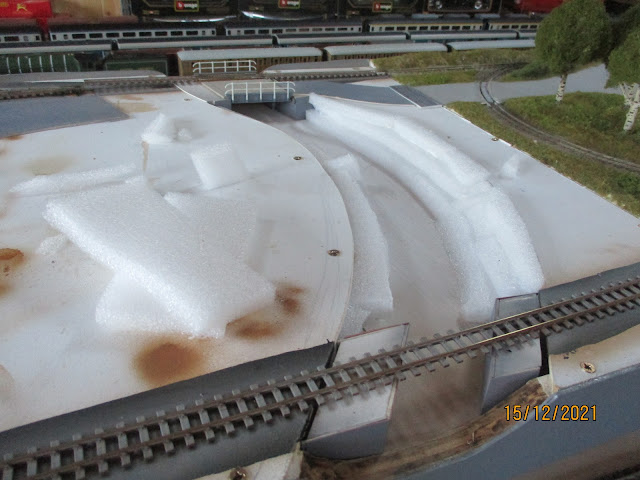
...and onto the work bench where the rest of the profiles and foam have been added. Te foam has been cut to the shape of the profiles ready for....

009 Narrow gauge layout

...being overlaid with some kitchen roll - other brands are available! 

009 Narrow gauge layout

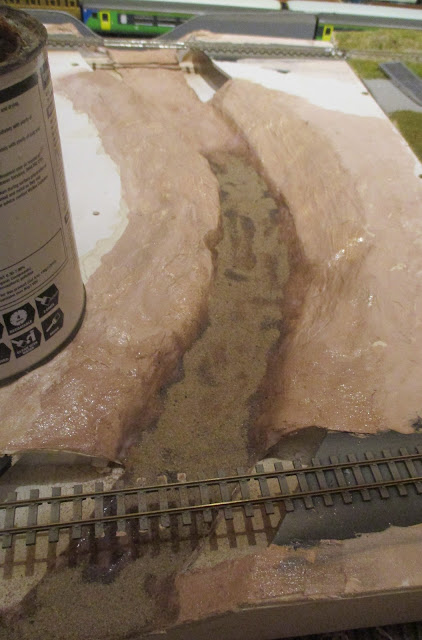
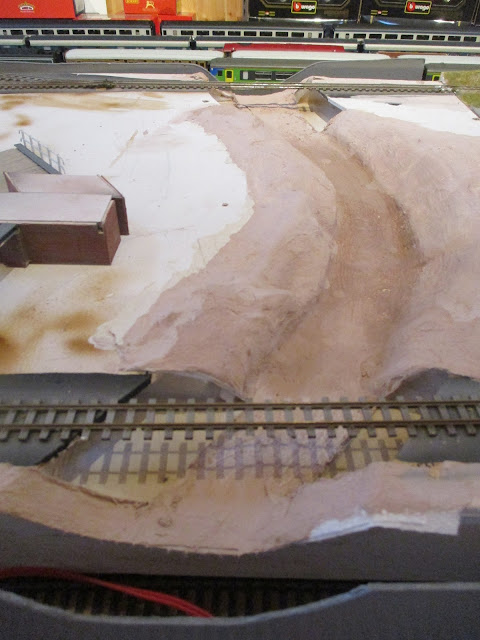
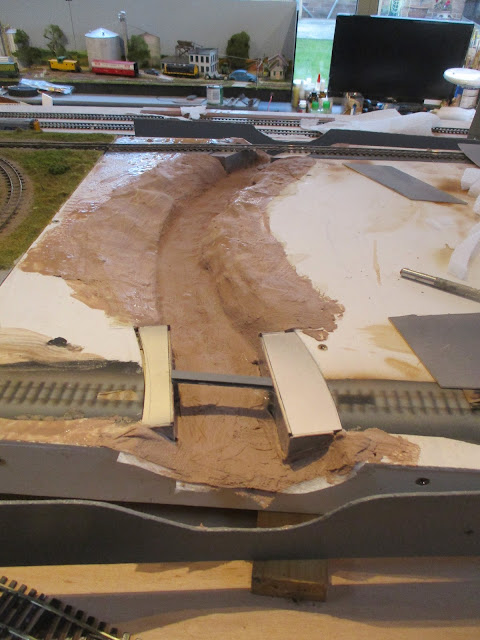
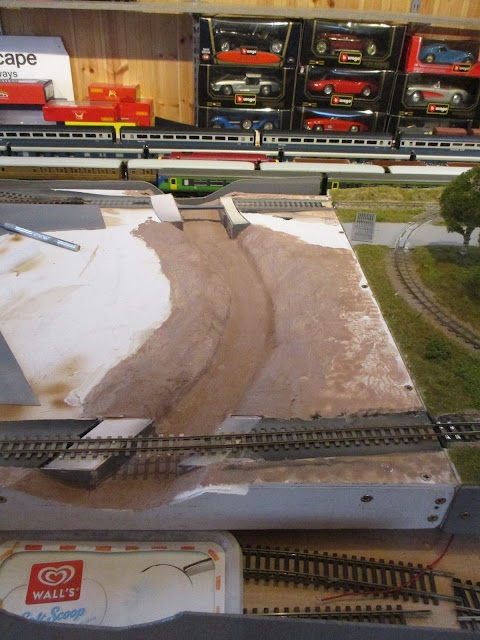
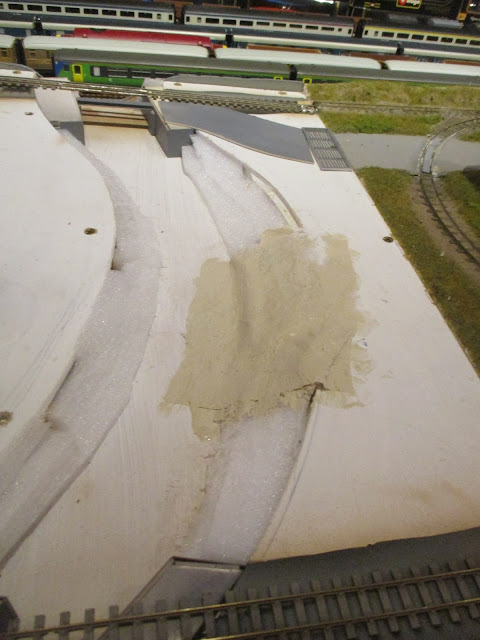
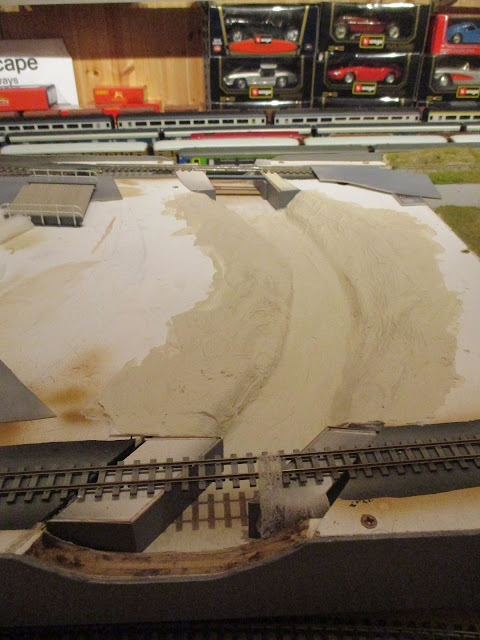
Having reached this stage it was then time to mix up a sloppy mix of DIY filler with some brown acrylic paint added and then get plastering! The initial covering of kitchen roll was coated in stages with the filler mix and smaller pieces of kitchen roll added which in turn were covered with more filler and more kitchen roll. There are about four layers of kitchen roll in all and they will form a solid shell as the sloppy filler mix is absorbed by the kitchen roll. Indeed, this particular brand is noted for its absorbency capabilities so it should make for an extra hard surface!

In progress.

009 Narrow gauge layout

Finished on the work bench.....

009 Narrow gauge layout

...and whilst Mrs. W is absorbed with TV detective Vera it is sneaked into the warmth of the kitchen to dry. Wonder if Mrs. W will detect that?

009 Narrow gauge layout

I also had time to add another coat of acrylic varnish to the river bed and banks and being extra generous with it as I need this to stick a coating of sand to make the river bed. I have a feeling I will need to do this several times but I won't know until it dries and I find out if it has worked and iof so how well! 

009 Narrow gauge layout


Monday, December 27, 2021

Added enthusiasm!

With the arrival of the Bachmann Ffestiniog Railway Double Fairlie 'Livingston Thompson' in my 009 gauge fleet there is a renewed enthusiasm to finish the layout. As I have explained before my progress on matters happens on a random haphazard manner so how this current enthusiasm will manifest itself into progress to a finished layout is a matter which I don't even know the answer to! However progress has been made. Mrs Woody had settled down for an evening of favorite TV murder mystery programmes (should I be worried by her passion for these types of programme?) so I took the opportunity to have a few hours in the man cave AKA The Room of Gloom.

The kitchen roll and brown coloured DIY filler mix that I had done before Christmas have continued to dry and the brown has lighten in the process of drying which is good.

009 Narrow gauge layout

As I am going to try using an epoxy liquid to create the river, the river bed and sides need to be 'water tight'. The DIY filler is not going to be that so I have coated the river bed and sides with two coats of acrylic household varnish. This should hopefully keep the resin in where it should be and not dripping down from the bottom of the baseboard. How successful this will be is questionable. As a youngster a group of us built a boat out of odds and ends and its maiden voyage saw it becoming a submarine - enough said! Anyway the sheen on the plaster indicates that the first coat of varnish sealed the DIY filler and the second coat now sits on top of that giving a sealed surface.  

009 Narrow gauge layout

I also managed to start doing some work on the area around the canal wharf. Most of the track will be set into the surface which will most probably be some form of cobbles. To do this I need a sub-base to support the cobbles and this is 2mm mounting card cut to fit around the outsides of the track and helpfully is level with the sleepers of the track.

009 Narrow gauge layout

009 Narrow gauge layout

I have also started constructing the ground formation in the corner of the layout. It may all look a bit mis-matched at the moment but it should, if my calculations are right, work! Then again it may not!


Sunday, December 26, 2021

Nice things come in small packages.

With it being Christmas Day yesterday there was much excitement at WMD HQ as presents were unwrapped. Mrs Woody got various items including a new fancy hairdryer which makes the possibility of the old one repurposing itself into the man cave AKA The Room of Gloom a possibility! 

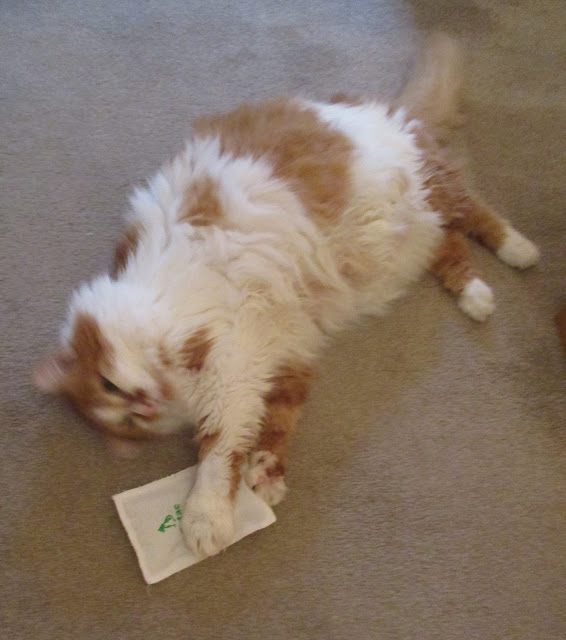
The cats were pleased with their cat nip packages which they soon were playing with. Sammy, who passed away this year used to love these and would end up drooling and rubbing the package all over his head in a frenzy of cat delight! Although Chloe and Holly didn't droll as much they still found a good few minutes to play with these small packages.

Cat nip package

Cat nip package

I did get a number of packages one of which was indeed small but contained a wonderful 009 loco.

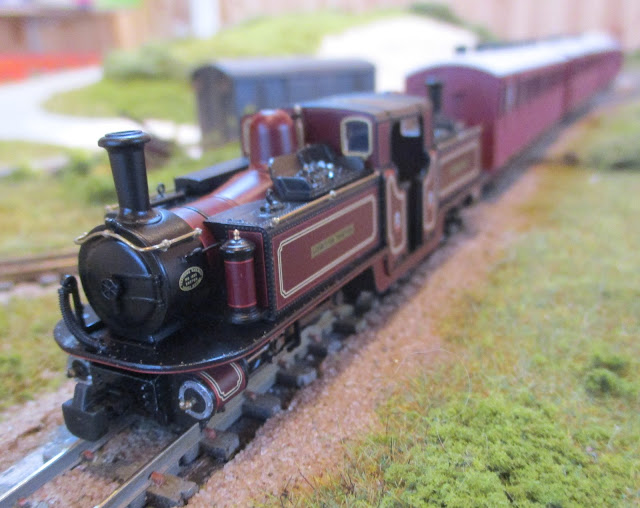
Bachmann Ffestiniog Rly Double Fairlie 'Livingston Thompson' FR Lined Maroon

This beauty is the Bachmann Ffestiniog Railway Double Fairlie 'Livingston Thompson' in lined maroon complete with DCC sound chip. I had to escape to the Room of Gloom for an hour or so whilst Mrs.W was sorting out handbags or something like that, and soon had it going round my 009 layout, even if it was un-prototypically hauling a rake of Lynton and Barnstable coaches! It runs great and is a fantastic addition to the 009 fleet. Gives me some increased impetus to finish the layout. There were some bigger packages but more about those another day. In the meantime I am enjoying this nice loco which indeed came in a small package!

Bachmann Ffestiniog Rly Double Fairlie 'Livingston Thompson' FR Lined Maroon


Saturday, December 25, 2021

Merry Christmas!


Merry Christmas!

Hope that you all have a great time and that 2022 is a good one for you!

Stay safe and build models!

👍


Friday, December 24, 2021

Working smarter not harder as I get older!

In my last post I described how I had used sellotape around the bridge abutments to protect them from the sloppy filler mix that I was sloshing about as I constructed the river banks of my narrow gauge layout - all part of my working smarter not harder as I get older philosophy. Well it did work. I managed to extract the abutments and there was a fair amount of filler on them.

009 gauge model railway layout

Peel off the selotape and hey presto....

009 gauge model railway layout

Next up was giving some colour to the brickwork so it was like being back at school as the colouring pencils came out. A few good quality artists pencils in reds and browns just randomly run over the brickwork pick out the bricks whilst leaving the mortar course a nice grey from the primer coat. If you look at real bricks they are not just one colour - they have a multitude of colours in them which this pencil method of colour gives a fair impression of.

009 gauge model railway layout

009 gauge model railway layout

The finished items ready to go back in place. Once the filler is dried on the river banks and in the river bed I will seal it with a coat of varnish before putting some river bed type debris in place. Then the plan is to pour a resin in to create the river which has all sorts of possibilities of going wrong unless I am really smart in my older age! 

009 gauge model railway layout


Thursday, December 23, 2021

Further tales from the river bank

Despite the cold yesterday I ventured out to my man cave AKA the Room of Gloom or perhaps more aptly The Ice Cave! The heater soon bought up the temperature to something more hospitable and allowed me to do a little more on the river banks of the narrow gauge layout. Despite having shaped and built up the landscape of most of the river banks I still needed to fill in around the bridge abutments and add a bit more strength to the rest of the landscaping. Because anything to do with a sloppy DIY filler like substance in my hands is going to cause a mess I needed to protect the brickwork on the abutments. Indeed I still need to colour the brickwork. In one of my rare more thinking ahead moments, I had made the abutments removable at this stage so I was able to lift them out and then put sellotape around them. The shiny surface would stop the the filler sticking to the abutments and also it would protect the brick work surface. 

009 narrow gauge model railway layout

Next I mixed up my usually sloppy mix of DIY filler but this time adding some brown acrylic paint to tint the mix to look like earth. The idea of this is that if the surface is chipped in the future it is going to look less glaring as a brown surface than the white of the normal mix. Say no more! Further kitchen roll was at hand from the roll I still needed to put back in place before Mrs. W misses it! An hour or so saw the area around the abutments done and a layer of the mix laid over the previous days work. It all looks very rough at the moment but it should get better from now on - famous last words! Whether there be any progress today relies upon if the mix has dried or not and if I have managed to wrap Mrs. W's Christmas presents! If I don't manage that wrapping job by Saturday it could well be an interesting next Tales from the River Bank!

009 narrow gauge model railway layout

009 narrow gauge model railway layout


Wednesday, December 22, 2021

It may not look pretty, but it works!

Probably something that Mrs Woody thinks about me! Although having still got a list of jobs left to do from her 'List' the last bit of the title may not be so true! 

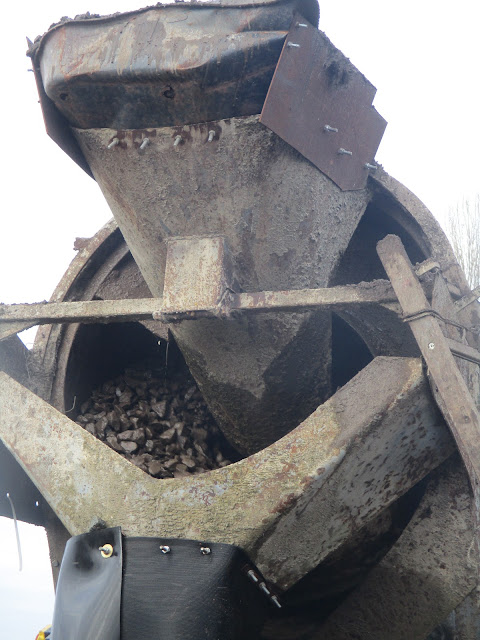
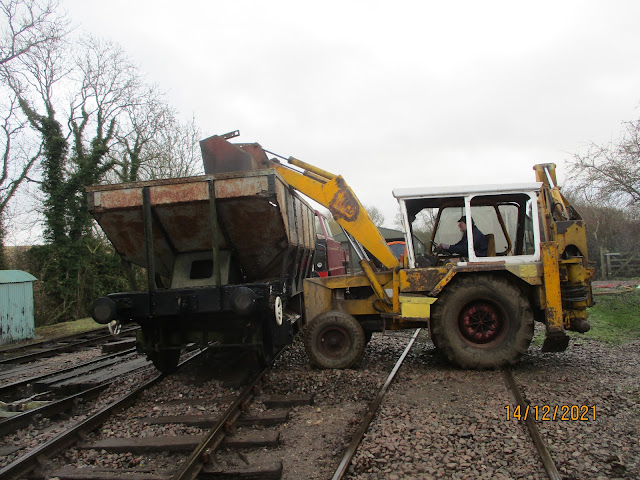
However I did manage a few hours of work at the Rocks by Rail Museum yesterday where the ballast washing operation continued with the over sized washing machine that I  talked about last week (go here to see that post). Not looking pretty is something of an understatement about the machine as it looks as though it is a cast off from the Gold Rush TV series! The loading hopper is a case in point - lots of large nuts and bolts, bits of wood and rusty metal all fastened together in a bit of a haphazard manner which would make most advocates of aesthetic design turn away in disgust. However pretty it may not be but it works and that is what counts! In addition it cost a fraction of the £50m that Network Rail spent on a ballast cleaning machine back in 2015 - go here to see details of that and indeed how much prettiness £50m buys!

Rocks by Rail Museum ballast washing

Anyway, following a day at the museum I also had an hour in my man cave AKA The Room of Gloom. The foam that i had glued to make the substructure for the river banks had dried and whilst not looking pretty, once carved to shape with a kitchen knife (note to self  - remember to return before Mrs. W misses it) it provided the perfect base for the next part of the landscaping work. This involved mixing up a fairly sloppy mix of DIY filler and then using small pieces of kitchen roll laid over the foam and bushed with the sloppy filler until saturated (note to self - also remember to return kitchen roll before Mrs. W misses it). The idea is that you build up several layers of kitchen roll which eventually dry into a hard shell. Again, it may not look pretty but it works. Once it is covered with model foliage it will then look pretty - I hope!

009 gauge narrow gauge model railway layout

Foam has been carved to shape.

009 gauge narrow gauge model railway layout

First pieces of kitchen roll and sloppy filler being applied.
 
009 gauge narrow gauge model railway layout

Most of the river bank completed.

How quickly this will dry is a big question as the man cave can get cold so progress may be slow - but that is the story of my life!

Thursday, December 16, 2021

Tales from the river bank.

If you are associating the title of this post with a children's programme from way ago you are of an age where age doesn't matter any more!

A bit of work last night on the river banks. Mrs. Woody had a parcel delivered (one of many!) with some rigid foam surrounding the contents. That almost ended up in the bin but I had the idea that it would be useful as the subbase to my landscaping of the river banks. Normally I would use polystyrene - the type which disintegrates into those small spheres that through static charge get stuck all over you. This foam however was as light as polystyrene and could be cut with a knife without me ending up looking as though I had been through a snow storm and having ended it in a collapsed igloo. I have therefore had a pleasant hour or so cutting it into the rough shape and gluing it all with PVA with no big mess to clear up - working smarter not harder as I get older! 

Its a bit cold in the Room of Gloom as I call my man cave, so the glue will take a while to set. However once set a bit more snow free carving should see a basic shape which will then be covered with plaster and paper towel to give a rigid base for scenic treatment. That is for another time though when there will be more Tales from the river bank! 

009 narrow gauge layout


Wednesday, December 15, 2021

Oversized washing machine!

Last week it was clearing vegetation at the Rocks by Rail Museum but this week it was a chance to use the oversized washing machine to do some ballast washing. Now I generally like to keep away from washing machines as close contact with them can lead to all sorts of unreasonable domestic expectations about me using them from Mrs. Woody. However supersize the machine and put it in a railway setting - well that is a completely different situation that I like to be involved in.

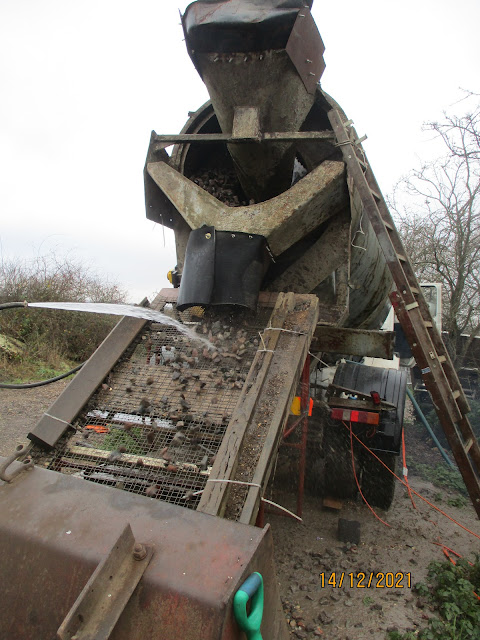
It may look somewhat Heath Robinson in nature but the system is sheer brilliance. The basis of the system is an old cement mixer with a drum of about 4 to 6 cubic meters capacity. Dirty ballast is loaded into it via the hopper at the top.

Rocks by Rail Museum ballast washing

Add some water from the nearby handy water container that was previously a 14 ton molasses tanker

Rocks by Rail Museum ballast washing

Let the drum rotate for a few minutes. Put the drum into reverse so that the ballast comes out and it spills down the screen deck where it gets a bit more of a hose down into the waiting front bucket of the JCB. There are two wheel barrows under the screen which collect all the fine material that falls away from the ballast so that it can be reused elsewhere on site. They fill up more or less with each wash cycle and with added water weigh a ton - I know from experience now! It is surprising just how dirty and contaminated ballast can become.


Rocks by Rail Museum ballast washing

Having been washed the ballast then gets transferred into the nearby Trout ballast wagon ready to be spread around the tracks. I do have a gravel driveway at home which looks a bit dirty - wonder if Mrs. W would notice if I used the washing machine..........

Rocks by Rail Museum ballast washing


Tuesday, December 14, 2021

Glacial progress!

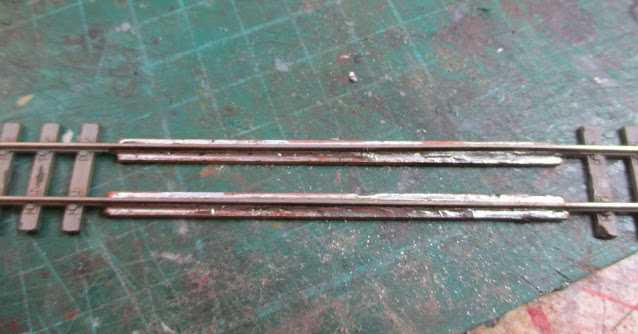
In light of various things going on with the climate I am sure there are actually glaciers that are moving one way or another faster than my progress on the narrow gauge layout. You think you will have time to do a few hours and then find yourself getting pulled into other jobs. The good weather the other day meant a too good a chance to catch up with tidying up the garden so that was most of the day taken up. However at least there has been some progress with the layout with the two river crossings more or less structurally complete. On the bridge with the wood deck I had to take the sleepers off the track. In real life the rail across most open deck or wooden bridges is supported by a sub-structure which holds the rail in place. If there were only sleepers then there would be no ballast to hold the track firm. In model terms taking the plastic sleepers off is fairly easy - a little action with a craft knief and they are gone. However the remaining rail does need some support to retain rigidity and avoid the track warping. Therefore I soldered some copper clad strip under each rail. The copper clad strip is plastic sheet covered with a layer of copper which makes it useful for all sorts of things including circuit boards in most electrical appliances. However as with many items people find uses for products which were far from the minds of the original creators as in this case.

009 gauge layout bridge build

The copper clad strip cut to length.

009 gauge layout bridge build

Now soldered into place giving rigidity to the rails. I am going to have to recess the rails into the bridge deck which is something my original plan did not envisage but that plan also did not take account of my miscalculations on levels! Say no more! 

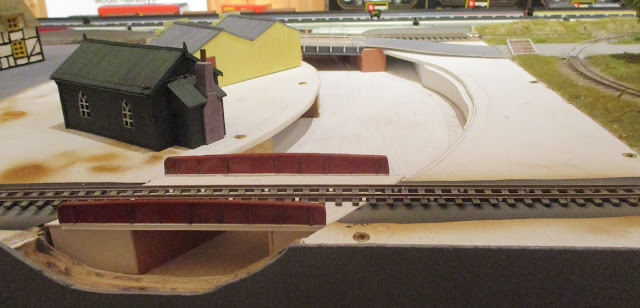
With some of my woeful geometry calculations for angles, the abutments for both bridges are done and it is mow looking like this.

009 gauge layout bridge build

The unusual looking item on the right of the picture is supposed to be a cattle grid. Made from some off cuts of plastic sheet and rod it is my idea to disguise the joint in the road between the two baseboards of the layout. How good it works out is another matter!

009 gauge layout bridge build

The second bridge is much more conventional in style. The steel girders have been hanging around in my scrap box of bits which "may come in handy one day" for over 30 years. However despite not having seen them for most of that time I still remembered that I had them. Now if only I could remember what Mrs Woody was saying the other day - that would be progress!