Search this blog

Thursday, January 6, 2022

Boy, is it cold today - 1 degree and 1 percent!

A few days ago in the balmy weather of the New Year holiday I was cycling in shorts. Today I was covered all over in several layers but it was so cold cycling. I should have perhaps realised how cold it was by the fact that none of the cats wanted to go out and Tim the postman who delivered another package for Mrs. W looked as though he was going on an Artic trip. It was supposed to be 1 degree Celsius but felt more like -10 with the wind chill.  Even trying to go faster to get warm was not much use with a strong headwind! However now 56 miles into this years target of 5200 so that's just over 1%! 

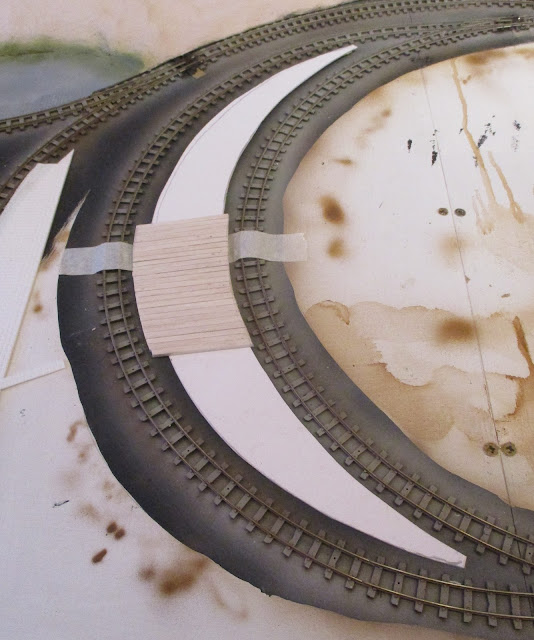
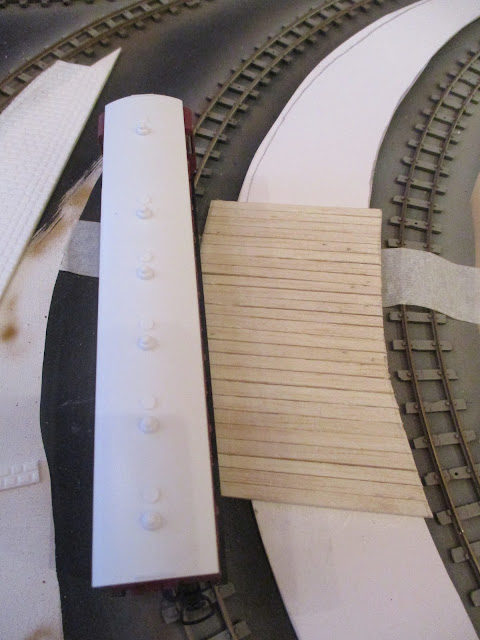
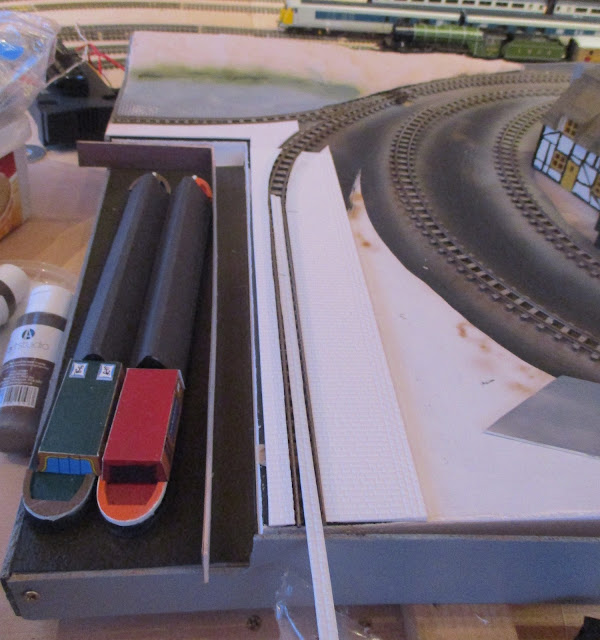
Having got home and warmed up I had an hour in my Man Cave AKA The Room of Gloom and continued with the platform build started yesterday. Luckily there is a heater so I could bask in some warmth whilst working. However it can not be that warm in there as the model water resin has still not dried - yes I poked it again! Some progress on the platform with about three quarters done now. As you can see in the photos the strips of balsa are glued to the card sub-base having been cut to the rough length needed and then cut to shape later. As I said yesterday I am not sure if this will look right but its growing on me. Worked stopped short of finishing it off as with Mrs W's return imminent I had to get onto cooking duties! Enchiladas for dinner if it all goes well or beans on toast if it doesn't! If it is beans on toast I can guarantee a frosty time from Mrs. W!

009 narrow gauge layout

009 narrow gauge layout


Wednesday, January 5, 2022

Mind the gap!

The phrase Mind the Gap is synonymous with the London Underground and you can get T shirts and other items of clothing with that phrase emblazoned over them! However in my case my wardrobe does not boast such attire but I do have a phobia about big gaps between model platforms and the coaches they are supposed to serve. As model railways use curves far tighter than you would find on real railways (most model railway curves would see passengers hurled across the coach with G force as the train went round them) if you have platforms on a curve they tend to end up with a scale 3 foot gap meaning that the passengers would have to make a 3 foot leap to get onto or off the coach. Not good! In the case of my narrow gauge layout the platform is on a leap but because coaches used on such systems tend to be close to the ground platforms are usually close to ground level. This is an advantage I have taken in starting the platform on my layout in that the coach can in effect over ride the platform surface. The platform itself is supposed to represent a wood planked structure. A piece of card to fit in the loop was cut to shape and balsa sheet cut into strips to represent the planks. At the moment progress is slow but we have the beginnings and there is no gap! I am undecided if the wooden platform will look right but sometimes you just have to try! In addition I need something to do whilst I am still waiting for the model water to dry. Prod of finger still shows it has yet to dry!

C
009 gauge layout,

009 gauge layout,

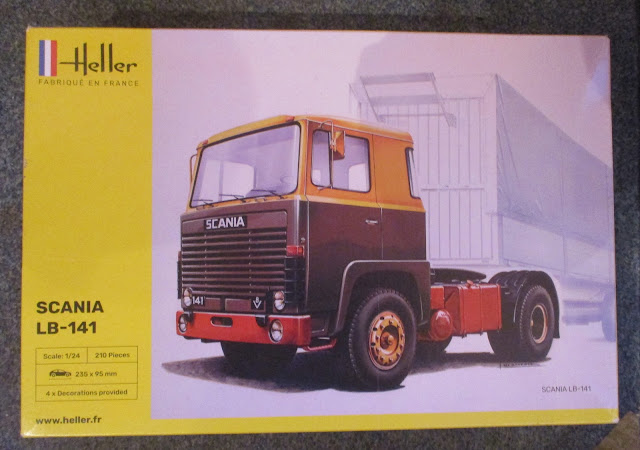
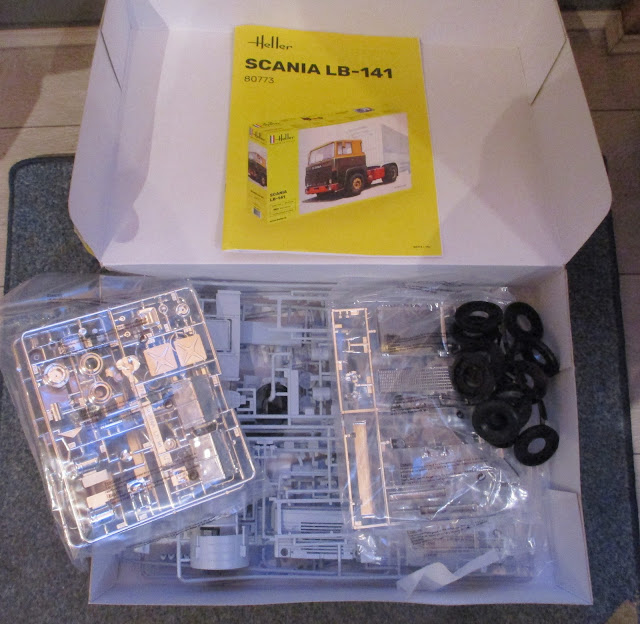
Whilst going through some stores at WMD HQ I unearthed this in my stash of kits and think it could make a good first kit in my 12 in 22 as I am going to call my target of building 12 kits this year.

Heller Scania 141

Heller Scania 141

When will I learn!

Tuesday, January 4, 2022

Steamy Times!

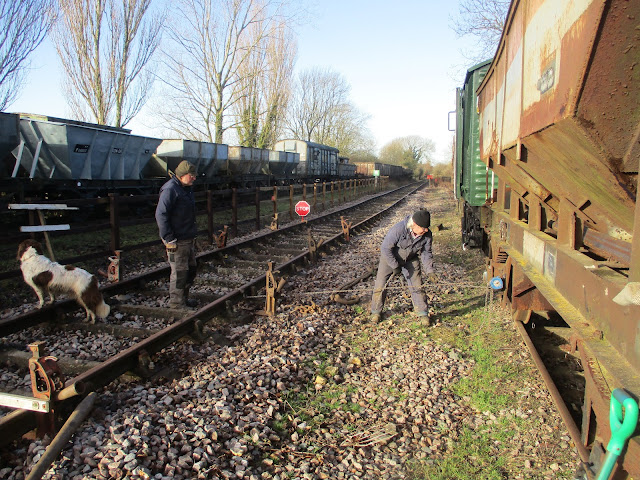
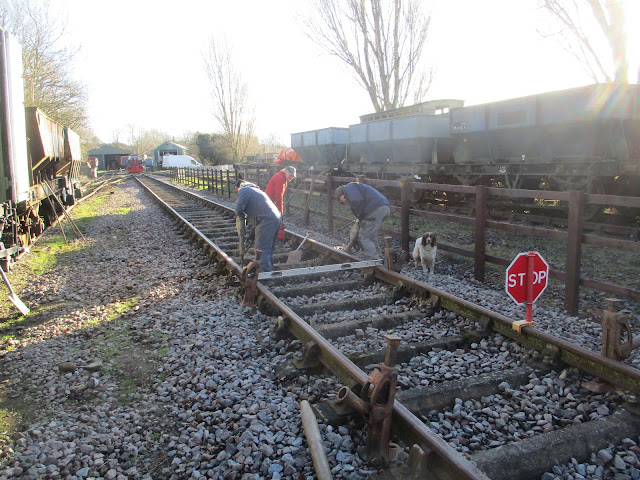
Another day at the Rocks by Rail Museum. The temperature had dropped from about 14 degrees Celsius yesterday to a more chilly 4 degrees today. However the sun was out and further shoveling work kept me warm if not at times steamy! Yes more track leveling and straightening work. There was a slight bend in the track which was straightened by using a block and tackle attached to a conveniently located wagon on the adjacent siding and then using this and pry bars the track was straightened.

Rocks by Rail Museum

After that more shoveling and packing of ballast.

Rocks by Rail Museum

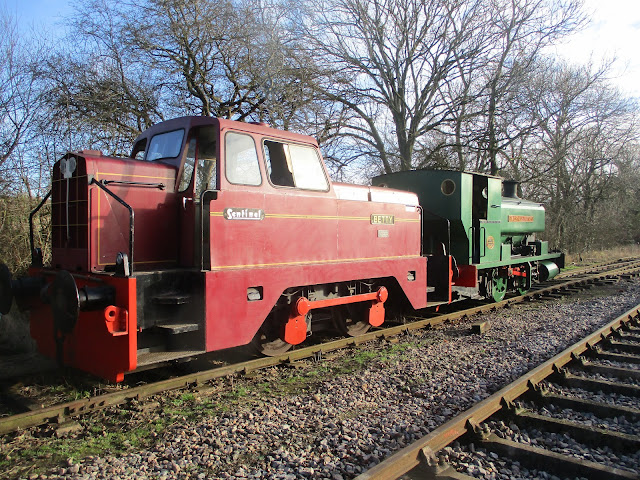
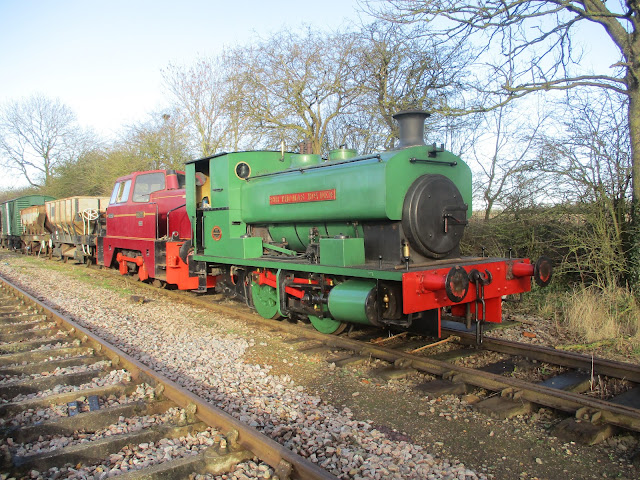
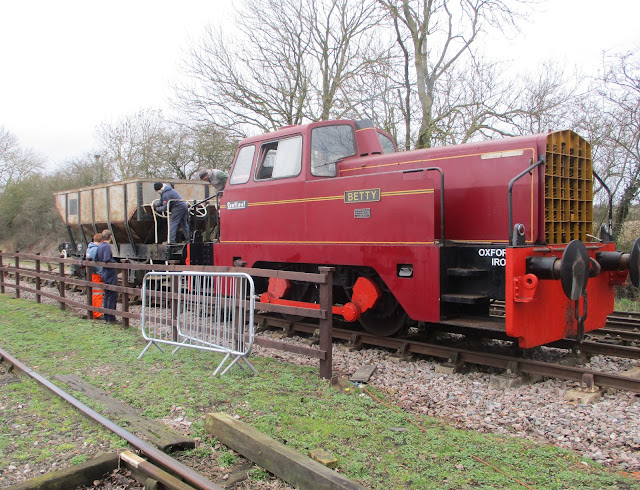
Talking of steamy times, there is a members day soon at the Museum, so one of the Andrew Barclay 0-4-0 steam engines, Sir Thomas Royden, was brought out of the shed by Betty the Sentinel diesel engine to have its water tanks filled ready to be steamed up.

Rocks by Rail Museum

Rocks by Rail Museum

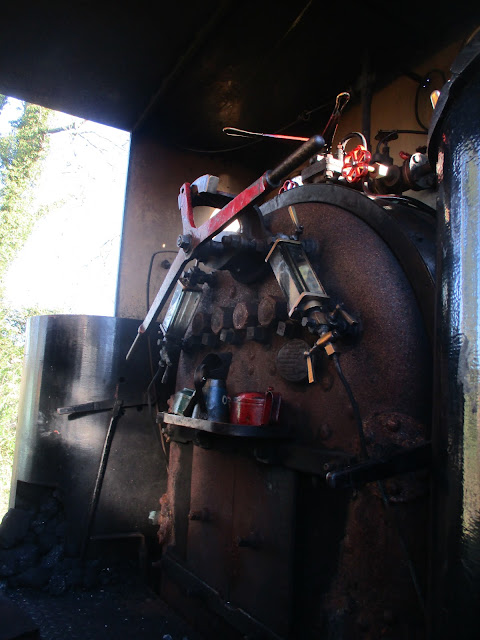
I took the opportunity to look in the cab - every boys dream of a certain age to drive one of these!

Rocks by Rail Museum

Built in Scotland in 1940, it is not that old by steam loco standards.

Rocks by Rail Museum

I will look forward to seeing this loco in steam.

On the model making front I could not resist poking the model water poured yesterday. It was still wet but at least it has stayed in the river and not leaked out - yet! I am amusing myself cutting the infill cobbled areas for the canal wharf area which is a slow and at times frustrating job. However it has to be done so no point in getting steamed up about it!

009 model railway layout


Monday, January 3, 2022

Pour it on!

Pour it on! That us something I would say when the cream comes round at desert time. However in this case it relates to the river on my narrow gauge layout. Having put some more 'greenery' in parts of the river bed and banks to simulate river weed it was time to pour the water or in this case the resin model water - you certainly would not want to drink it. The bottle even has a warning not to drink it but then takeaway coffees warn that the coffee may be hot! A final look around the river bed and banks gave me sufficient confidence that it was time to create water! What can go wrong????

009 gauge layout, Javis - Simulated Countryside Water

The product itself is made by Jarvis and marketed as their Simulated Countryside Water. It comes in a 250mm bottle and the instructions say to pour it in 1mm layers which take 48 to 72 hours to dry. Well the question is going to be how many finger prints will I leave in the surface as my eagerness and curiosity get the better of me? Only time will tell! The water pours but is very thick but should find its own level before it sets. I have been wise enough to seal each end of the river to avoid a recreation of a water fall feature as the resin cascades down either side of the baseboard. Again how successful that will be only time will tell. You may have deduced that I have my concerns and I have to admit apart from a pond on one layout this is the first major water feature that I have modelled. As they say - Never too old to learn! 

The two photos below show that the resin still needs to find its level but then again rivers do not always have a flat calm surface so at the moment I am not too concerned. It also shows that my 'greenery' and river bed appear as I was hoping so I will keep my fingers crossed that it stays that way. I was toying with the idea of adding a fish or two but thought better of it - maybe a shark might have been interesting though! 

I have covered this first pour of the resin with a piece of card to dry to minimise dust settling on the surface but there will be at least one further layer added. Surprisingly I have only used about one third of the bottles contents so far.

009 gauge layout, Javis - Simulated Countryside Water

009 gauge layout, Javis - Simulated Countryside Water

Stay tuned to see if the swear jar gains any contributions over the next few days as I wait for this resin to firstly stay in the river bed and secondly dry without issues.

Sunday, January 2, 2022

A bit of that and a bit of this!

The first real post of the New Year and my thoughts partly look back over what I did last year and what I would like to do. A case of a bit of that and a bit of this! The blog gives me a good reminder of what I did and there was a fair amount achieved including breaking my cycling target of 5200 miles for the year by actually ending up with 5544 miles. Although it is useful to set a few targets I do not rule my life by them but you do need some direction. As the blog serves as a record and reminder of what I did I will also use it as a reminder of what I would like to do. For this year I am going to try to do 

  • the jobs on Mrs. W's ever refreshed list!
  • cycle 5200 miles
  • build at least 12 kits of scale 1/35th or greater from my stash 
  • finish the narrow gauge railway layout  
  • finish laying the track and wiring on my Last Great Project layout and try to get some basic scenery on it
  • complete as many Shelf Queens as I can
  • sort out/tidy/de-junk my man cave AKA The Room of Gloom
  • try to spend one day a week volunteering at the Rocks by Rail Museum
  • finish sorting out my parents affects which although I have not talked about it on this blog has taken up so much of my time last year and is an emotional business. I would like to complete it.
Well I have recorded it and in 363 days time I can see just how much or more possibly little I have achieved of that lot. What ever I end up doing I will try to have fun doing it! On the cycling front I have managed 24 miles so far this year which is not even 0.5% of my desired total however it has been that mild weather wise that I have been riding in shorts. That's the problem when you complete one target and start another - you have to start at the bottom again!

Model making wise a few steps forward with the narrow gauge layout having had a bit of a break over News Year Day with watching old favorites in the James Bond and Indiana Jones series on TV. What is ridiculous is that we watch them on TV and sit through the adverts when we have them advert free on  DVDs! Note to self - think about this!

The bridge abutments have been added and the acrylic varnish used to seal around them so that when I pour resin to model the water in the river, the resin itself will hopefully stay in the river and not flood what's under the layout. In addition the river bed has had some greenery added to represent the type of weed and plant life you would find in a river of this sort. I am no expert so the whole thing is random and probably breaks all known laws of biology but is anyone going to look that closely? It will probably need a few further applications but slowly does it - there are another 363 days to this year yet!

009 gauge layout


009 gauge layout

I did also find a bit of time to do a bit more painting on the two sheds for the narrow gauge layout which now have doors and framework in a contrasting shade of blue. The internal face of the two open doors also got another coat of paint and hinges and locks have been picked out in black paint. Meanwhile the crates and barrels got a wash of dilute black paint to highlight the plank detail. The drums have also been painted in that contrasting blue shade that the sheds were painted in - something to do with sqeezing too much paint out and needing a use for it!

009 gauge layout

Hopefully over the next few days the sheds will get fully finished and the river may even get its water! 

Saturday, January 1, 2022

Happy New Year!

Happy New Year!

 Hope that 2022 is good for you!

Stay safe, build models!


Friday, December 31, 2021

One door closes another door opens!

As the door of 2021 closes and the door to 2022 opens there is a similar situation with the two sheds for my narrow gauge railway. As I said a few posts back, one shed will have its doors open. Unfortunately the kit doors do not include the internal detail of the doors or the floor. The floor has already been made and described a couple of posts ago so the next job on the non-Mrs. Wood list of jobs was to make some internal detail on the doors.

The external detail on the doors.

009 gauge layout,Wills SS12 Station Garage Kit,

The undetailed and blank back of the doors - a bit like me - featureless!

009 gauge layout,Wills SS12 Station Garage Kit,

After scribing some plank detail with the back of a scalpel blade and assisted by a straight edge the internal framework of the doors was added from an off cut of plastic sheet lying on the work bench - sometimes its useful to be untidy!

009 gauge layout,Wills SS12 Station Garage Kit,

I have also added the roof sheets and the window frames to the sheds and although not finished yet they are taking shape. The doors still need another coat of paint on the internal side which will probably get done sooner than the door that is still on Mrs. Woody's list of jobs for me! Just don't tell her!

009 gauge layout,Wills SS12 Station Garage Kit,

I have also airbrushed the various crates and barrels in  wood shade - the drums will wait until I decide on their colour. A bit of weathering will tone the brightness of them.

009 gauge layout,Wills SS12 Station Garage Kit,

With regard to watery matters, I have given the wharf walls and the bridge abutments a gentle misting of green paint where the water line will be. If you look at any structure surrounded by water for a while there is a layer of green slime (no doubt there is a biological definition but slime is about my limit on the science front!) that builds up. It is subtle, but hopefully will have a visual impact.

009 gauge layout,Wills SS12 Station Garage Kit,

Well that is another year of modelling done! Hope you see the New Year in, in the manner which you want to and hopefully this blog and me - oh and nearly forgot (how could I) Mrs. W - will be here in 2022 for more adventures from WMD HQ!

Thursday, December 30, 2021

Doing the laundry!

Well it feels like he laundry! Another day at the Rocks by Rail Museum with a barmy 14 degrees Celsius at the end of December! First we dig the ballast out, then we wash it and then we put it back just like you put the laundry away after washing!  Each stage involves shoveling and that is where my shovel skills appear to come in handy. Its back breaking work but with a great crew, some interesting chat and a few jokes it soon gets done.

The ballast is transported after washing in the Trout ballast wagon. This has discharge chutes either side and in the middle. The three white wheels on the end of the wagon each control one of the chutes although on this wagon the middle one doesn't work which is a pity as that is where the ballast is needed! However some muscle power sees the piles either side of the track spread in the middle to give a nice even spread of ballast.  

Ballast arrives....

Rocks by Rail Museum

Discharge chute on the wagon is opened with the control wheel..

Rocks by Rail Museum

Ballast is discharged....

Rocks by Rail Museum

Eager crew wait to spread the ballast....

Rocks by Rail Museum

Several hours of shoveling and several tons of ballast later we have some neat looking track!

Rocks by Rail Museum

Only another mile or so to go! That should make 2022 interesting!

Wednesday, December 29, 2021

A tale of two sheds!

Over the past few days and defying my normal one or two days of frenzied activity and then nothing for weeks, I have made further progress on the narrow gauge layout - must really think of a name for it! 

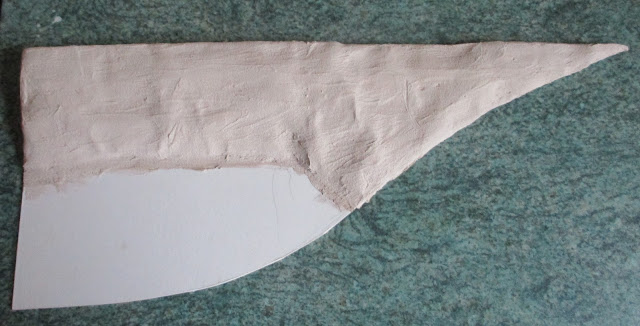
The hillside that I started constructing a few days ago and left in the kitchen has dried undetected by Mrs. W and as you can see has dried to a light earth shade - lovely!

009 narrow gauge layout

As shown in a post a few days ago this hillside will be at the side of the canal wharf. Between the hill and the wharf there are two sheds which are supposed to represent a small traders storage sheds. The sheds themselves come from the Wills SS12 Station Garage Kit but can be built differently to that supposed and instructed in the kit giving two shed like structures. Another case of the male of the species not following instructions! However in this case it does work!

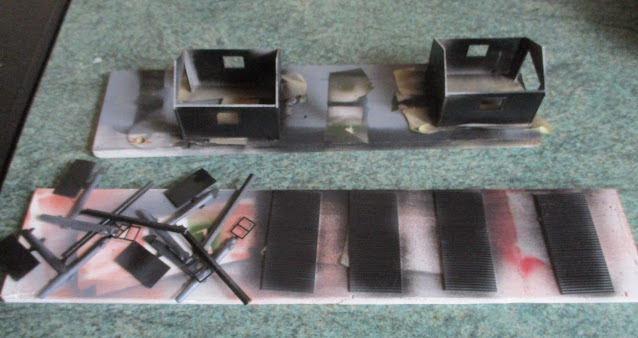
I had already constructed the walls of the shed back in the summer when I wanted to get a feel for where various buildings would go on the layout. The kit is moulded in a white plastic and as I have previously highlighted in this blog white attracts the eye. Whilst I had plans to paint the sheds a blue I did airbrush all the parts, including the inside of the sheds, with Vallejo's black surface primer. As a hint, when I have a large number of parts that need to be airbrushed I tend to get a piece of plywood or cardboard to fasten them onto to be painted. You can use Blutack or what ever your chosen poster temporary adhesive is to fasten the parts to the board or you can use masking tape. if you turn the sticky side up and fold the two ends over on themselves before fastening the ends to the board you are left with a strip of stick masking tape to which you can fasten the parts that need to be painted. 
009 narrow gauge layout, Wills SS12 Station Garage Kit

The photo below probably shows the masking tape in a better light. The various drums, barrels and crates are for the layout eventually but as I had some primer left in the airbrush it seemed a good idea to prime these up.

009 narrow gauge layout,

I do plan to have a door open on one of the sheds so a wooden floor was required. There is nothing better to represent wood in model form then wood itself. A small piece of balsa sheet was cut to size and then planks forming the floor were scribed into the balsa wood using a straight edge and the back of a scalpel blade. Using the blunt back of the scalpel means you don't have much risk of cutting right the way through the wood and it gives a nice visible groove in the wood.


009 narrow gauge layout,

009 narrow gauge layout,

In its basic form the wood was far too clean so a coat of my favorite diluted back paint was washed over it highlighting the groves and giving a nice weathered and worn appearance. Once dry it can go into the shed.

009 narrow gauge layout,

I also started on the cobbled surface which will cover the wharf area and into which the rail tracks will be inlaid. I found, in the WMD HQ stock pile of things bought long ago and which may come in handy one day a couple of sheets of vacuum formed plastic cobbles which should do the job.


009 narrow gauge layout,

A bit of cutting has the first piece fastened in front of the two sheds.

009 narrow gauge layout, Wills SS12 Station Garage Kit

If I can manage to keep the momentum up hopefully the whole scene will come to life in a few days. However I understand Mrs. W does have a new list of jobs for me for 2022! Gulp!

V2!

Not the nasty war time V2 rocket but a much more pleasant LNER class V2 locomotive. My other Christmas present was this beautiful Bachmann LNER V2 with DCC sound chip. It is a truly stunning model and initial running shows that it runs and sounds as good as it looks. If you want to find out about these locomotives you can go here where Wikipedia will inform you better than I can!