Any railway needs firm foundations for their track and the ballast provides a lot of that. The stones that usually form the ballast are angular and when compacted lock together holding the sleepers and rail allowing the trains to pass over without deflection that could derail them. Ballast also provides drainage preventing water ponding and soaking into wooden sleepers and rotting them. Modern concrete and steel sleepers still need drainage even though they are less susceptible to deterioration from water than wood is.
In model form ballast can take many forms. Usually crushed granite ballast is used or one of the other custom products from manufactures such as Woodland Scenics. You can even get underlay sheets such as those made by Hornby and Peco. Here at WMD and being tight fisted sand is the choice of ballast for this 009 gauge railway. Not ordinary sand but kiln dried sand. It is about the right scale for ballast in 4mm scale and it is cheap! What's more WMD HQ stores has a large bag in stock bought many years ago for about £3.
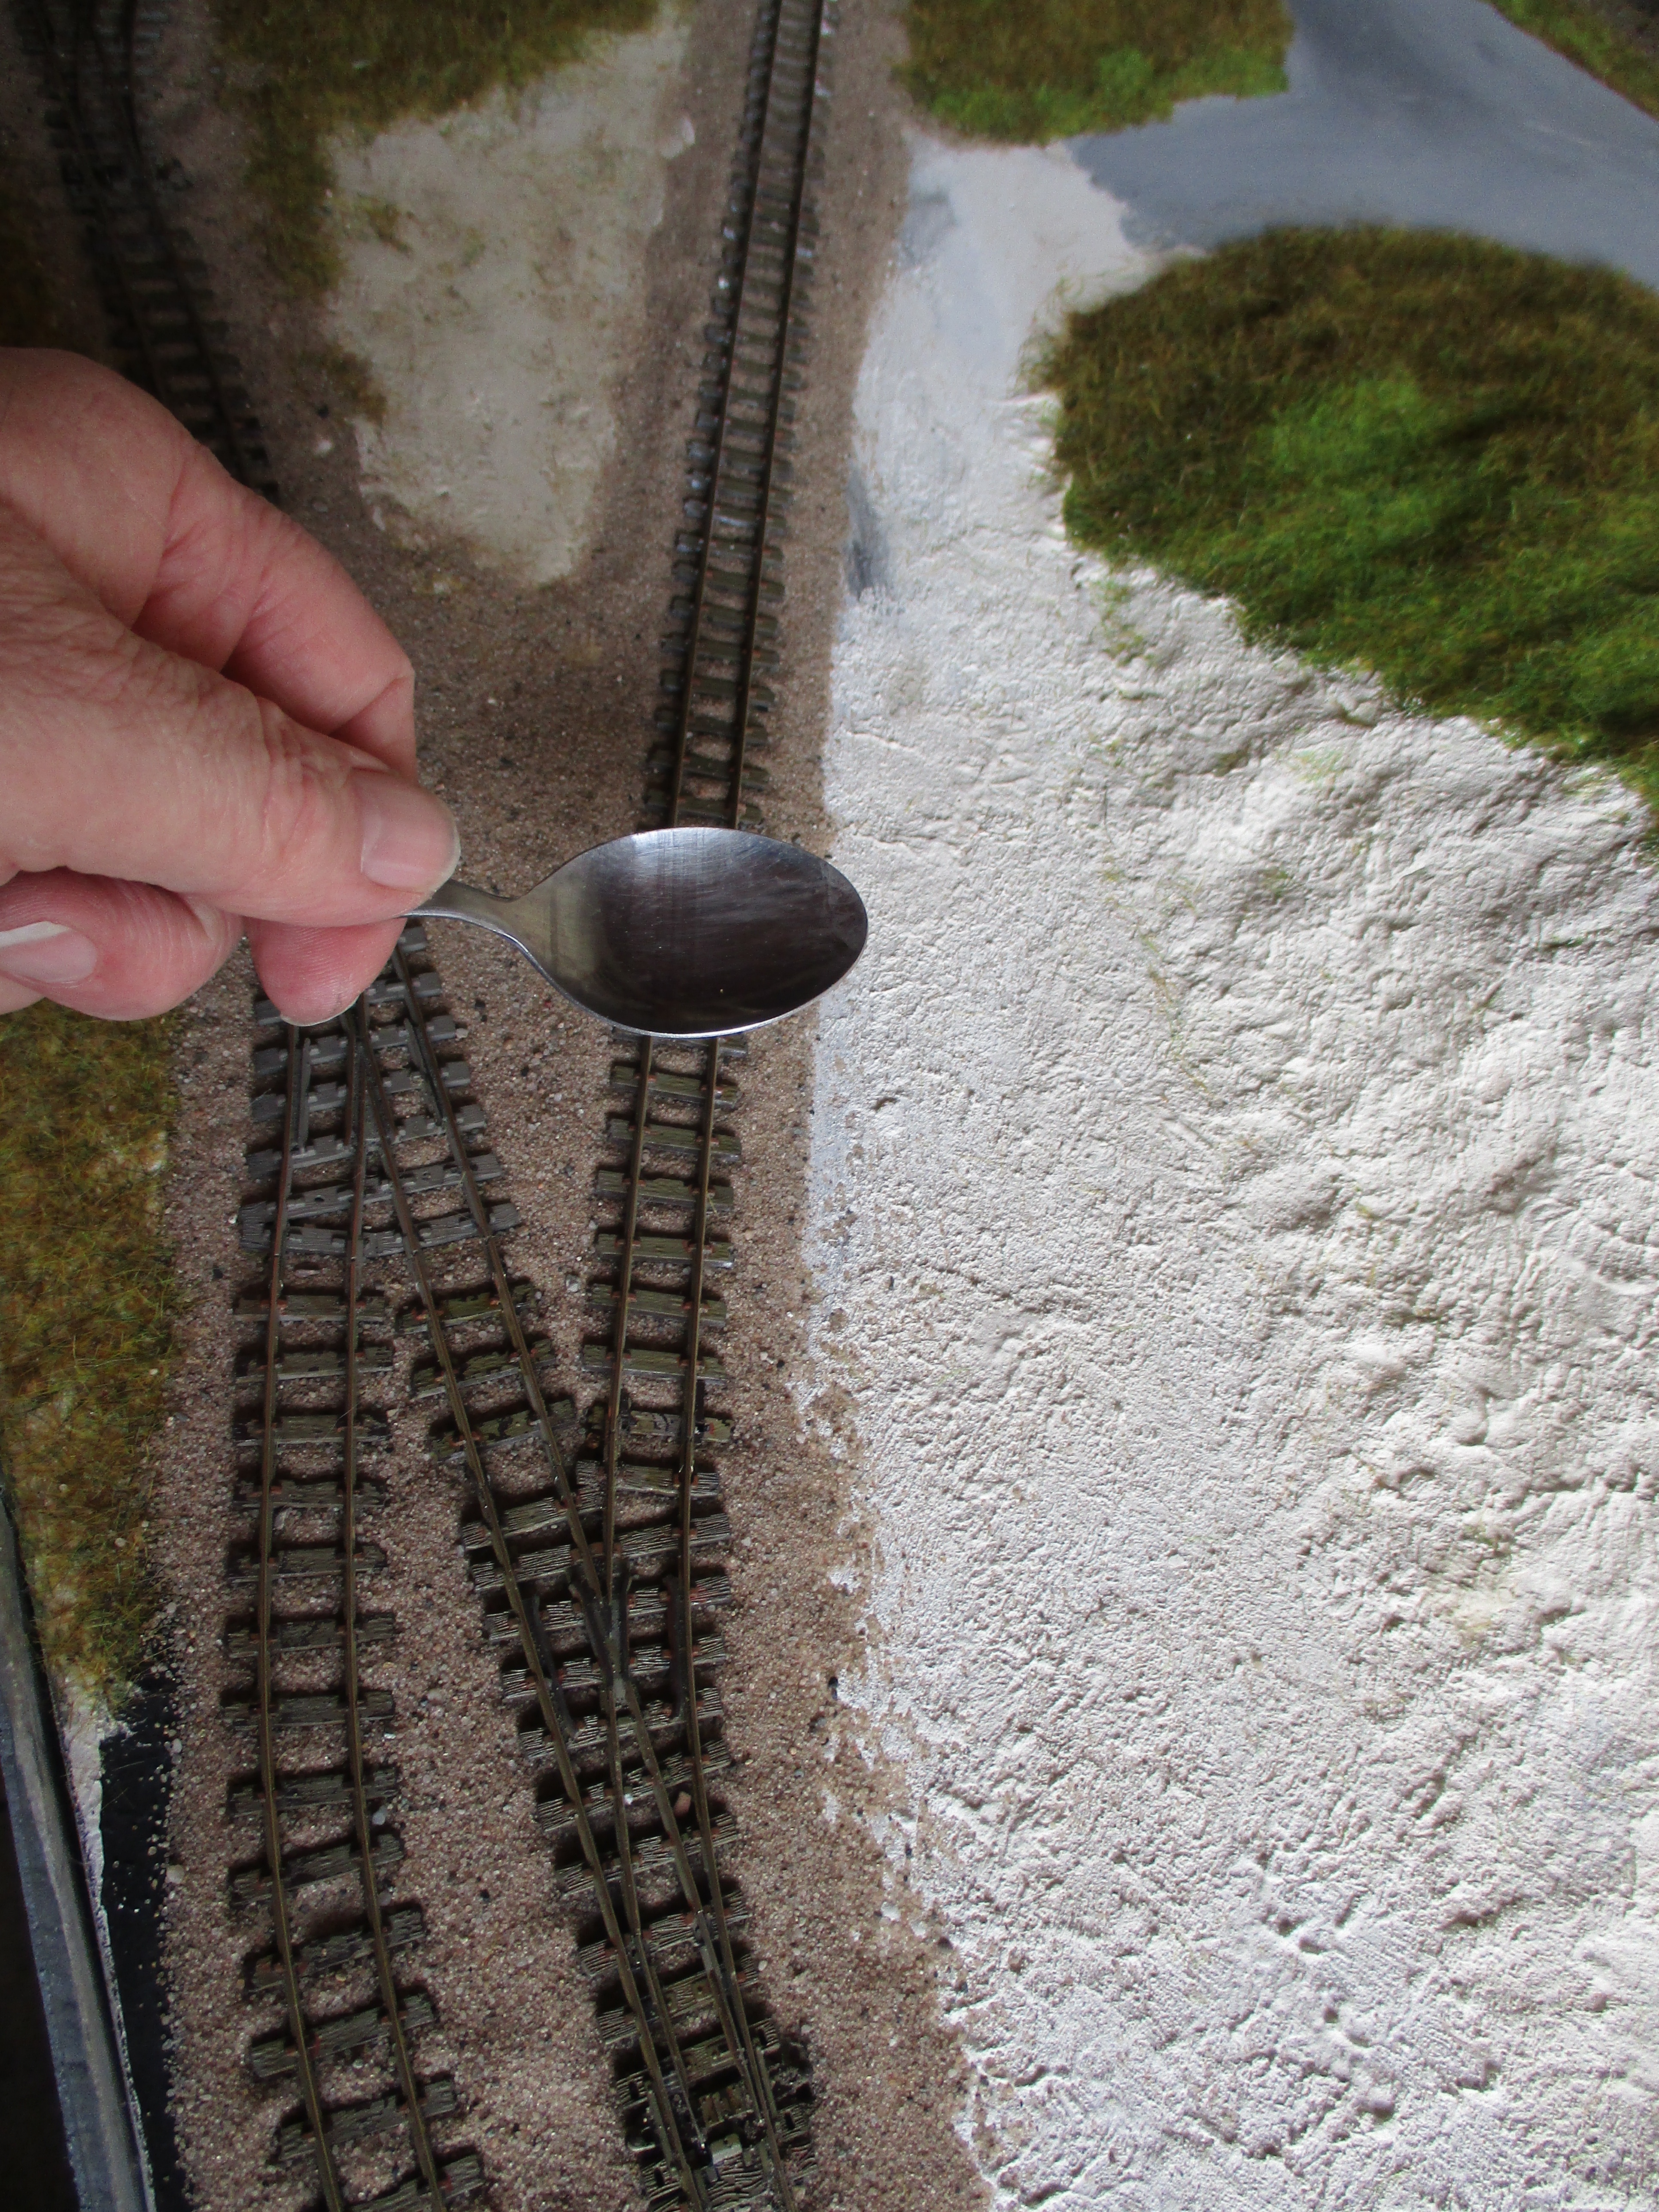
So the material for the ballast is chosen. What happens next? Well before ballasting I should say that before laying the track I did weather it with a spray brush and picked out the spikes holding the rail to the sleepers with a rust colour so that was one job already done! Talk to many people about ballasting and they talk of problems with points. You do have to be careful but my dodge to try to minimise issues is to apply petroleum jelly to the moving parts. That way any glue used to fasten the ballast is unlikely to glue the point up and any stray ballast is therefore also unlikely to end up glued solid to the moving parts. Have a look at the phots below.


Applying the sand was done with a tea spoon (note to self; do not admit to Mrs. Woody use of kitchen utensils!) and a small soft flat brush was used to brush the sand into place. A handy tip is that when you have the ballast roughly as you want it use the spoon to tap the track or baseboard to in effect 'vibrate' the sand off the sleeper tops and into where it should be.

Once happy with the placing of the ballast it was time to fasten it down. The long used mix of diluted PVA glue with a few drops of washing up liquid was mixed ala James Bond style (shaken but not stirred) by putting the ingredients in a jam jar, remembering to securely put the lid on and shaking for a few minutes. The drops of washing up liquid will cause a froth but the main liquid is what is needed. Using an old syringe, (having cats means that you do end up with syringes from the vets to administer various lotions and potions) the glue mix was syringed onto the ballast. It looked a right mess as the pictures show, but as with any process where you have to let things dry, it takes on a whole different look once the glue sets.


Without admitting to Mrs Woody, the glue was given an encouragement to dry from her hairdrier!

Once the glue was set the track looked like this.

I think it looks good but then I would! With a bit of cleaning trains were soon testing their newly ballasted track.
No comments:
Post a Comment