Search this blog

Showing posts with label cat. Show all posts

Monday, August 22, 2022

Stay calm!

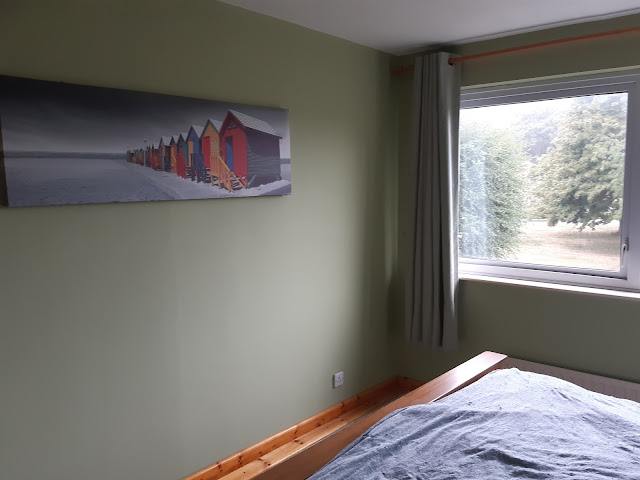
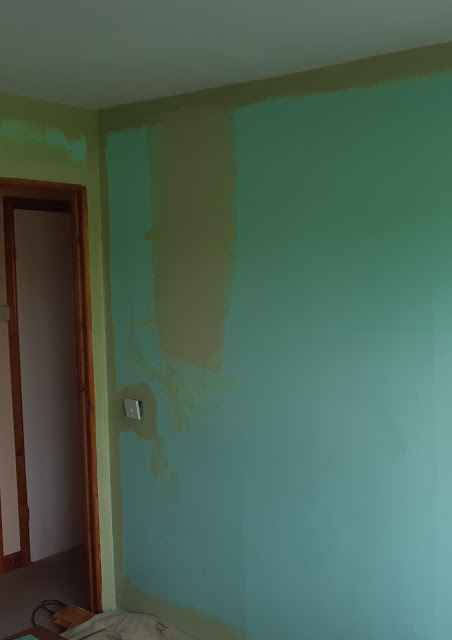
We all have a moment when we think what have we done and a sort of panic sets in. I must admit that was my reaction yesterday evening when I started painting the walls in the bedroom with what Mrs. Woody and myself had chosen from the vast range of possible colours that can be mixed at our local DIY emporium. What was supposed to be Soothing Sage looked more like swamp mud as I painted around the edges. I had visions of having to go back and choose a different colour and in effect scraping £40 worth of paint - oh the pain in my wallet! However, I stayed calm and waited for it to dry as that surly would brng out the real Soothing Sage. It dried and still looked like swamp mud. So I left it for this morning hoping that things would change in the natural light of day. It didn't. The photo below perhaps doesn't show just how brown this paint was looking but believe me it was.

Fitted wardrobe

However I continued to stay calm and decided to paint the whole wall just in case my colour awareness was being hindered by the peppermint coloured original paint. Luckily it came out well. With the peppermint covered and the walls fully covered in Soothing Sage I was, well, soothed. Probably not as soothed as these two having a kip in the cat conservatory but I certainly was calm.

Cats

With a full days work the walls are all painted. The ceiling was painted yesterday so all that remains is to paint the window sill, radiator and door and refit some skirting boards that needs shortening to fit where the wardrobe is fitted.

Fitted wardrobe

Mrs. W has suggested that the side of the wardrobe could be used as a chalk board for the list of her jobs for me to do. I remain silent on the matter!

Fitted wardrobe

Fitted wardrobe

All in all I am pleased that what looked early on to be turning into a mud swamp has indeed turned into a soothing place. One thing though I am not calm or  soothed about is the fact that there is an awful lot of empty space in that wardrobe at the moment. Even as I write this, I can see Mrs. W pursuing the internet and its retail outlets!!!! Stay calm Woody!

Sunday, August 15, 2021

RIP Sammy cat.


There are some days which are not so good. Saturday was one of those days. Sammy cat, who has featured in previous posts, was diagnosed back in October 2020 with a mass growth in his mouth. He was given a few weeks to live. He defied all odds and without pain or suffering as far as we can tell survived for nearly 10 months. On Friday he was fine in the morning and demolished his breakfast. By lunchtime he had hidden himself away and by the evening Mrs. Woody and myself knew we had to make a decision and that was to be kind before he really began to suffer.

We don't know much about Sammy's early life as like most of our fleet of cats he was a rescue cat. He had a fantastic personality and a call which sounded like he was saying Hello. He used to do that a lot when he carried a catnip sock in his mouth. We buried him, with all our other departed cats, under our apple tree with that sock. He also had a habit of jumping in the empty bath tub when I was cleaning my teeth. I had to turn the cold tap on and he would go to the other end of the bath and start digging! 

In his latter years he became very friendly and despite what some people may find horrifying, it was not unusual for him to go to sleep in the middle of the bed. He did take up some room and had a rumbling purr that resounded through the mattress but was that comforting throb that sent you to sleep. He often beat the alarm clock and had a persuasive way of getting you up to get his breakfast. 
When I say he had 'clicky' ears other cat owners will know what I mean. Cats love their ears being stroked and generally rubbed. Sammy's ears 'clicked' when you did that.

He will be sadly missed by both Mrs Woody and me. Unfortunately we have lost a cat a year for the past three years so I am hoping that for at least a few years we may stay lucky with our remaining fleet. However, as with all such matters, the sun went down yesterday and rose this morning and the World continues but just a little bit differently for Mrs. Woody, me and Sammy's cat friends.


Tuesday, July 20, 2021

Cats and chassis


Cats and chassis. What have they got in common apart from both beginning with the letter C? Nothing! However as I was doing some work on the chassis of the Zvezda K5350 Mustang truck I saw Chloe the cat finding some shade and relaxing just as cats do in the garden during the heatwave that the UK is going through at the moment. Not a care in the World! Sometimes you wonder if animals actually have the right idea!

Back in the heat of the Room of Gloom at WMD HQ work on the chassis continues with me now up to Section 24. I did come across the one area where the parts fit was not to the usual standard on this kit and that is where the exhaust pipes join as highlighted by the red ovals in the picture below. It is just a butt joint with no locating pin. However with a bit of use of  glue and prodding with tweezers a joint that can be cleaned up once the joint has set hard has been established. A little acrylic putty is probably going to be needed to fully disguise my ham-fisted jointing but it should work out. 


In spite of this I am still overly impressed with the kit. The axles should end up going on today having been built up yesterday and with a few other items that should bring the chassis to the built up stage. Looking ahead in the plans, the body is next which will mean dealing with much larger pieces so my eyes will get a rest!


Musical entertainment was provided by a double compilation tape that I bought in 1986. As the price tag shows £6.99 it cost which back then was getting on for about 10% of my weekly take home pay then, but hey, it has some classic tracks! I can remember buying this when I went to the petrol station to fuel up - the fuel only cost £12 for a tank full! Oh those were the days!


Friday, July 16, 2021

Small and Beautiful!


The picture above illustrates the size of many of the parts I am dealing with - they still need cleaning up with the removal of the plastic from where the parts were located on the sprue. You have to admire the guys who developed this kit and that is something we model makers sometimes forget. We admire completed models and praise the builders for their skills and abilities but usually forget that there was an immense amount of skill and ability put in by people into developing, making the patterns and sorting plans out for the actual kit itself. I am still very impressed by this kit so for those at Zvezda I respect you and thank you! Please note the £1 coin is this week's pocket money from Mrs W. Just enough for a small ice cream!

Progress has continued with the chassis so I am now up to Section 21 on the plans. Its beginning to look like a truck - well in my eyes anyway! We will see how progress goes with the impending heatwave coming this weekend in the UK. It could be ice creams all round here at WMD HQ! Well a small one maybe!

Music for the latest build was provided by that great band Level 42 with their album Running in the Family and then to a compilation album from the 80s Our Friends Electric. Strange how you forget about certain songs which were big at the time and the memories that they bring back when you hear them again for the first time in years - oh happy days! 


Saturday, March 20, 2021

MiniArt T80 Russian Light Tank - The build begins

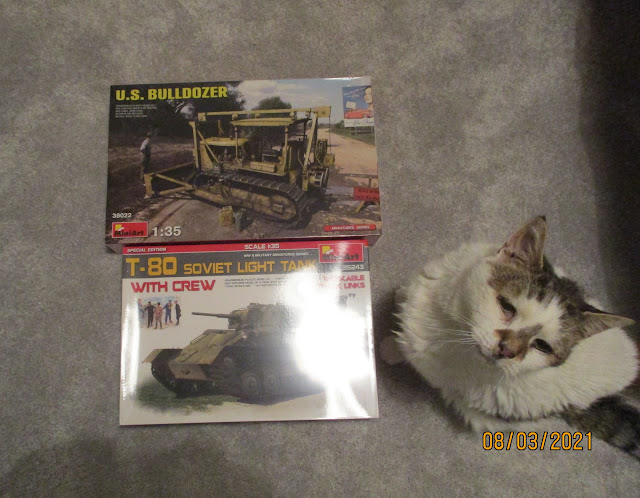
 I do not know a great deal about MiniArt but they are a model kit manufacturer who are producing new models almost on a weekly basis. They have a good reputation, from what I have read, in making accurate and highly detailed kits. On the basis of this and a good price on two kits I purchased the USA Bulldozer and the T80 Light Tank - not to be confused with the current T80 Main Battle Tank. You may recall the last time the kit was seen in this blog, Sammy the cat was eyeing up the boxes as a potential food container.


Having eventually managed to distract him and some of his fellow feline friends that live at WMD HQ by putting actual food in their bowls, it was time to open the box and have a look at what was actually in it.


First impressions were that the box was certainly well made and if it actually contained cat food would most probably resist feline attack to get into it for some time. It was also nice to see the sprues bagged which means if any components have come loose they are safely contained in the bag I recall in my earlier days of modelling Airfix kits where you opened a somewhat flimsy box to find many of the parts loose and making a dash for the carpet as you struggled to keep the box upright and in one piece. Taking the contents out this is what you get plus an instruction sheet which is not shown.


The molding quality is certainly good. I can not comment on accuracy as I am no expert in Russian WW2 tanks and there are better people out there in the World of Internet Forums who will no doubt highlight their thoughts and observations on that matter if you want to search them out. Here at WMD HQ, the general rule is if it looks right it must be right! This kit looks like the photos I have seen on the internet so that's good enough for me. Anyway, by the time I throw some weathering at it no one will be able to tell if the bolt holding the shovel on is the correct shape or not.

I was keen to see whether the quality molding translated into a pleasant build. The last thing you need is a kit that fights you - modelling is supposed to be relaxing after all. The first thing that you find out once you start building this kit is that the sprues have no part numbers next to the components. This means that you have to cross reference to the sprue diagram in the instructions each time you need to identify a part. Given that there are also a number of parts that are not used in this kit, the whole process of going backwards and forwards in the instructions as you build the kit becomes a bit tiring and something that you could do without. However that is just my experience and view.

Moving onto the kit itself, there is a basic hull and turret complete including some of the etched parts. There are some etched locker fasteners on that etch which I cannot see clearly even under a magnifier so those wont' be used. Luckily the plastic molding for the locker does have the fastener molded on so that will do me. As this kit is based upon an existing kit for a similar variant of the tank you do have to make a few alterations including cutting a large hole in the hull roof and taking the side out of a louvre. Anyway here are a few photos of what I have done so far which may explain matters beter than my words.


The brass etch louvres for the engine are fitted in the hole you have to make in the hull. I had to add some plastic strip to the inside of the hull to provide a mounting point for the louvres. There is a etched grill to go over the top which still needs to be made up. I really need to get some paint on that shiny brass before putting the grill over otherwise it could end up shining through the grill.


At the moment I am struggling to make the workable track links. More on that another time but they are not playing ball!
  

Thursday, March 11, 2021

'Jab Done' and a good few days!

 A welcome trip away from WMD HQ on Monday as being of a certain age I got my Covid jab. A very slick operation by all concerned at the jab centre and my heartfelt thanks to them all.

Monday also saw the arrival of some post in the form of two MiniArt kits. I broke my New Years Resolution of no more kits but couldn't resist when an email popped up from Jadlem Models with the US bulldozer and a perusal of their site for some 1/35 Russian tankers to go with my recently finished T34 found me looking at paying about £13 or buying the T-80 light tank kit with a crew kit for £22. It was a no brainer! In effect the 1/35 MiniArt tank kit for £12! As a satisfied customer only, I will say it was good service from Jadlem - well packed and arrived in three days and no postage charge. Upon arrival at WND HQ unpacking was soon undertaken with the help of Sammy the cat who probably thought his food was in there somewhere!


Never built a MiniArt kit before but it has been started and I will update on progress and thoughts another time.

I have made progress with the narrow gauge 009 model railway. Most of the posts so far about this have been about various aspects such as baseboards, ballasting, landscaping and other such things. Today has seen a lot of progress on the scenics. Although some work has already been done a lot came together over the past few days. So here are some pictures that give a bit more of an insight into the layout. You can get a larger picture by clicking on them if you want to see more detail.

First off from the drone an aerial view showing the whole thing.


View looking down the road with a scratch built field gate, hedge and post and wire fence now installed.

Coming under the bridge the Baldwin hauling a goods train.


A bit further round the curve the crewless Baldwin (must sort that out as it looks most odd!) heads towards the quarry.


Passing the quarry the start of the loading facilities can be seen - again scratch built.


A closer look at the loading facilities and the grounded van store. All need a lot more work but gives a sense of what it will be like. I was aiming for something that if you watch Gold Rush you would think Tony Beets had constructed!


The train crosses the level crossing to head back up the cutting to continue its round and round journey!


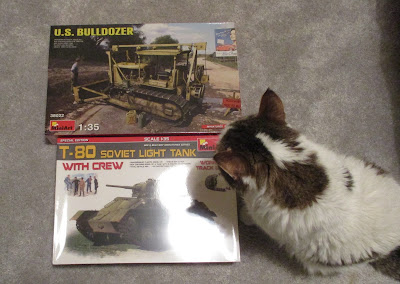
I'll give a little more detail about some of the scenics and the structures in a later post but in the meantime I better feed that cat who looks as though he is about to open the boxes thinking his dinner is inside!


Wednesday, January 20, 2021

Windy Wednesday

With here in the UK being battered by Storm Christoph I though it appropriate to post a wind related item - nothing to do with my diet but it is about the Dapol windmill! As mentioned in a previous post a Shelf Queen of some years standing which is now actually finished! I started with this.

Once primed, grays and white were sprayed t start to bring some life to the model.


The sails and wooden main structure were sprayed white and whilst the roof to the brick base building was sprayed grey. The bricks are not actually painted on this model. A trick I picked up from Phil Parker, he of British Railway Modelling and Garden Railways magazines fame showed this on his blog (well worth looking at Phils Workshop ), was to use coloured pencils! When I first heard what he was about to do I thought that it stood no chance of working but it does. The trick is to have several brown, orange and red coloured pencils and use them randomly to rub across the brick work of the model. Because the mortar lines of the bricks are recessed in the model , the pencils just colour the bricks leaving a great finish. If you doubt it try it!


A bit of weathering took place with some black dilute paint and earthy type weathering powers toning that pristine white finish back to a more life like battered one. The doors and windows were painted pale green and whilst the green was on the brush a bit was added to a few spots around the base to give that moss/algae look that old brick work gets when damp.  The finished item I think looks good and to say that the moulds from which this kit are made are over 60 years old they still have great detail There is even a horse shoe on one of the doors! 


As the two wires hint, I have motorised this kit and just to prove it works.....


If you have the volume you will probably hear a clunk on each revolution where one of the sails was hitting the base - soon sorted with a slight bend. You may also hear a cat in the background who wanted his dinner and had no understanding of the Spielberg moment going on!


If you are interested the kit is actually based upon a real windmill at Rolvenden in Kent - Picture here. 

Right , I better go see if I have a garden fence left after this Windy Wednesday!