Search this blog

Sunday, March 6, 2022

Moving on!

The Scania 143H caught up on some of what I failed to do to it yesterday so it is moving on. 

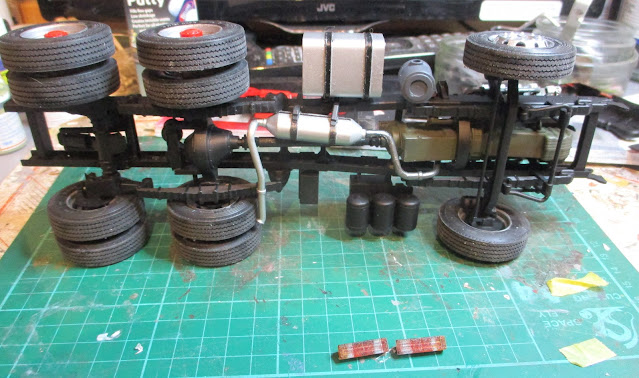
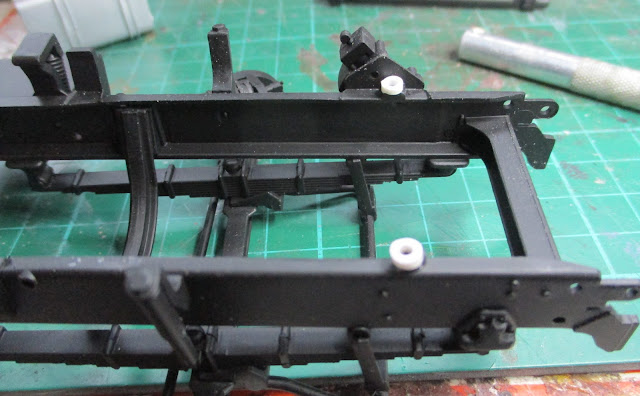
The exhaust and air intake are connected to the engine. The exhaust is never going to satisfy me but that is one of those things I will have to live with and probably will never be seen again once the kit is finished! The wheels are on as well and the fuel tank has also be glued in place - good job it is not real and needing filling with diesel with current prices! The mud guards are next and I have painted the rear light lenses and put them in the light case that then need to be fastened to the rear mudguards. I still have concerns about the fit of the cab on the chassis as I had to raise the engine slightly in the chassis to get it to fit and this may cause problems but I will have to wait to see if that is an issue! In the meantime the chassis looks like this. 

Italeri Scania Streamline 143H

Italeri Scania Streamline 143H


Saturday, March 5, 2022

Exhausted!

Exhausted s ow I feel today. Not because I am tired but because I have spent several hours dealing with the exhaust system on the Scania 143H model truck. I had high hopes of finishing the chassis today but that went out of the window! 

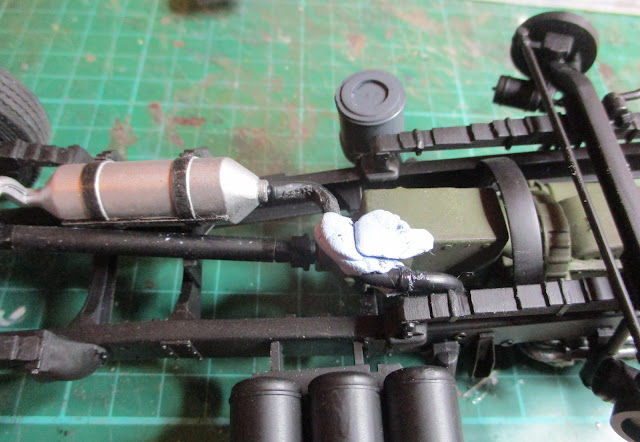
Italeri have issued this kit using the existing cab moulding from a kit that used a 4 x 2 chassis and mounted it on a chassis from a kit for a bonneted Scania on a 6 x 2 chassis. The result was that to make it look right Italeri requires the builder to shorten the chassis so that the truck looks right. Whilst they make reference to shortening the chassis rails, the side skirts and the prop-shaft, they make no reference to the exhaust system other them saying you have to make sure you drill holes in the chassis rail. Putting the kit supplied exhaust together results in a system that can not be installed because it ends up in the area occupied by the rear axles. The only thing that you can do, and this took me some time to ponder, is to mount the exhaust silencer as far back on the chassis as possible and then cut and shut the exhaust pipe  to it from the engine into four parts and glue something together from those that fits. I eventually got there and the pipe is held in position with Blu Tack whilst the glue hardens. I am not even going to bother looking what Scania actually do as it won't be what I have done but given the parts in the kit that is all I could do. Luckily much of this is hidden from the view topside of the model. Hopefully the exhaust can now be finished allowing the rest of the chassis to be completed!

Italeri Scania Streamline 143H


Friday, March 4, 2022

Holding stock!

We have heard a lot over the past few months about the pressures on industry and commerce by a break down for varied reasons of the Just In Time System (JIT) of production and commerce. Basically the idea is that you don't hold stocks of materials or products to minimise the amount of money tied up in holding stock and the facilities to store them. Instead you order when you require it and the materials and products appear through a streamlined delivery system that delivers just as you need the item. That is the theory and to be fair nowadays until recently it has worked well. However I can remember when a Company I worked for introduced the JIT system of working back in the late 80s. It soon became known as the TFL system by the staff - the first word is Too the third is Late and I will let you work out the middle one!

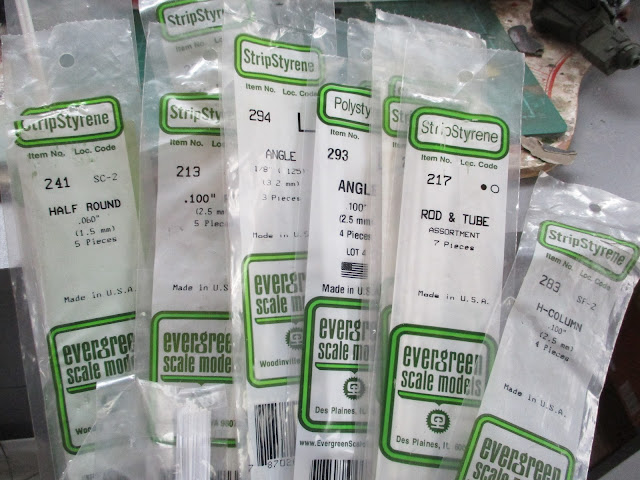
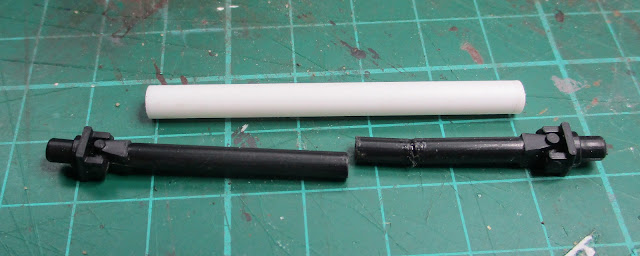
Here at WMD HQ, possibly tainted by those early experiences of JIT, I do keep stocks of materials which will be useful one day. Mrs. Woody just refers to it as junk. However my prudence pays off on occasions such as today. I started to install the engine for the Scania 143H and I need to put the prop-shaft in as part of that process. As with other parts of this kit there is a need to shorten the kit part. I did try doing this by cutting the appropriate amount out of the part but to be honest the parts did not glue back together well and I could see broken parts at some stage. I decided that I would just cut off the universal joints that enter the gear box and rear axle and then join them with a new piece of plastic tube. Now where would I get some tube from? The WMD stock holding - that is where!

Italeri Scania Streamline 143H

This is just some of the junk  stock that I have and yes there was a suitable piece of tube which was soon cut to size and then the part painted.

Italeri Scania Streamline 143H

Italeri Scania Streamline 143H

Italeri Scania Streamline 143H

The tube may be slightly larger in diameter than the original part but once painted it looks OK.

Trial fitting the engine I found that the front engine mounts on the chassis and engine block did not come into contact with each other. Despite filing down part of the exhaust manifold that was part of the issue the parts still had a gap between them. Back to the stock holding and a smaller diameter tube provided a suitable solution by filling the gap. Here the two slices of tube have been glued to the chassis and once the glue has hardened they can be painted and the engine mounted. Hopefully such a small alteration will not have adverse impacts on the cab fit - fingers crossed and swear jar at the ready!

Italeri Scania Streamline 143H


Thursday, March 3, 2022

Bits and pieces!

Bits and pieces - not the Dave Clark Five hit from the 60s but more bits and pieces of the Scania 143H truck model. 

This build, along with the Scania 141LB, is dragging out a bit and perhaps with a bit more planning in the builds they might have progressed a little more quickly. However I don't do planning well so it is what it is! 

Today saw the mirrors constructed and painted along with a few other parts. In addition I have gloss coated the mud guards and side skirts to protect the recently applied decals. I also had to repaint part of the front cab panel as some static grass had found its way onto the original applied paint. A hazard of having a messy work place but then again that is how I work! They are all hardening off in the Man Cave so will be ready to be united with the main build over the next day or so.

Italeri Scania Streamline 143H


Wednesday, March 2, 2022

One of those days!

A wet, cold and miserable day when I just could not get going with anything! We all have them and my day didn't even see me get out on my bike - the first time this year. Still I have managed 787 miles this year with 776 up to February so I guess I cannot grumble!

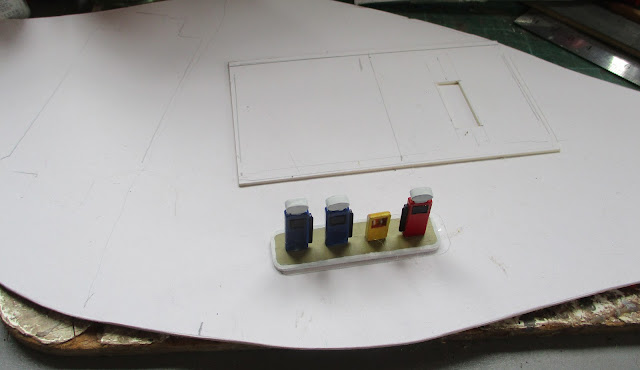
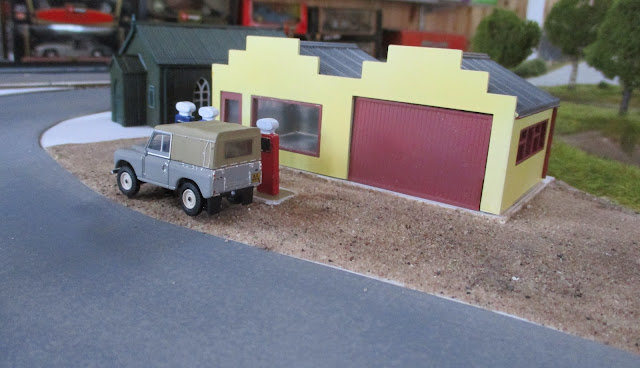
I did manage to do a bit of model making with the making of a base for the Dapol Service Station on the 000 narrow gauge layout and a forecourt laid out in what is supposed to be gravel. This was common for rural areas back in the 60s and 70s so hopefully looks the part. All I did was spread PVA glue in the required areas and then cover it with some kiln dry sand which gives a good representation of gravel.

The handy thing with having separate sub-bases is that you can move them off the layout and work on them in the comfort of the workbench.

009 gauge layout

The gravel laid and looking a bit more finished.

009 gauge layout

Hopefully tomorrow I will be a bit more energised. In the meantime I will have to explain to Mrs. W why those jobs on her list didn't get done!

Tuesday, March 1, 2022

Thatched delight!

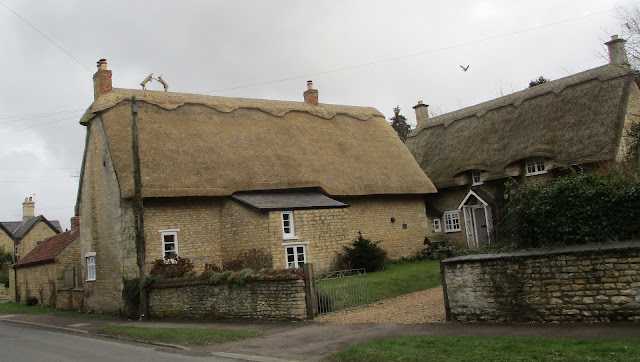
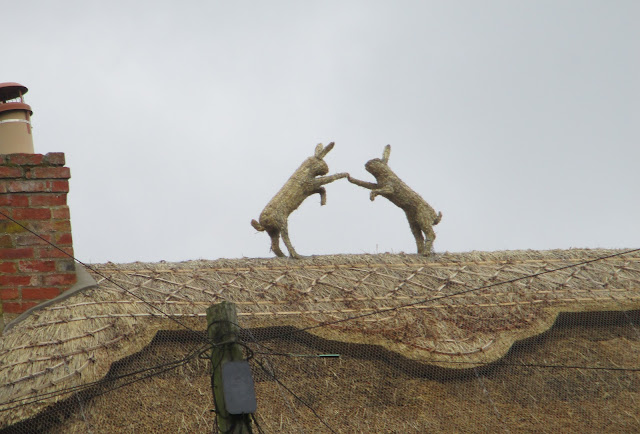
My journey to the Rocks by Rail Museum takes me through the Rutland village of Cottesmore which is one of those quintessential English chocolate box cover villages. Over the past few weeks I have watched as one of the cottages has been rethatched and a wonderful job it is to. However there is one part which I just find, well, delightful and just shows the skill of the thatcher.

Thatched cottage

Moving in a little closer and you see this.

Thatched cottage

Wonderful!

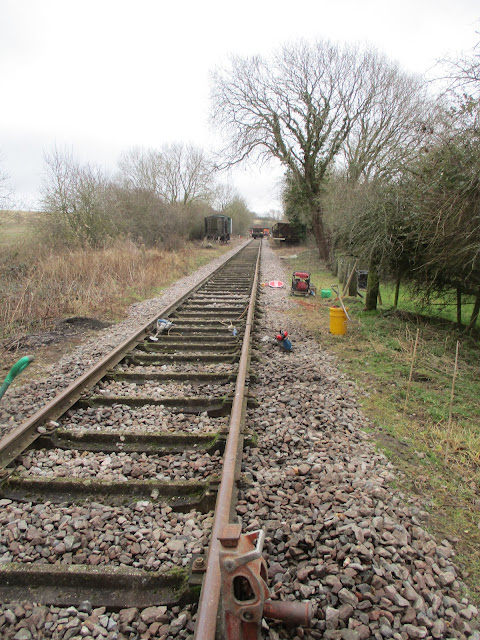
At the Museum it was another day of track levelling and packing and you can see looking back towards the locomotive shed that the track is looking good.

Rocks by Rail Museum,

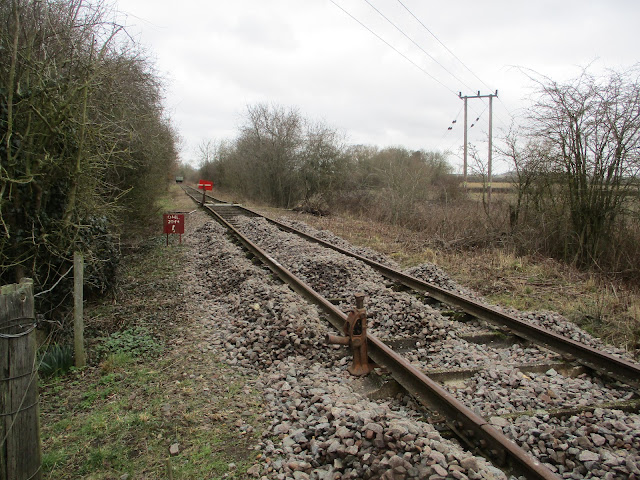
Look the other way and there is still some work to do but a lot less than back in October!

Rocks by Rail Museum,

If we ever finish the track there are plenty of other projects waiting their turn!

Rocks by Rail Museum,

On the model making front a few more decals applied to the Scania 143H model but lots more to go yet!

Italeri Scania Streamline 143H


Monday, February 28, 2022

The Sensible Red Button

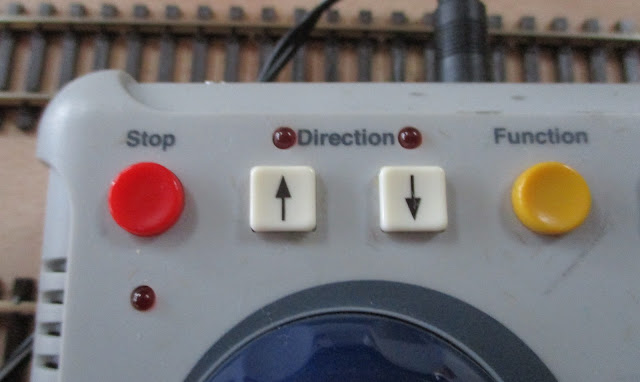
With the World becoming increasingly madder with events seemingly escalating and running away I turn to my model railway for some relief. The manufacturers of DCC controlled trains know that at times you can get in a situation where things can go wrong and you can see a disaster unfolding as perhaps two trains head on a collision course with each other. Their answer is a Red Button on the controller which far from increasing the speed of the trains heading for impact, just stops everything on the layout. 

The sensible red button!

The sensible red button!

Once pressed you then have a chance to assess what is going wrong, sort it out and then get underway again once the problems have been solved! 

Maybe all the World's leaders should have a model railway - it might lead to a more settled planet!

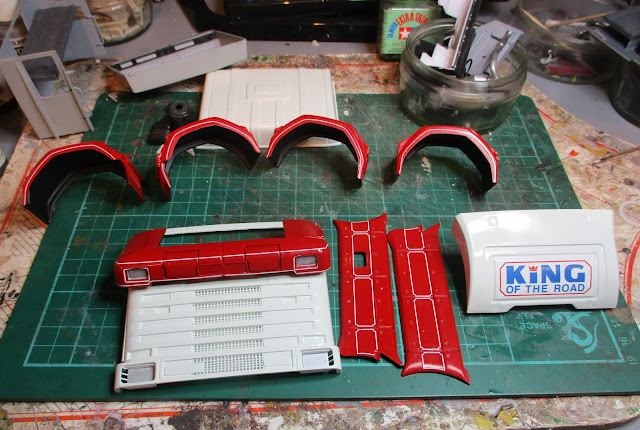
On other matters a bit more decaling on the Scania 143H with the front bumper now having its pin stripping added which was a real pain to do. These four decals took me over an hour to do. Lots more to do but hopefully not as complex!

Italeri Scania Streamline 143H


Sunday, February 27, 2022

Repurposing.

A nice day which saw me putting potting compost in some seed trays to warm up in the greenhouse ready for sowing in a week or two. I have covered the trays to help the compost warm with some glass from the windows of he shed that stood on the site of the greenhouse a couple of years ago - a great example of repurposing!

I do repurpose in my model making activities too. Today was a day when I caught up with a few small painting and assembly jobs on parts for the Scania 143H so nothing too exciting to report but it is progress. 

Italeri Scania Streamline 143H,

However, the sanding stick on the right of the photo above has been repurposed from Mrs. Woody's dressing table. It has four different grades of sanding paper, it is flexible and does a great job. I will need to repurpose another one soon as this one is beginning to wear out! I just need to await an opportune moment when Mrs. W will not notice!

Italeri Scania Streamline 143H,

Another example of repurposing is this glass container into which I put parts for a kit that I have removed from the sprue and are awaiting fitting. Very useful and helps in keeping the parts safe until needed. The jar is actually from the Gu desert range - other deserts are no doubt available but may not be as tasty - and once emptied of its contents which is easy to do - In best Homer voice, Hmmmmm, Gu desert! serves its new purpose.

Most things can find a new use if you think about it and in model making sometimes it is the most unlikely things that become most useful. 

I am off now to repurpose some more Gu deserts as the 54 empty jars I have in stock at the moment need replenishing!

Saturday, February 26, 2022

Boating adventures!

Not a Caribbean Cruise that Mrs. Woody would not actually enjoy as she easily gets sea sick (now that's a saving!) but in my characteristic grasshopper way of moving between projects I decided today to do something else other than the Scania truck kits so I have almost finished the canal narrow boats for the wharf on the 009 narrow gauge layout. The various decorative panels have been added, the tiller is installed as are the mooring pins and the stove and engine chimneys. In addition I have also added some ropes the cargo bay having raided Mrs. W's sewing kit. I have remembered to return the black cotton that I used so I will never be found out unless she reads this! The ropes add a nice touch breaking up the other wise boring cargo hold cover. Having actually thought the matter through my original idea of cutting individual lengths of cotton was dropped in favour of using one long piece as the photo below shows - working smarter not harder as I get older!

009 gauge layout,CraftLine Models Canal Barge Kit

009 gauge layout,CraftLine Models Canal Barge Kit

Almost finished with just some weathering to do.

009 gauge layout,CraftLine Models Canal Barge Kit

009 gauge layout,CraftLine Models Canal Barge Kit

Placed on the layout they look good - to me anyway! Probably ant self respecting canal enthusast would condemn them and have me walk the plank!

009 gauge layout,CraftLine Models Canal Barge Kit

009 gauge layout,CraftLine Models Canal Barge Kit


Friday, February 25, 2022

Decal Day!

Mrs. Woody had a day off and so we went curtain browsing which actually means buying. My argument that our present curtains were a mere 15 years old and had plenty of life left in them went unheeded. I surrendered! We went, we looked and we bought! The only thing is that we have moved from pleated to eyelet curtains, so my task will, at some point yet to be determined by the level of nagging I can endure, be to put new curtain rods up.

Having got over the shock of that escapade I did manage to find solace for an hour with the Scania 143H as I started the process of applying the decals. There are a lot of them as this extract from the instruction sheet shows.

Italeri Scania Streamline 143H

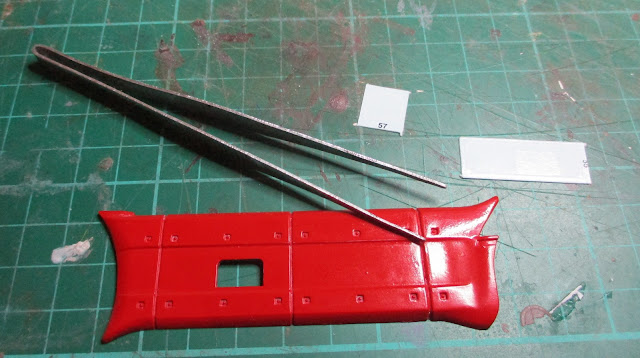
I started with the white lining on the side skirts which was actually eight separate decals. Despite my fears about them breaking or disintegrating things progressed well - for once! There are many different approaches to decal application. Some like to drop the decal and backing paper into water and leave it there for a few minutes to allow the decal to semi separate from the backing paper. The danger with this is the decal completely separates from the backing and you then have to fish it out of the water and try to unravel it as it wraps around itself which is a bit like trying to unravel wet tissue paper. My preferred method is just to dip the decal and backing paper into some water for a few seconds and then just let it sit on the workbench for a few minutes. The decal does separate from the backing and it is altogether a much easier job to then apply it. The photo below shows two of the decals waiting to be applied having been dipped in water.

Italeri Scania Streamline 143H

After an 40 minutes or so the first 8 decals have been applied - just a lot more to go so Decal Day may become Decal Decade with my rate of progress! 

Italeri Scania Streamline 143H