Search this blog

Thursday, March 16, 2023

Foundation time.

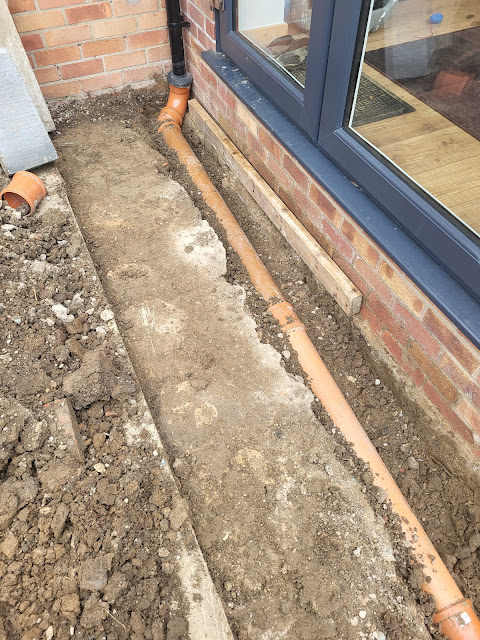
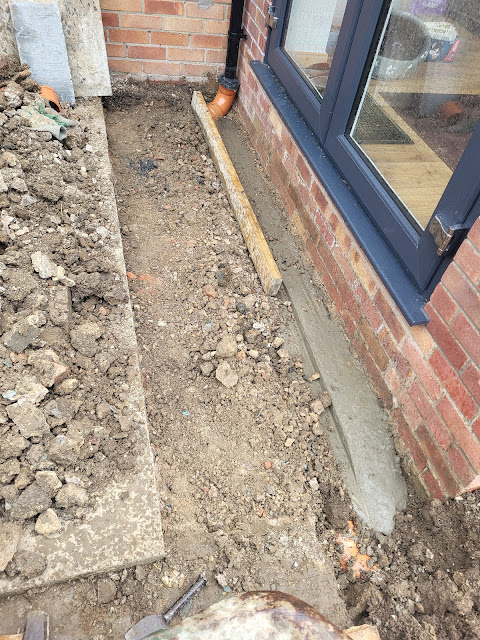
It is another day of back ache! It was another reasonable day so having drained myself yesterday moving the drain to enable me to put the foundation in for a step into the rebuilt conservatory I did actually put that foundation in. My back is again aching! Mrs. Woody tells me I am over doing things! I think it is more that I am getting older and my back just isn't as hardy as it used to be! Anyway the foundation is a two step one which means one side will have three courses of bricks to bring it up to the level where the step needs to be whilst the other side will have two courses. The ends will be a mix! It makes sense in my mind but how that equates to a workable solution is as usual open to debate! The foundation had to be dug out and concrete hand mixed which is probably why my back is somewhat aching.

Conservatory rebuild

I was hoping that the base left from the lifted slabs would be a suitable foundation but unfortunately it was very thick in the first place I tested but very flimsy in all the other areas so it had to come up!

Conservatory rebuild

The rear of the foundation in and three couses of bricks will go on that.

Conservatory rebuild

The front and ends are at a higher level.

Conservatory rebuild

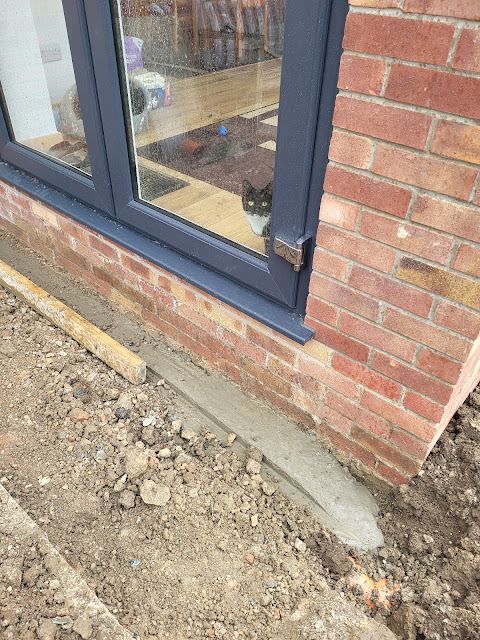
A smaller cat audience today and Matty was probably wondering why I was out in the rain which came during the last hour of work.

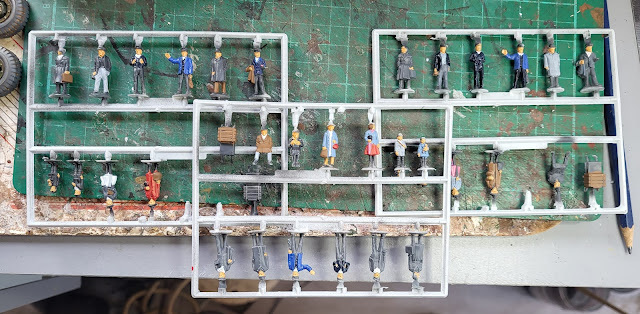
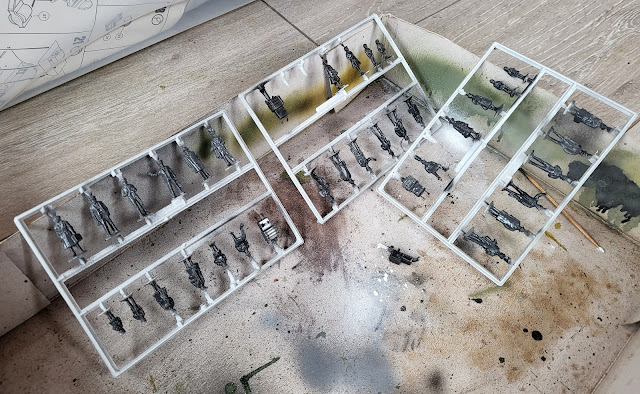
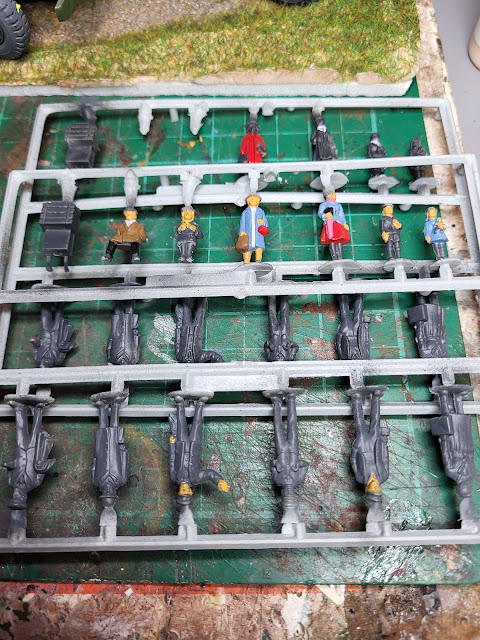
I did manage a half hour or so continuing to paint my model people from the Dapol Platform Figures. It is one of those jobs which if you just have a half hour or hour every so often is quite therapeutic and more importantly back friendly! They are almost at the point where I will varnish them and then cut them from the sprue to paint hair/hats and shoes. Leaving them on the sprue makes it easier to paint and avoiding handling them means the risk of rubbing the paint off with fingers is minimised. Once the varnish is on they will be more robust to being handled. 

Dapol Platform Figures

You may notice the plastic pot lid that is my paint pallet - very handy and once it is too messy it can be washed clean and looking like new. Wish I could look like new when I wash!
Wednesday, March 15, 2023

The drain has drained me!
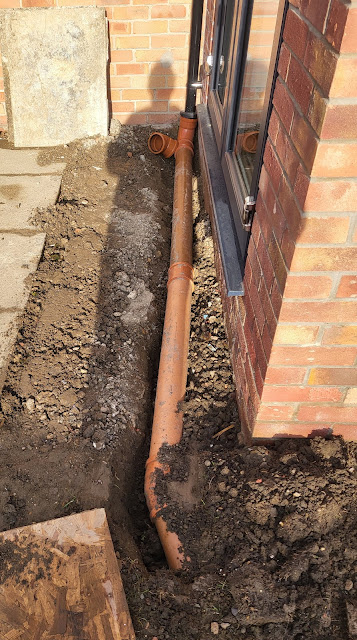
I am well and truly drained today. The cause - a drain! Going back to the conservatory rebuild at the beginning of this year, a drain was installed to take one half of the roof water. The other part went into an existing drain. When the guy installed the new drain it was a horrible wet and cold day and I guess it was not conductive to doing much digging. The result was that the drains position was such that I did not have room to put a foundation in for a step to the doors.

Conservatory rebuild

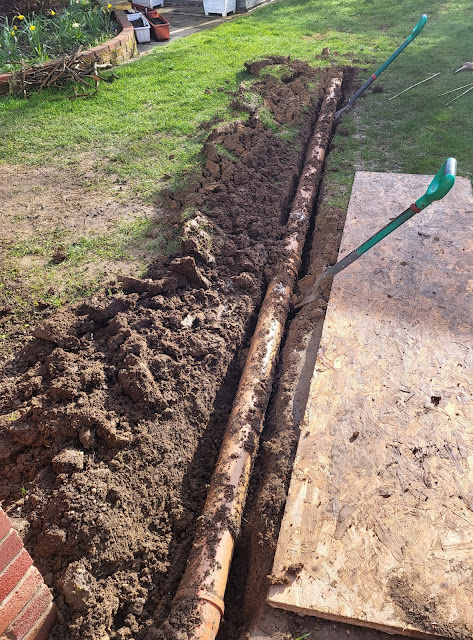
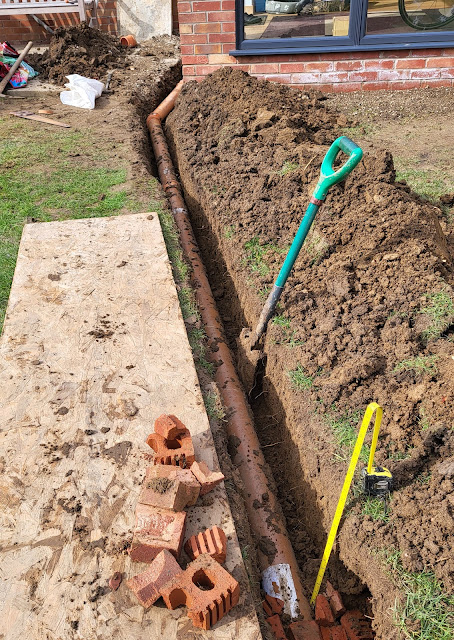
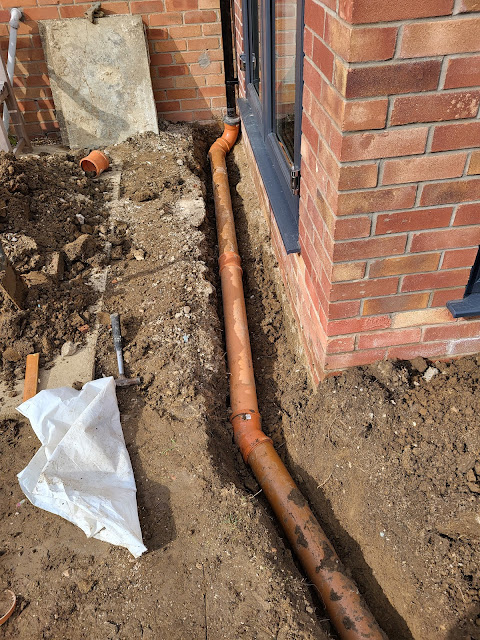
I have been planning to move it for some time but with this continued winter weather I guess I felt like the ground worker did when he put the drain in - I just wanted to be in the warm and dry! However until the drain was moved just about all the other jobs to sort the WMD HQ garden out could not get done. So this morning it was dry and warmish so I decided today was the day. However the job was bigger than I thought it would be. Where the pipe goes through the lawn it only had about 3 inches of cover. I could easily have put a fork through it and in a dry summer the grass above the pipe would just die. 

Conservatory rebuild

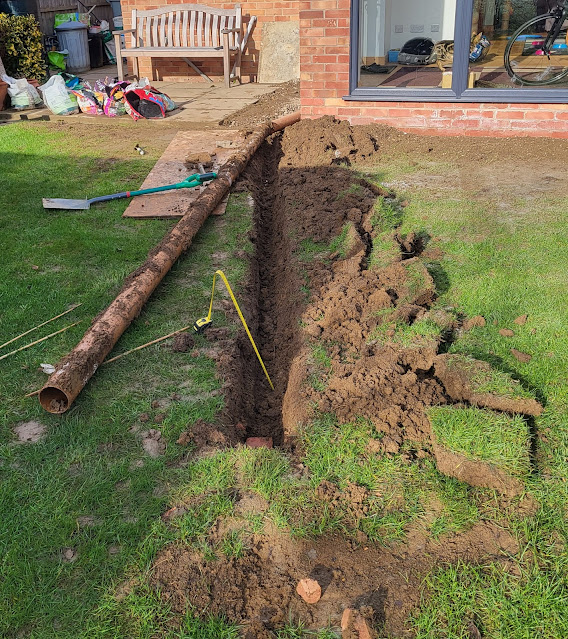
So the whole pipe was exposed, removed and the trench dug down another 9 inches. That doesn't sound much but it will be enough and it was a tough dig in clay so I think that its is about as much as my back can stand! Anyway my back lasted long enough to put the pipe back into its new deeper home and backfill. 

Conservatory rebuild

Conservatory rebuild

Conservatory rebuild

I did have a bit of an audience who were probably bemused by what I was doing just as Mrs. Woody was when I told her what I was doing!

Conservatory rebuild

The foundation for the step will need a bit more digging out but that can wait for another day and a better back!

Back in the comfort of my Man Cave I was able to remove the various weights that I had placed on the sub-assembly for the gardens to the thatched cottage and shop on my OO9 narrow gauge layout that I glued down last night. I have used PVA and whilst it gives a good bond once dry it does take its time to go off and during that period it is best to weigh down the surfaces.

009 gauge layout

Everyuthing apart from the kitchen sink weighing the car base down!

009 gauge layout

The sub-assembly now well and truly flat and stuck down!

009 gauge layout

At least I won't have to dig any drains for the 4mm scale houses on the layout!

Tuesday, March 14, 2023

Many things happening at the Rocks by Rail Museum!

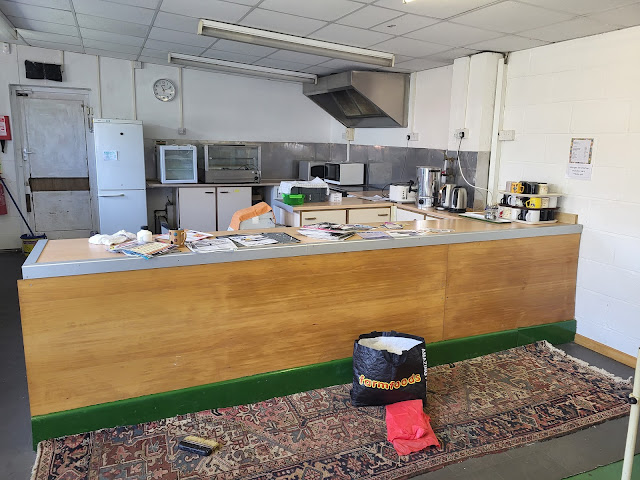
Another day of many things happening at the Rocks By Rail Museum today. Firstly in the Cafe, Jane came in to do a collage on the front counter.

Rocks by Rail Museum

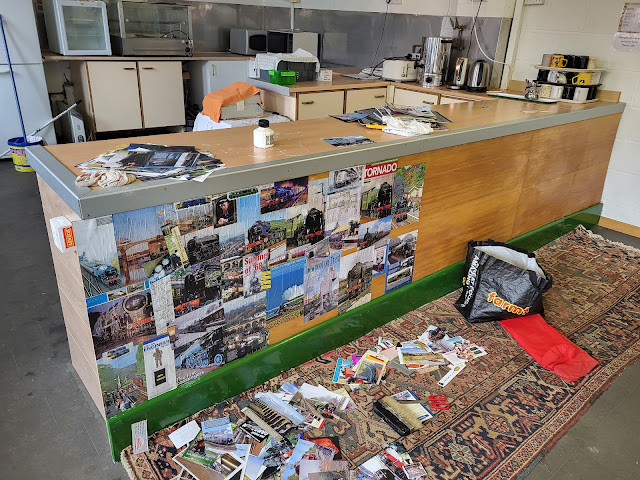
Jane is using parrts cut out of magazines to build up a train themed collage.

Rocks by Rail Museum

Its a long job but already it is looking good.

Rocks by Rail Museum

Rocks by Rail Museum

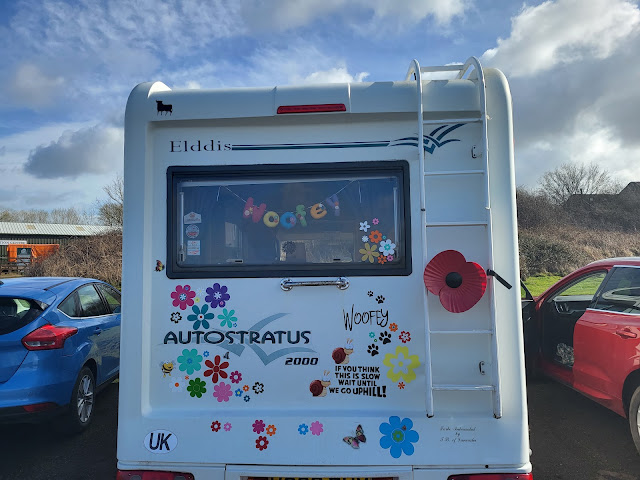
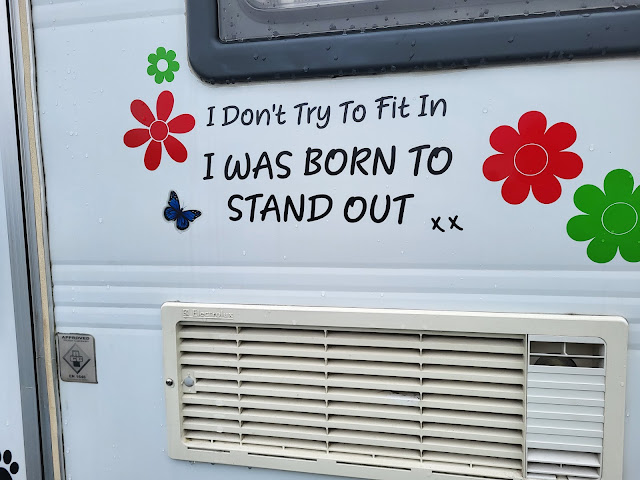
Jane has an artistic talant as proved by her camper van customisation!!

Rocks by Rail Museum

Rocks by Rail Museum

Rocks by Rail Museum

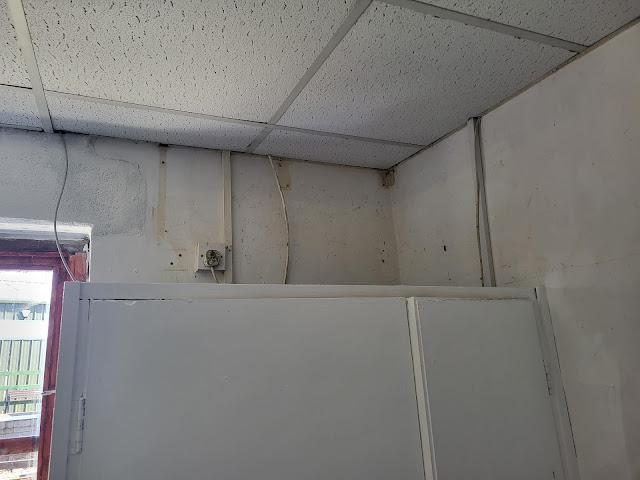
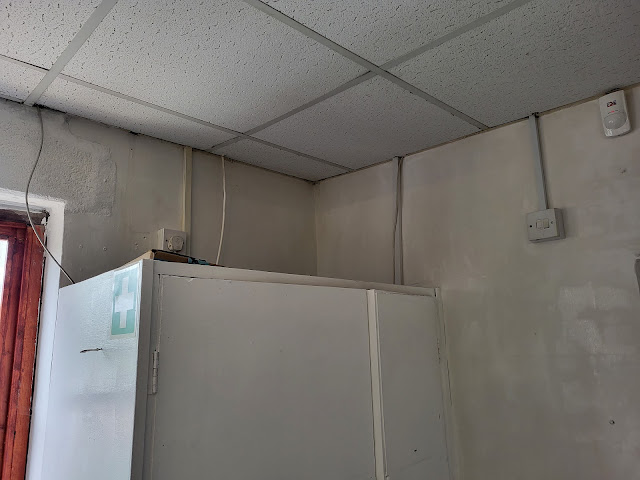
Meanwhile I was still painting! This time above and behind the cleaning cupboard that I painted last week. It was quite dirty up there and had not seen a paint brush for some time. I could tell why as I had to do contortions to get up there!

Rocks by Rail Museum

The paint is taking ages to dry but it is cleaner looking - honest!

Rocks by Rail Museum

Meanwhile more painting has been going on inside the LMS brake van that is needed for this season. It is looking great and as I had not been in for a while it was a bit of a shock to see just how much has gone on since my last visit.

Rocks by Rail Museum

Rocks by Rail Museum

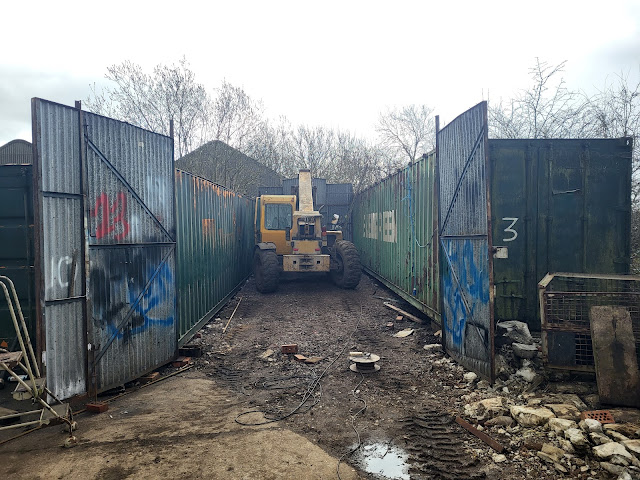
Back outside work on putting the roof on the storage shed for Harriot the JCB and the CAT is progressing but slowly! It is one of those jobs which will suddenly jump forward but not sure when!


Rocks by Rail Museum


Monday, March 13, 2023

A mixed bag!

A bit of a mixed bag of model making activities today - just like the weather at the moment! I thought it might be a nice day for a bike ride but as I was getting ready this morning the wind suddenly increased as indicated by the bird table going across the garden at a rapid rate of knots and then the rain started! Every now and again it would go sunny for a few minutes then the next influx of rain. Oh well, a good excuse that I can't do anything in the garden Mrs. Woody (although I am sure she would point out I have a perfectly good weatherproof jacket), so I had a couple of hours in my Man Cave!

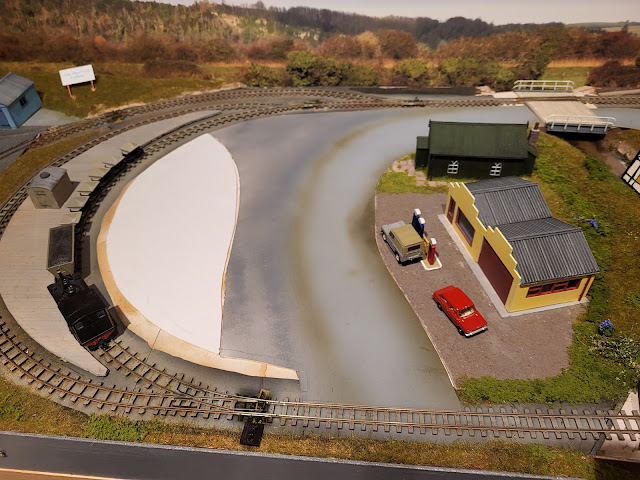
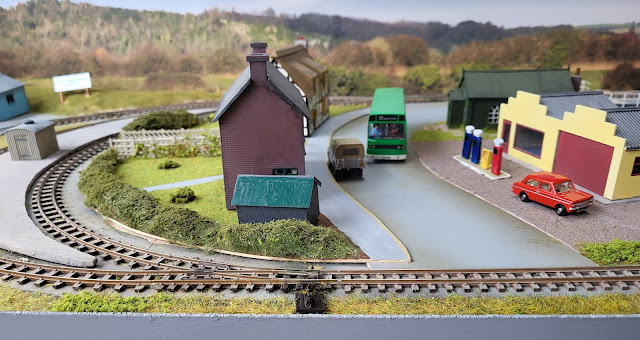
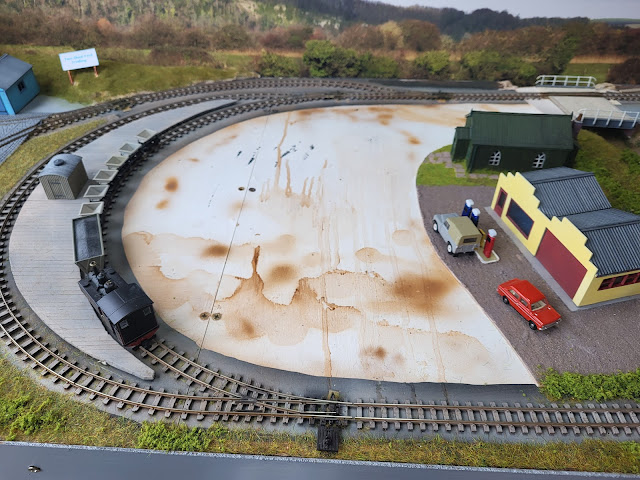
On my 009 narrow gauge layout I have commenced gluing down the card sub-assemblies of the road through the village and the then the thatched cottage and shop base will be glue onto that once the glue is dry.

The bare baseboard - looks strange!

009 gauge layout

Always best to weigh the card down as the glue dries.

009 gauge layout

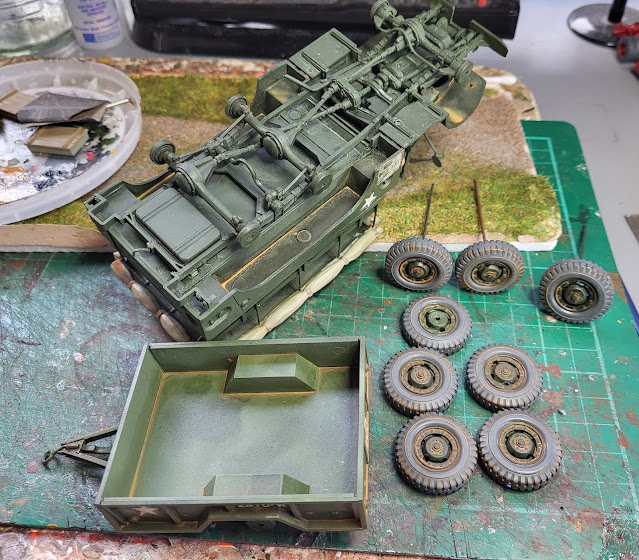
Whilst I wait for the glue to dry I did some weathering of Airfix Dodge 1 1/2 Ton Personnel Carrier. Using a dilute brown wash I have started the wheels and a bit more on the trailer and the main carrier itself. It is a slow job as I need to wait for the paint to dry before doing more but an ideal one to fit in around other jobs.

Airfix Dodge 1 1/2 Ton Personnel Carrier

Another slow job is the painting of the Dapol Platform Figures. However it is a job that if you take your time and accept that it is going to take a while can be quite therapeutic. I am not sure if my sense of fashion is right (Mrs. W would say categorically no!) but these figures are supposed to represent the 50's/60's so I am sure they will be OK - I hope! At least my OO gauge figures don't have to face the wind and rain in their small World on my layout!

Airfix Dodge 1 1/2 Ton Personnel Carrier


Sunday, March 12, 2023

Figure it out!

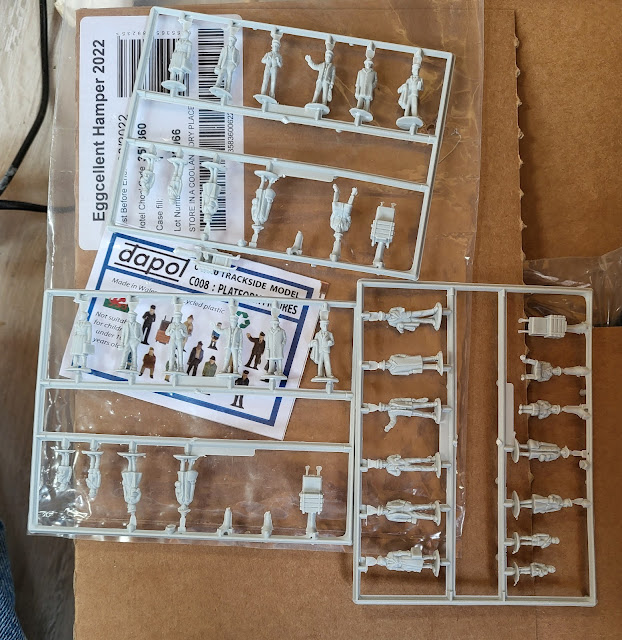
A quiet day today and one where I figured out that my 009 narrow gauge layout will eventually need some figures to give it life. I could buy ready painted ones by a variety of manufacturers at a cost of somewhere in the region of £1 to £3 a figure. I know you can get bundles of 50 to 100 ready painted figures on eBay but the ones I have seen do look as though they have been painted with a tar brush using colours from a clowns make up box. I figured that I would be better off painting some figures myself especially as I had a pack of Dapol's Platform Figures in stock. In fact I had used three of them to populate my Leyland National bus that I built last year.

Dapol Platform Figures

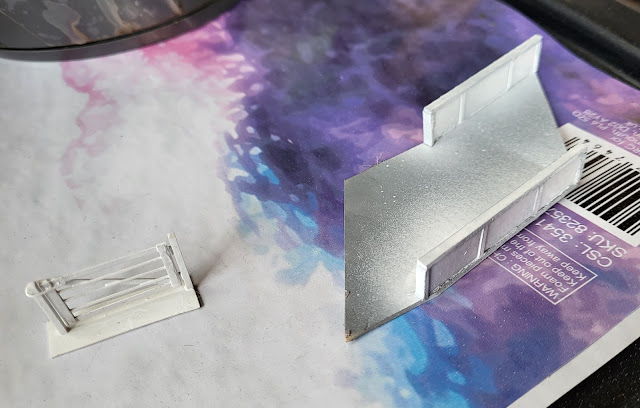
I think I paid about £4 for them not so long ago but I see they are now about £7.50. That is still cheaper than buying ready painted figures even allowing a few pounds for he paint used. First stage in painting them was to give them an undercoat of black primer. However whilst I had the airbrush out and before loading it with white paint I had the unusual inspirational idea that I could spray the cattle grid gate and track bridge from my 009 layout white to move that project on. This would mean I would only need to clean the airbrush out once at the end of the session of spraying as loading it with black paint after the white would produce a still suitable dark grey undercoat.

009 gauge layout

Dapol Platform Figures

With the primer dry the job of painting the figures commences. They are actually nicely detailed figures which I think do not date back the 60 years to the Airfix figures but are more recent. As usually the power and resolution of digital photography makes my painting abilities look bad but in reality from normal viewing distance the nearly finished ones look OK - honest!

Dapol Platform Figures

I figured out that it would be easier to leave the figures on their sprue at the moment to ease the painting. Their hats and shoes will be painted in once the rest of the body is painted and the figure removed from the sprue.

Saturday, March 11, 2023

Testing times for Woody!

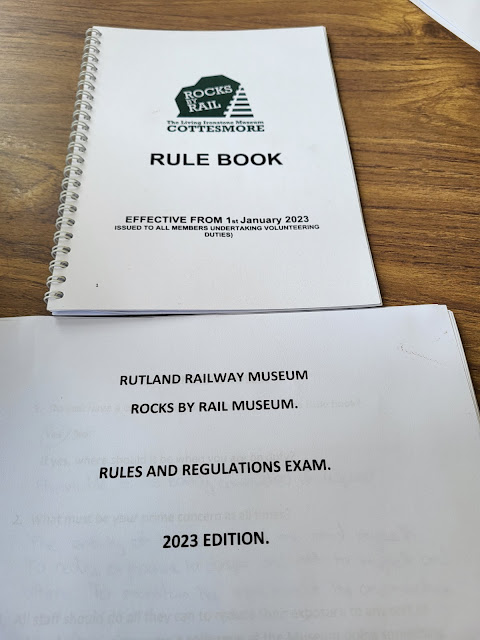
The last thing you expect to be doing on a Saturday is an exam and its been a while since I last sat down to do one. However that is exactly what I found myself doing today. In order to go trackside during operating sessions at the Rocks By Rail Museum I have to pass certain competency tests. The first one is the understand of the Rules Book. All railways have a rule book which puts into formal terms how the railway is run and operated and the responsibilities of the various levels of staff. 

Rocks by Rail Museum

Two hours and a bit after starting I finished - it was not a short exam! I will find out my result in a few weeks time.

Rocks by Rail Museum

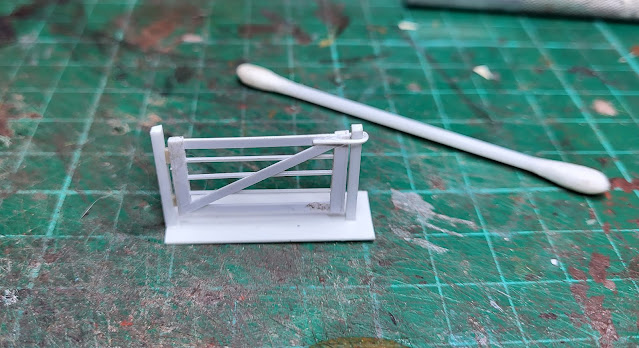
To be honest I felt somewhat fuzz headed after that exam but having got back to WMD HQ and after a short nap on the sofa I was back in the zone as they say! It was time to do a bit more testing of myself with some modelling. I did add a couple more decals to the Airfix Dodge 1 1/2 Ton Personnel Carrier. However as this is a slow job I decided that I would commence a critical element for my 009 narrow gauge layout that would enable me to move on with the scenic work. I have a cattle grid made for the road at the back of the layout. Cattle grids are there to stop cattle and sheep from getting out of an area but there are times when there is a need for someone to get passed the grid with an animal such as a horse. Therefore there is usually a gate to the side which allows passage by our four legged friend when accompanied.

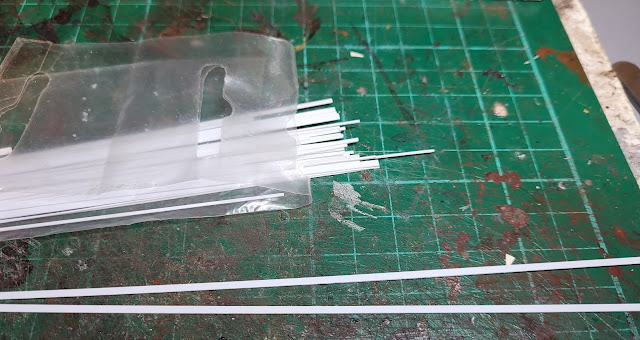
I could have had a dig around for a suitable gate either in my scrap box of useful parts (or junk as Mrs. Woody would call it!) or looked for one on the internet. However I have materials and a pack of plastic strip was dug out of the WMD Stores and so further testing of myself commenced!

I usually keep a pack of these small plastic strips in stock as they are so handy. I thiunk that they are produced by Slaters and I usually end up buying a pack from Squires when they are at a model railway exhibition that I attend.

009 gauge layout

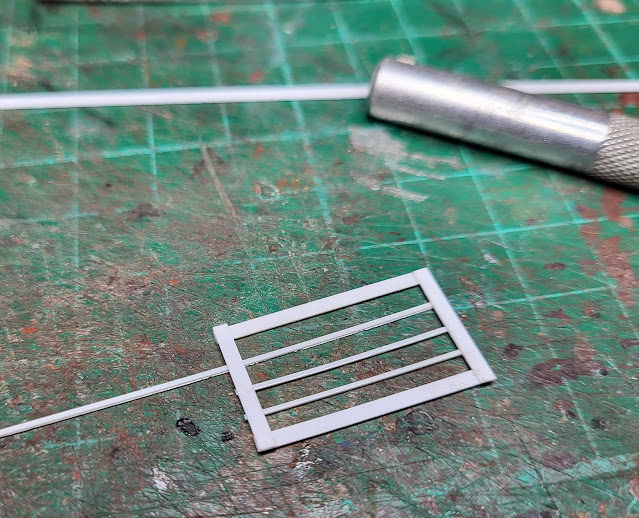
The basic gate is made up - nothing is planned apart from a basic size which is one of my usual traits!

009 gauge layout

After an hour or so I have what I want. Mounting it on a small piece of plastic sheet should make it easier to install on the layout - note the word 'should'!

009 gauge layout

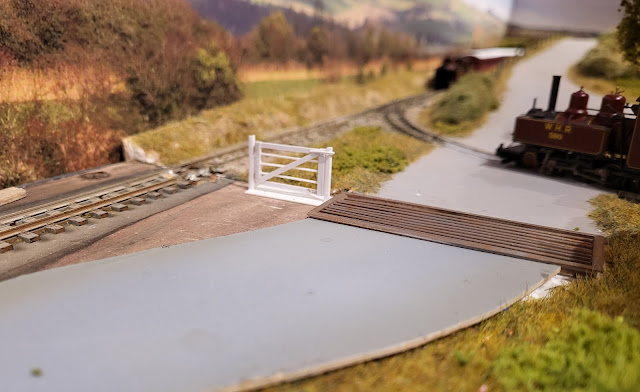
Testing it in position on the layout and I think this is one test that I have passed!

009 gauge layout

Just needs painting and then I can get on with the scenic work. Hopefully that won't be so testing!

Friday, March 10, 2023

Woody gets it right - for once!

I posted a few days ago about my decal disaster which you can read about by clicking here. Given that the decals were nearly 50 years old I knew they would be fragile and probably break up when soaked to release them from their backing paper. Much as Mrs. Woody would hate to admit I was right. I had sprayed the decal sheet with some acrylic varnish. The theory being that the varnish would hold the decal together. It didn't, proving Mrs. W is right that I usually get things wrong! However, having thought about it a bit, I wondered if soaking the decal to release it from its backing paper was also dissolving the water based acrylic varnish? Hmmm! Having only taken a couple of the decals off the main sheet I still had the main sheet. So out came a can of enamel varnish and the sheet given a coat of it.

Airfix Dodge 1 1/2 Ton Personnel Carrier

My revised theory that the water proof enamel would not be affected by soaking the decal to release it from the backing sheet was right! Mrs. W would just roll her eyes at that but I was pleased! It is not all plain sailing. You have to cut the decals out of the sheet close to the actual printed detail other wise you end up with a large film of clear varnish surrounding the printed detail. Not easy when it is white print on on white backing paper! In addition, despite soaking the decals in water as I need them, I am having to use a scalpel blade to slide between the decal and paper to get the decal fully off the backing paper but in general the decals are coming off more or less complete. Once applied a coat of decal softener is applied to help them set in place. 

Airfix Dodge 1 1/2 Ton Personnel Carrier

It is taking some time to apply all these decals but it does make the model look better. I will need to apply a coat of varnish once all the decals are in place to seal them ready for further weathering.

Whether I will actually get anything else right is open to debate although I know Mrs. W's view but at the moment I am basking in the supposed glory of getting this right!

Thursday, March 9, 2023

Woody and the Great Bake Off????

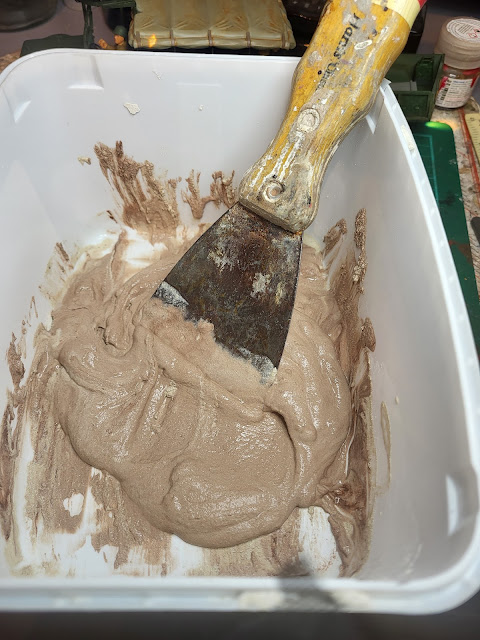
Not sure if I would actually make it to the Great Bake Off with my recipe but my ingredients certainly produced the right mix for my diorama base. Starting with a mixing bowl I added filler, brown paint, PVA and water - Mmmmm!

Airfix Dodge 1 1/2 Ton Personnel Carrier,

After a thorough mixing with this less than hygienic looking spreader it looked like this. Double mmmmmm!

Airfix Dodge 1 1/2 Ton Personnel Carrier,

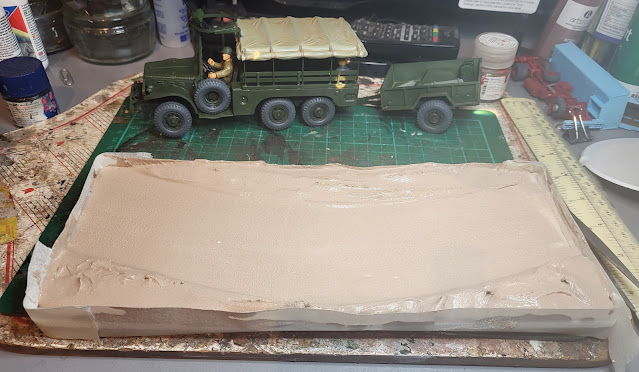
 Having placed masking tape around the edges of my base to keep spillages to a minimum the mix was spread to create my desired landscape which was a lane on a slight curve. 

Airfix Dodge 1 1/2 Ton Personnel Carrier,

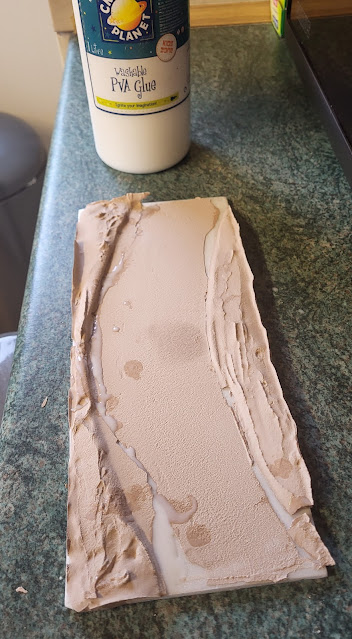
Left to dry in the kitchen (don't tell Mrs. W) things did not quite go to plan! It dried but despite the PVA glue to provide grip to the base there had been a slight warp during the night which loosened parts of the mix. Never mind! The art of the modeller is to recover from mistakes and as you know I make a lot of mistakes so I am used to making recovery strategies! In this case I glued the pieces back with PVA. It did not need to be perfect as it would be covered in scenic materials later.

Airfix Dodge 1 1/2 Ton Personnel Carrier,

Once that gluing session had dried it was time for yet more glue! This time for the lane surface.

Airfix Dodge 1 1/2 Ton Personnel Carrier,

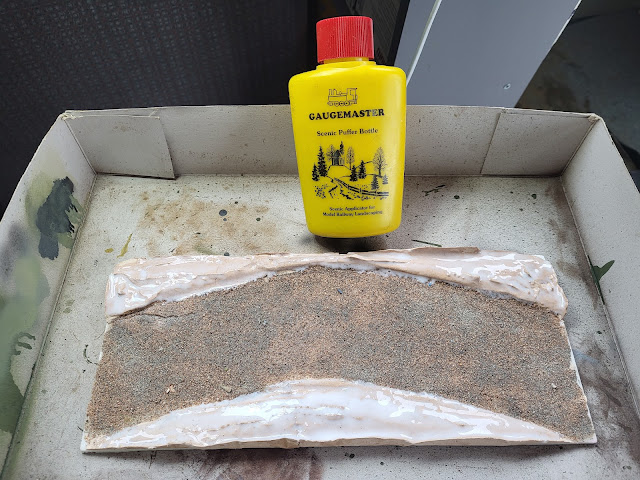
I brushed the PVA glue on and left it for 10 minutes to spread naturally. Then I spread my favoured road making material, kiln dried sand. It is perfect for this type of effect where I am trying to recreate a gravel lane. I bought a 10kilo bag years ago for about £1.50 and still have most of it so value wise it is great.

Airfix Dodge 1 1/2 Ton Personnel Carrier,

That Gaugemaster Scenic Puffer Bottle gives a hint of the next stage which was to spread yet more PVA and then apply static grass using the Puffer Bottle. Although I still need to tidy up the edges it certainly has made a big difference.

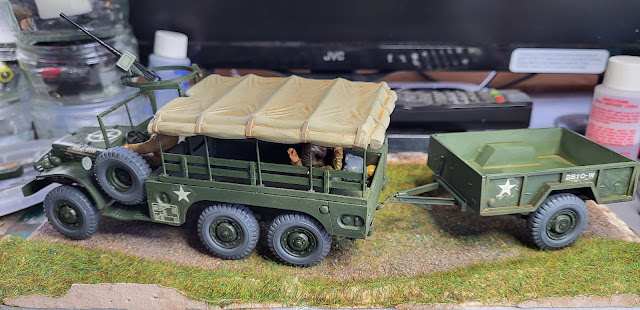
Airfix Dodge 1 1/2 Ton Personnel Carrier,

Airfix Dodge 1 1/2 Ton Personnel Carrier,

Airfix Dodge 1 1/2 Ton Personnel Carrier,

You may notice some decals appearing despite the issues I posted on a few days ago. More on that hopefully tomorrow.  In the meantime I feel like baking a cake for some reason !