Search this blog

Tuesday, March 1, 2022

Thatched delight!

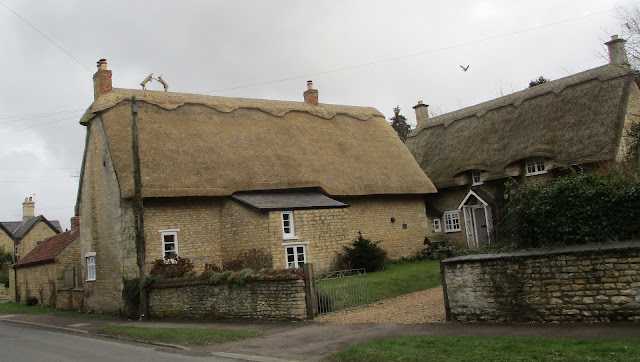
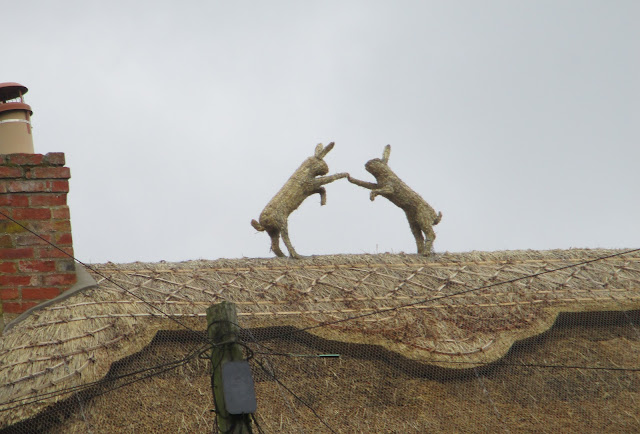
My journey to the Rocks by Rail Museum takes me through the Rutland village of Cottesmore which is one of those quintessential English chocolate box cover villages. Over the past few weeks I have watched as one of the cottages has been rethatched and a wonderful job it is to. However there is one part which I just find, well, delightful and just shows the skill of the thatcher.

Thatched cottage

Moving in a little closer and you see this.

Thatched cottage

Wonderful!

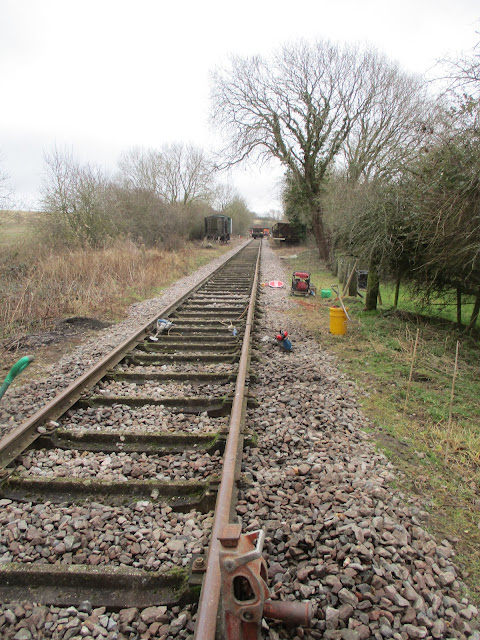
At the Museum it was another day of track levelling and packing and you can see looking back towards the locomotive shed that the track is looking good.

Rocks by Rail Museum,

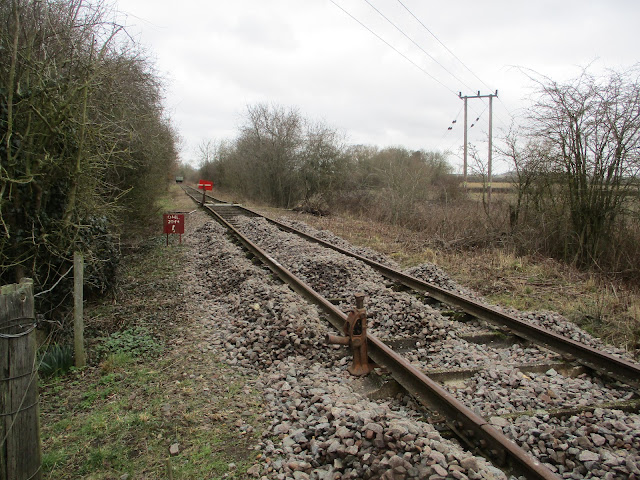
Look the other way and there is still some work to do but a lot less than back in October!

Rocks by Rail Museum,

If we ever finish the track there are plenty of other projects waiting their turn!

Rocks by Rail Museum,

On the model making front a few more decals applied to the Scania 143H model but lots more to go yet!

Italeri Scania Streamline 143H


Monday, February 28, 2022

The Sensible Red Button

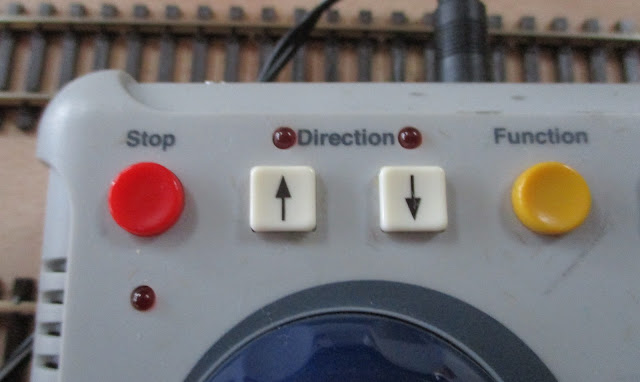
With the World becoming increasingly madder with events seemingly escalating and running away I turn to my model railway for some relief. The manufacturers of DCC controlled trains know that at times you can get in a situation where things can go wrong and you can see a disaster unfolding as perhaps two trains head on a collision course with each other. Their answer is a Red Button on the controller which far from increasing the speed of the trains heading for impact, just stops everything on the layout. 

The sensible red button!

The sensible red button!

Once pressed you then have a chance to assess what is going wrong, sort it out and then get underway again once the problems have been solved! 

Maybe all the World's leaders should have a model railway - it might lead to a more settled planet!

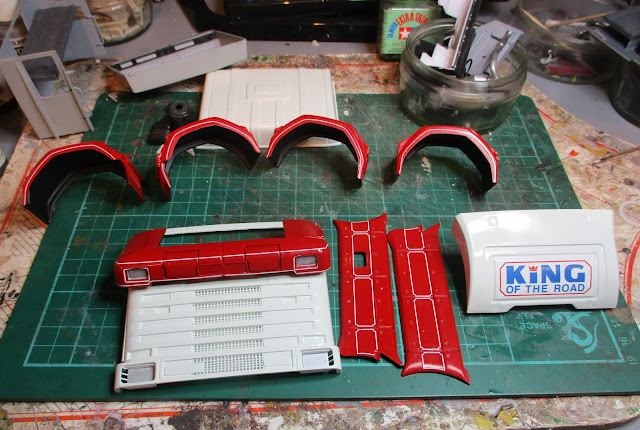
On other matters a bit more decaling on the Scania 143H with the front bumper now having its pin stripping added which was a real pain to do. These four decals took me over an hour to do. Lots more to do but hopefully not as complex!

Italeri Scania Streamline 143H


Sunday, February 27, 2022

Repurposing.

A nice day which saw me putting potting compost in some seed trays to warm up in the greenhouse ready for sowing in a week or two. I have covered the trays to help the compost warm with some glass from the windows of he shed that stood on the site of the greenhouse a couple of years ago - a great example of repurposing!

I do repurpose in my model making activities too. Today was a day when I caught up with a few small painting and assembly jobs on parts for the Scania 143H so nothing too exciting to report but it is progress. 

Italeri Scania Streamline 143H,

However, the sanding stick on the right of the photo above has been repurposed from Mrs. Woody's dressing table. It has four different grades of sanding paper, it is flexible and does a great job. I will need to repurpose another one soon as this one is beginning to wear out! I just need to await an opportune moment when Mrs. W will not notice!

Italeri Scania Streamline 143H,

Another example of repurposing is this glass container into which I put parts for a kit that I have removed from the sprue and are awaiting fitting. Very useful and helps in keeping the parts safe until needed. The jar is actually from the Gu desert range - other deserts are no doubt available but may not be as tasty - and once emptied of its contents which is easy to do - In best Homer voice, Hmmmmm, Gu desert! serves its new purpose.

Most things can find a new use if you think about it and in model making sometimes it is the most unlikely things that become most useful. 

I am off now to repurpose some more Gu deserts as the 54 empty jars I have in stock at the moment need replenishing!

Saturday, February 26, 2022

Boating adventures!

Not a Caribbean Cruise that Mrs. Woody would not actually enjoy as she easily gets sea sick (now that's a saving!) but in my characteristic grasshopper way of moving between projects I decided today to do something else other than the Scania truck kits so I have almost finished the canal narrow boats for the wharf on the 009 narrow gauge layout. The various decorative panels have been added, the tiller is installed as are the mooring pins and the stove and engine chimneys. In addition I have also added some ropes the cargo bay having raided Mrs. W's sewing kit. I have remembered to return the black cotton that I used so I will never be found out unless she reads this! The ropes add a nice touch breaking up the other wise boring cargo hold cover. Having actually thought the matter through my original idea of cutting individual lengths of cotton was dropped in favour of using one long piece as the photo below shows - working smarter not harder as I get older!

009 gauge layout,CraftLine Models Canal Barge Kit

009 gauge layout,CraftLine Models Canal Barge Kit

Almost finished with just some weathering to do.

009 gauge layout,CraftLine Models Canal Barge Kit

009 gauge layout,CraftLine Models Canal Barge Kit

Placed on the layout they look good - to me anyway! Probably ant self respecting canal enthusast would condemn them and have me walk the plank!

009 gauge layout,CraftLine Models Canal Barge Kit

009 gauge layout,CraftLine Models Canal Barge Kit


Friday, February 25, 2022

Decal Day!

Mrs. Woody had a day off and so we went curtain browsing which actually means buying. My argument that our present curtains were a mere 15 years old and had plenty of life left in them went unheeded. I surrendered! We went, we looked and we bought! The only thing is that we have moved from pleated to eyelet curtains, so my task will, at some point yet to be determined by the level of nagging I can endure, be to put new curtain rods up.

Having got over the shock of that escapade I did manage to find solace for an hour with the Scania 143H as I started the process of applying the decals. There are a lot of them as this extract from the instruction sheet shows.

Italeri Scania Streamline 143H

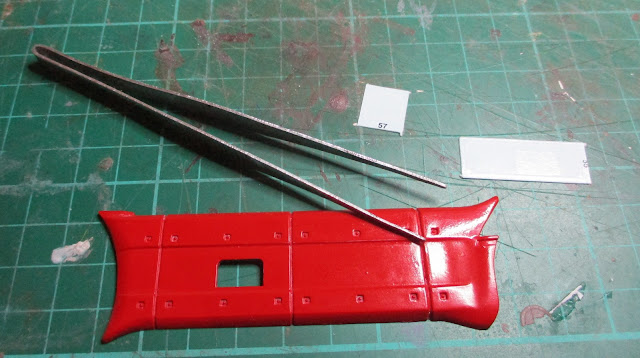
I started with the white lining on the side skirts which was actually eight separate decals. Despite my fears about them breaking or disintegrating things progressed well - for once! There are many different approaches to decal application. Some like to drop the decal and backing paper into water and leave it there for a few minutes to allow the decal to semi separate from the backing paper. The danger with this is the decal completely separates from the backing and you then have to fish it out of the water and try to unravel it as it wraps around itself which is a bit like trying to unravel wet tissue paper. My preferred method is just to dip the decal and backing paper into some water for a few seconds and then just let it sit on the workbench for a few minutes. The decal does separate from the backing and it is altogether a much easier job to then apply it. The photo below shows two of the decals waiting to be applied having been dipped in water.

Italeri Scania Streamline 143H

After an 40 minutes or so the first 8 decals have been applied - just a lot more to go so Decal Day may become Decal Decade with my rate of progress! 

Italeri Scania Streamline 143H


Thursday, February 24, 2022

Fill it up please!

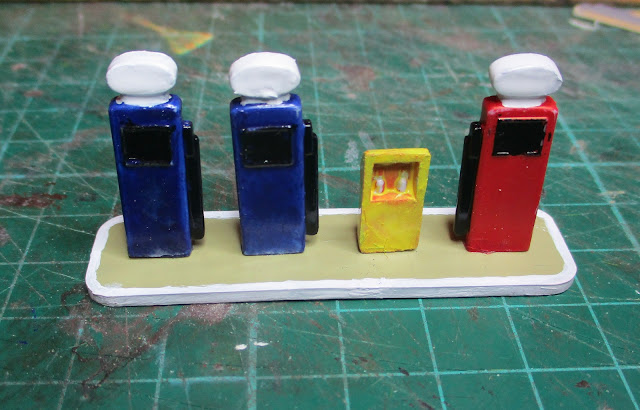
The 00 gauge motorists on the 009 narrow gauge layout now have somewhere to fill up their vehicle fuel tanks with the arrival of the fuel pumps at the Dapol Service Station. The camera can be cruel in close up and whilst the oil dispenser could do with another coat of yellow and the whole lot with a dash of some weathering/dirt it looks OK from normal viewing distance which is good enough for me. If you are not carful you end up spending hours on something no one will notice anyway so better spending that time on something a little more noticeable - well that's The World According to Woody!

009 gauge layout, Dapol Service Station

009 gauge layout, Dapol Service Station

Putting effort into something that will be noticed is what I did do with the cab panels for the Scania 143H. They have all been top coated now using, unusually for me, a can of Halfords Nissan Artic White which I inherited from my Dad's collection of things that might come in useful one day. Well this paint did and it seems to have done a good job and there was no need to clean my airbrush either!

Italeri Scania Streamline 143H

Just need to let the paint fully harden over the next few days and then it will be time to decal them with the various ones contained in the kit. Italeri decals are a love hate relationship for me. They are wonderfully thin so sit on the surface well but they do have a tendency to break and in some cases, if several years old, disintegrate! Stay tuned to see just how full the swear jar becomes especially as it keeps say 'Fill it up please'!

Wednesday, February 23, 2022

A bit of everything.

Today saw a bit of everything with some progress on both the Scania 141H and the narrow gauge layout.

The Scania body shell is now in the WMD paint shop where parts are now primed or primed and top coated. Hopefully this will be completed over the next few days. Whilst most components were painted whilst fastened to a scrap wooden board using masking tape, the back and sides of the cab which had been already been glued together was taped to a large paintbrush so that all of it could be painted in one go. The paintbrush was then poked into the packaging of a 4 pack of Fanta (other similar beverages are available) to support it and let the cab dry in mid air.

Italeri Scania Streamline 143H

On the 009 narrow gauge layout some work with mounting board has set the road out and the area of the pavement and adjoining plots for the properties. 

009 gauge layout

I also dug out the petrol pumps which came with the Dapol Service Station kit and started painting these up ready for the forecourt. 

Dapol Service Station

Luckily the 00 gauge motorists will never see the £1.60 a litre that we pay currently and indeed would not even know what a litre was as they still live in a land of gallons where that sort of money would fill your tank!

Tuesday, February 22, 2022

Every cloud has a silver lining!

At the Rocks by Rail Museum today was another day of ballast washing. I seem to spend more time washing ballast at the Museum then washing clothes at home as Mrs. Woody would no doubt highlight. However we had to have a break. The clouds unleashed a deluge of rain forcing me to seek shelter in the workshop. 

Rocks by Rail Museum

Rocks by Rail Museum

Although I do walk through the building on a regular basis I never really have had the time for a good look round. That is where the silver lining came in as the cloud now gave me the opportunity whilst sheltering from what was turning into near vertical rain. The whole building has that look of 50 or 60 years ago and that is so well demonstrated by this work bench.

Rocks by Rail Museum

In this day and age of engineering most workshops look more like operating theaters.

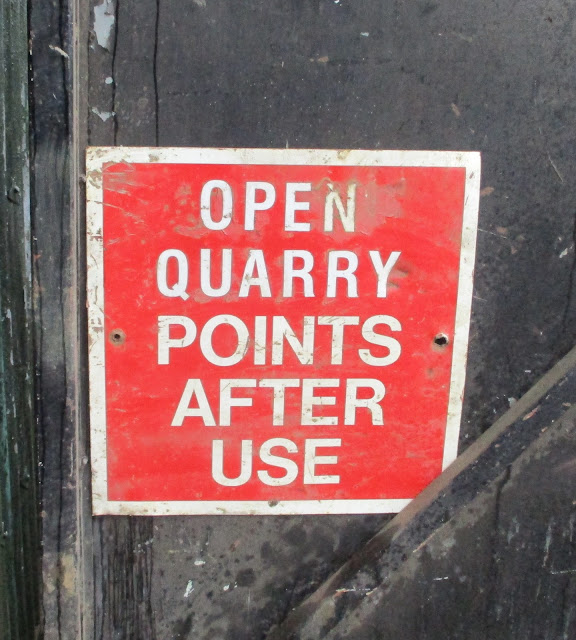
There are also a lot of signs which highlight the totally different times railways operated in years ago.

Rocks by Rail Museum

Rocks by Rail Museum

Rocks by Rail Museum

Rocks by Rail Museum

Before I knew it the rain had subsided and it was time to get back to the washing!

Monday, February 21, 2022

Cleaning up to see things more clearly!

One of those days when I was in the right mood to have a clean up. So many of those 'might come in useful one day' items that I have collected over the years and clutter the house went in the recycling or waste bins. Although Mrs. W will still find all sorts of items to question as to the relevance of their presence in the house I felt satisfied with my efforts and I could indeed see things more clearly like the dust that will no doubt be subject of a 'you could always do some dusting if you have a few minutes' comment from Mrs. W. I will await!

That cleaning mood also went into my Man Cave AKA The Room of Gloom where a good clear out saw useless items meet their friends from the house in the relevant bins. It still looks untidy but a lot less than a few hours ago. In addition I also needed to clear up after the static grass session yesterday - that stuff goes everywhere! In clearing up I also rediscovered the road section I had roughly cut out last year for the 009 narrow gauge layout so this went on the layout. With that in place I had a few minutes placing the buildings in a seemingly pleasing layout - to me anyway!. Although not any real modelling today the layout is looking a bit more organised so I can see more clearly what needs doing - dust included!

009 gauge layout

009 gauge layout

009 gauge layout

009 gauge layout


Sunday, February 20, 2022

Making it green!

As we batten down the hatches here in the UK for Storm Franklin, which will be the third storm in five days, I decided it was time to brighten my life having got soaked on this mornings bike ride, by making things a bit green. Although I try my best to be environmentally friendly, this making it green refers to grassing some of my 009narrow gauge layout. I thought that this would be a visual boost in the work on that layout and as Mrs. Woody had decided (I know my place) we were having a quiet day in then the opportunity was too good to miss. 

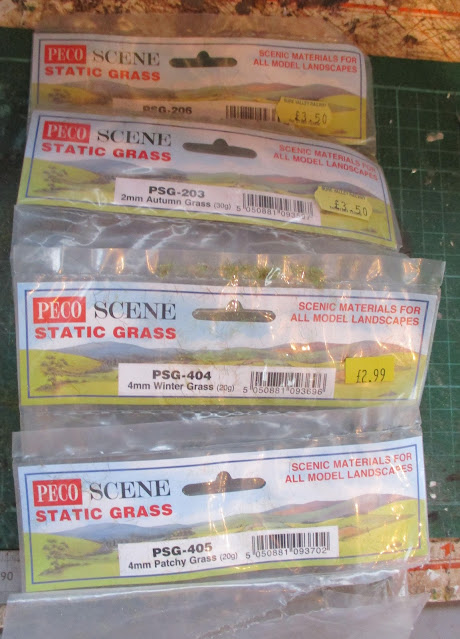
Whereas back in the 70's and 80's model grass was mainly created using dyed saw dust or for the more adventurous dyed lint which had an art all of itself to look realistic todays modeller has a vast array of more realistic products. Static grass has been around for a few years now and it has revolutionised modelling green areas. The grass is made up of nylon fibers which come in an assortment of lengths and colours. It is all to easy to fall into the trap of modelling grass as though it were some Alpine grass meadow in the full flight of summer growth with lots of sun and rain producing a vivid bright green. Here in the UK most grass in the countryside is a mix of grasses of a much more subdued pallet of greens. My chosen shades of green were four varieties, Winter Green, Autumn Green, Patchy Grass and Dead Grass! All by Peco and a mix of 2mm and 4mm in length so about a scale 6 to 12 inches long. This was not going to be a manicured lawn!
 

009 gauge layout

The rea to be grassed is by the river and I also wanted some trees there as well. Luckily WMD Stores had three Woodland Scenics trees of a suitable size in stock. These were brought out, tested for position and then the bases glued to the base board.

009 gauge layout

009 gauge layout

Now it was time to apply the static grass using a Peco applicator. This has a 9volt battery which is used to produce a charge to the sieve at the bottom of the hopper where the static grass is stored and shaken out of. The electrical circuit is completed by an earth wire which is placed into the glue which is applied to the surface to be grassed. As it leaves the hopper the static grass fibers become electrically charged and in effect land in the glue standing up therefore looking like individual blades of grass. Just don't touch the sieve of the applicator whilst the power is on as it gives a big jolt to you just like one of those electrical fly swats - don't ask how I know!

When I first bought the applicator I was persuaded to part with £9 for a bottle of 'special' Peco glue which was supposed to be conductive of electricity. Somewhat unconvinced about this supposed characteristic I used it and it worked well. I was also soon to be taught just how conductive it was. Having got some glue on my fingers I though no more about it until I used my tablet just after finishing the grassing. The touch screen of the tablet went crazy and it was the glue and its electrical conductivity that was doing it. Lesson learnt - wash hands straight after work!

Moving back to the layout the grass application is reasonably quick and soon shows results which is nice.

009 gauge layout

Once the glue dries, which is not very long, a small handheld vacuum cleaner is used to suck up the fibers which went wide of the glue. These are then used again where there is a need for reapplication.

009 gauge layout

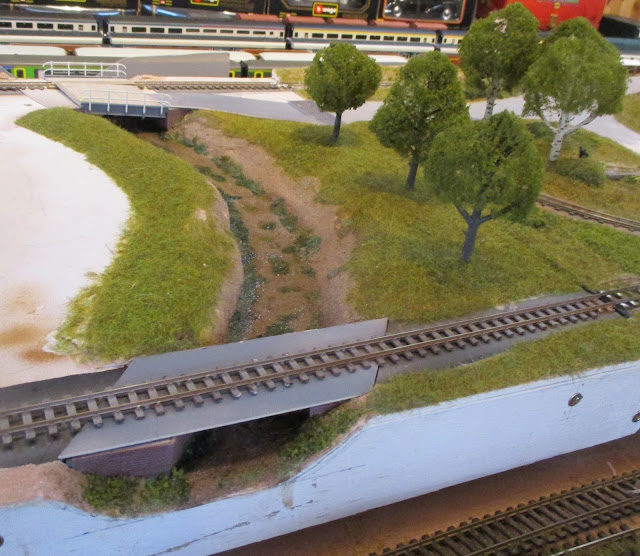
After an hour or so of doing by the river and behind the two huts on rthe canal wharf it looks like this.

009 gauge layout

009 gauge layout

009 gauge layout

There is still further work to do adding some more foliage but it does look a lot better than bare baseboard.

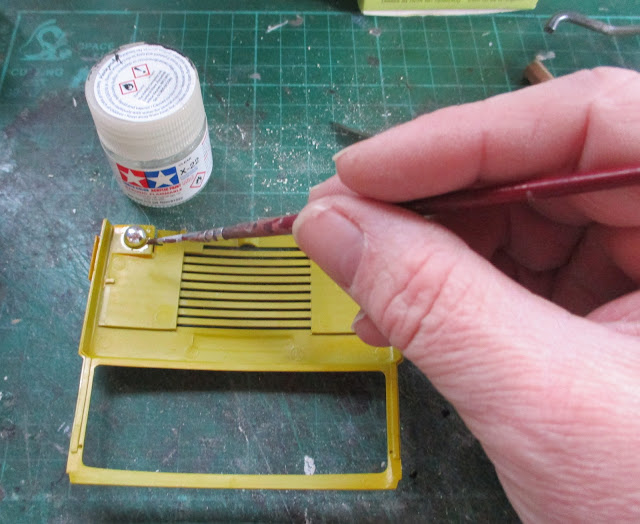
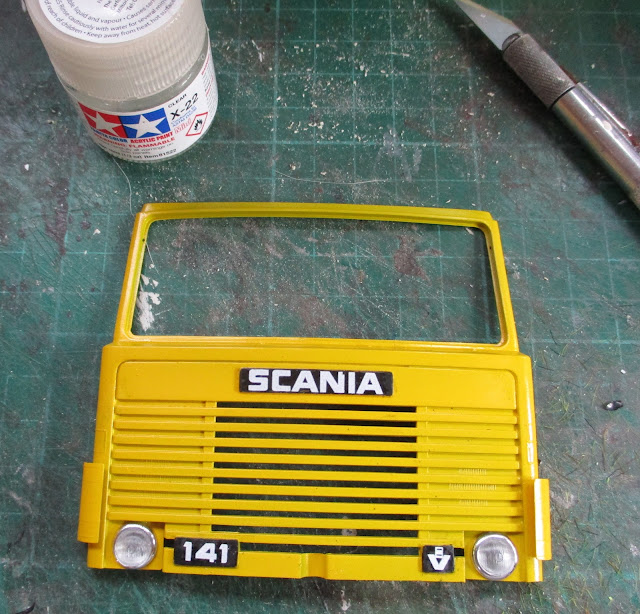
I even found time to add the headlight units to the front cab panel of the Scania 141LB. I used varnish to 'glue' these in which made the job nice and easy - working smarter not harder as I get older!

Heller Scania 141 LB

Heller Scania 141 LB

Hopefully Storm Franklin will leave as quickly as it came and we can get into some warmer weather when the grass gets green and grows!