Search this blog

Tuesday, November 15, 2022

Time to reflect.

Ever since last night when I had finished the plastering of the valley sides I had a thought in the back of my mind that I had missed something. As Mrs. Woody was off today as well we had a day out where I had time to reflect on that thought. 

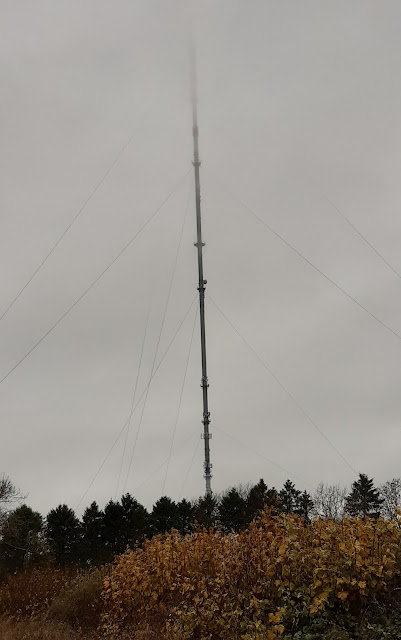
It was a wet and misty day so much so that the top of this TV transmitter mast was invisible in the low lying cloud. A bit like my mind at that time!


Waltham TV mast

We eventually ended up at another garden center attached to a gift shop! Almost Ground Hog day after yesterday. My eye was however caught by a couple of things. This old child's Raleigh tricycle was just parked in the garden center. It probably dates from the 50's/60's and had a magical patina about it displaying that it had provided hours of fun to its previous owners. 

Raliegh child's tricycle

Raliegh child's tricycle

In the car park was this modern VW van or Dub as I believe such things are known in the VW world hence the number plates relevance.

VW Woody dub

However getting closer I knew why it had attracted me - Woody!  Maybe a sign my mind was clearing?

VW Woody dub

Mrs. Woody and me had a purchesless (that amazed me) perusal of the rest of the garden center which was great for my wallet before returning to WMD HQ.  

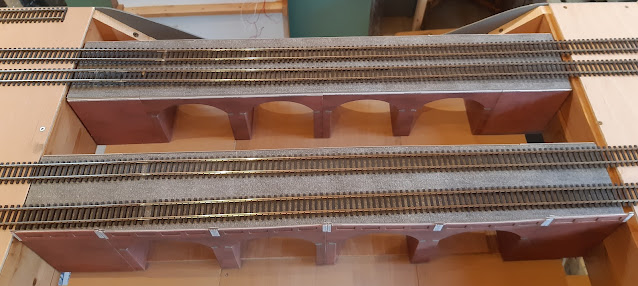
Having had time to reflect on what I had missed on the valley sides I realised i needed to move both viaducts closer to the outside edge of the baseboard. Why? Well I need to put two platforms for the station on the rear most board. Having concentrated on the opposite board I had totally forgotten to check that all was OK on the back board. At present there is room for two 4cm wide platforms or in real size 10 feet/3m. That is not very wide and given the platforms will be about 6 foot/2m long they would look strange.

THe platforms will go between the second and third tracks from the right of the picture and the fourth and fifth tracks.

My Last Great Project

Distance between tracks 2 and 3.

My Last Great Project

Distance between tracks 4 and 5.

My Last Great Project

On the opposite board I have about 7.5cm between the track and the edge of the baseboard so I can gain about 4 cm if I revise the landscape and move the viaducts over.

My Last Great Project

That will give me an extra 2cm for each platform bringing their width in real life to a more realistic 15 foot/4.8m. Whilst this will mean there is some undoing of some of my work done so far it is much better to discover at this stage then in a few weeks time when the destruction element would be much greater. Reflection and time for it, even if it means going to a garden center, can indeed be a good thing!
Monday, November 14, 2022

Racing Santas!

Mrs. Woody was at home today so we had a look round a local garden center which as is the case these days is more akin to a gift shop with a garden center attached. They had a lot of Christmas stock in and much as I could ignore the fancy Christmas trees with all the trimmings, the motorised reindeer and singing snowmen this did catch my eye.

Racing Santas

The Santas are lifted up the elevator to then roll down the roller coaster track. Hypnotically simple but pleases my mind which probably explains a lot!

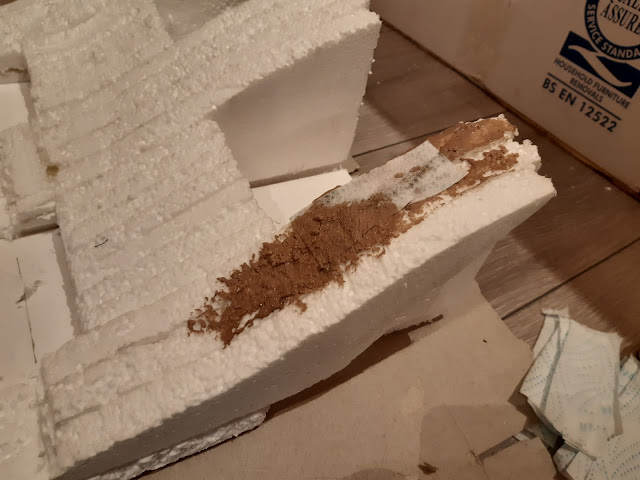
Back at WMD HQ I started to plaster the valley sides on my 00 gauge Last Great Project layout. A mix of plaster and brown paint was made up (the brown paint colours the plaster so if it ever cracks or chips it shows brown rather than white) and strips of paper towel cut.

My Last Great Project,

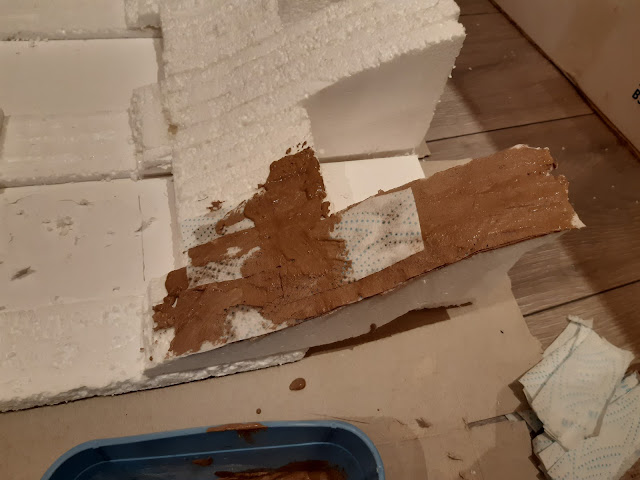
The plaster was then painted onto the polystyrene and then the paper towel strips added.

My Last Great Project,

More plaster was painted on top of the paper towel and so it went on...

My Last Great Project,

...until it was all covered.

My Last Great Project,

Just have to wait for it to dry out now. I'm just wondering now whether I could incorporate one of those Racing Santa set ups into this scene??????

Sunday, November 13, 2022

Mixed up World.

I had to remind myself that today is the 13th November as I did some work in the garden today. Normally at this time of year the flowering bedding plants are dead and the other plants have gone into their Winter hibernation. I have more colour in the way of flowers now then I had in the Summer drought. These flower beds should be barren by now.

Gardening

Gardening

Yes, it is a mixed up World at the moment! However I can isolate myself, unless Mrs. Woody decides other wise, to the World of my Man Cave where although things are mixed up it is me doing the mixing!

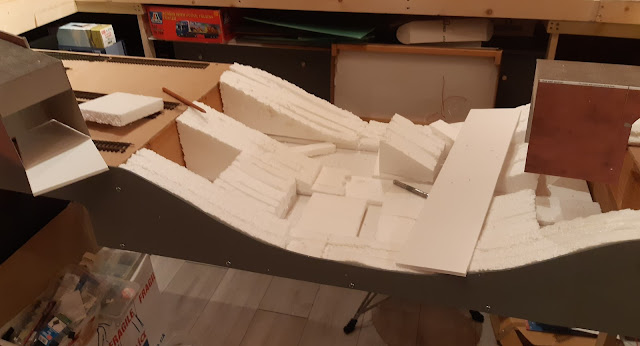
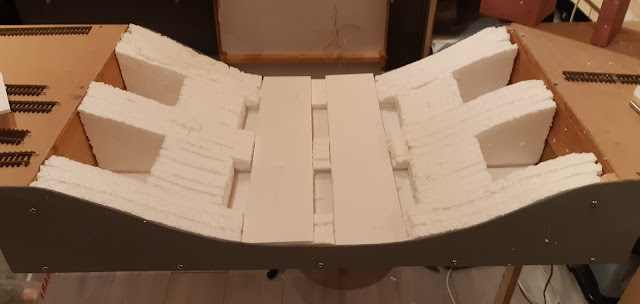
Following on from yesterday when I had completed the landscape profiles for the valley sides around the viaducts I spent today dismantling most of it so that I could fully glue it all together. 

My Last Great Project

However it all comes together with the middle part now having a flat base for a road/lane and canal/river.

My Last Great Project

The viaducts slot into the gaps which at the moment makes the next stage of covering the polystyrene with paper towel soaked in plaster a lot easier. That will come in the next few days - hopefully!

My Last Great Project

My Last Great Project

Despite my previous success at keeping the mess of working with polystyrene to a minimum today in my mixed up World, there was a lot of mess!

My Last Great Project

 Oh well, it will clean up! Just a good job it is in my Man Cave and not the house!

Saturday, November 12, 2022

Infilling.

It is slow progress but the polystyrene formers for the valley sides are just about done on my 00 gauge layout. All that was left to do was infill the arches of the two viaducts. Using the templets that I had made from the Cornflake box (other cereals for your breakfast delight are available) to cut the main valley sides I was able to get more or less the right profile. Luckily I found the bread knife!

My Last Great Project,

The two middle arches need a little more work on the profiles but I have ideas in my mind (never a good sign as Mrs. Woody would say) for a canal/river and road/lane so that will probably develop over the next few days.

My Last Great Project,

That train in the background is a Hornby model of Northern Rail's Royal Air Force 100th Anniversary Class 156 DMU. A fantastic model of the real thing and with a real relevance to me as my Dad spent most of his working life in the RAF.

Hornby Northern Rail RAF Class 156

I bought this back in 2020 during the pandemic and recall thinking whether Hornby and other manufactures would ever produce more models. At the time I don't think any of us really knew what the future would hold.

Hornby Northern Rail RAF Class 156

It looks good in its box and but its even better on the layout which is where models really belong.

Hornby Northern Rail RAF Class 156

Better get that bread knife back to where it belongs or Mrs. W will be infilling me!

Friday, November 11, 2022

Hot Stuff!

Not that Mrs. woody thinks I am hot stuff but my hot glue gun is indeed hot stuff even if I am not. These glue guns are brilliant as long as you don't get the hot glue on you! Yes, I have found that out the painful way! Used properly and in my case probably best under the supervision of a responsible adult, they provide almost instantaneous and strong adhesion of the parts being glued. This was just what I needed to glue the polystyrene parts together making up the valley sides on my dropped baseboard section.

My Last Great Project

A bread knife makes a great cutting tool for polystyrene. Luckily I got this back into the kitchen before Mrs. Woody had missed it so as long as she does not read this I have got away with it! Only thing is I can't find it now!

Using the glue gun I soon had parts glued together. No need to be too neat just as long as the top is the rightish shape and it is all solid.

My Last Great Project

I just need to add the parts under the arches but the overall landscape is showing its shape.

My Last Great Project

My Last Great Project

My Last Great Project

Better get some dinner ready - now where is that bread knife???? If I don't find it I could well be in hot water and really become hot stuff!

Thursday, November 10, 2022

Cornflake time!

My Last Great Project,

What have Cornflakes to do with model making you may well be asking. Well the Cornflakes themselves are a delicious breakfast cereal or indeed any other time of the day snack but for me the box has uses other than containing the aforementioned cereal. A source of cardboard which in my more impoverished days of model making served as a raw material for making buildings. Today I tend to use mounting card which a £2 a sheet - well it was the last time I bought some last year but has probably gone up since then - provides a good quality card. However where the card is sacrificial in a project I still turn to the likes of a Cornflakes box - a nice 1kg one is nice and large. Good job I like these cereals!

In my case I have moved on with My Last Great Project layout to start to build the valley sides on the dropped section of baseboard. Polystyrene is my choice of infill material and I have a couple of sheets of it as outlined yesterday. This will be covered with a mix of wall filler and paper towel but first I need to get it to near enough the right shape. Having thought about this and in line with my  'Working smarter not harder' philosophy I decided that it would be useful to make a templet of the valley sides which would enable me to cut the sheets to the right shape. Given the mess that cutting polystyrene can make with all those spheres through the wonders of static electricity, attaching themselves to anything nearby namely me (must be my electric personality or as Mrs. Woody would say more likely to my static personality!) minimising cutting means less mess. 

Templets were made and the first polystyrene profiles cut.

My Last Great Project,

Although I am only about a third of the way through the cutting process the mess was reasonably minimal.

My Last Great Project,

Although only part way through things are beginning to take shape. I will need to infill the arches with smaller profiles.

My Last Great Project,

With continually lifing the track it has come out of alignment but once all the landscaping is done I will put it back as it should be ready for ballasting - that is some time off yet though!


My Last Great Project,

Time to make Mrs. W's dinner. Wonder if she would appreciate a bowl of Cornflakes?????

Wednesday, November 9, 2022

Levelling up!

With my 00 gauge Last Great Project layout being built in sections (I discussed the reasons why back in my post on the 18 March 2021 available here ) I need to have a way to ensure that the joins at the four baseboards and level and flat. Fairly easy for three of them. I can just bolt them together. For the dropped section though is little more difficult as I need to be able to lift it out for when my body can no longer duck under it to gain access to the middle of the layout. In other words as Mrs. Woody would say I need to future proof for when I get old and decrepit although in her view I am already there! 

My mind has mulled on various solutions to ensure that the board is held fast in both vertical and horizontal planes. All sorts of complex solutions went through my mind but eventually the simplest solution came to the fore. Screws and slots!

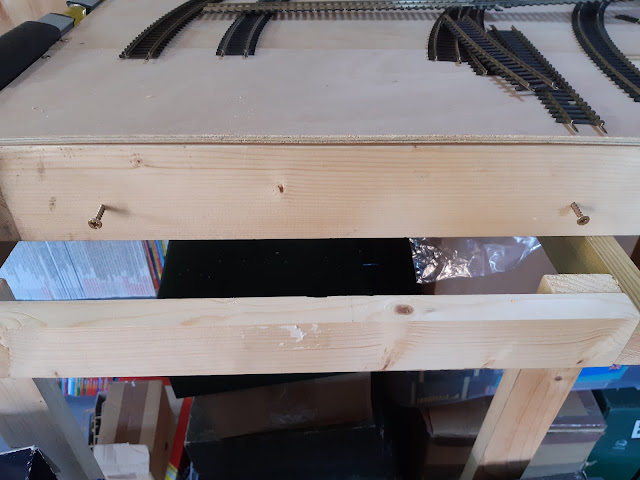
I used some G clamps to get the board level with its neighboughs and then drilled tow holes through the end boards at each end. Screws were fastened in that went through to the neighboring board as arrowed in the photo below.

My Last Great Project

Having taken the screws out again and then moving the dropped section out of way the screws were put back into the neighbouring boards leaving them sticking out by the thickness of the wooden cross batten.

My Last Great Project

I then cut slots into the dropped board cross battens.

My Last Great Project

THe dropped board was then put back into place where the slots in the cross battens engaged with the srews in the neighbouring cross battens and the board was level and held in place. Nice!

My Last Great Project

I also started the landscaping of the viaduct section by putting a base of polystyrene sheet into place.

My Last Great Project

Next stage is to start the valley sides which will be far from level!


Tuesday, November 8, 2022

Cutting back.

Much as Mrs. Woody would like to see me cut back on spending this cutting back relates to my day at The Rocks By Rail Museum. Following on from last week my battles with nature continued as I cut back more bushes and hedges that have narrowed some paths. Slowly I am winning the battle although it will grow back next year but that is something for Future Woody to deal with. I don't envy that guy!

In my inevitable way before and after photos show my vegetation butchery!

Rocks by Rail Museum,

Rocks by Rail Museum,

Meanwhile in the restoration shed where I visited whilst it was raining, Rob was tackling the broken step on Harriot the JCB. I have no idea where the name originates from but it sort of suits this JCB! Much rust cut back, much new metal, welding and grinding are taking place so the new step will probably outlast the rest of Harriot!

Rocks by Rail Museum,

Rocks by Rail Museum,

Rocks by Rail Museum,

Rocks by Rail Museum,

Back at WMD HQ I have managed to do a bit more on the Metcalfe Viaduct kits and one now has the basic parapets in place. I need to do some fettling before adding the various coping stones but it is looking good!

Metcalfe Viaduct Kit,

After this busy day I won't be cutting back on my dinner tonight although I do have to cook it!


Monday, November 7, 2022

Putting a bed in the viaduct!

The Metcalfe viaduct now has a track bed. Yesterday I sealed the underside of the track bed pieces with a sanding sealer which waterproofs the cardboard. Today I did the upper side just to make sure it really is all sealed. Once dry it was time to fasten the various sheets to the main structure of the viaduct. There were one or two places where joins needed a bit of reinforcing with scrap cardboard.

Metcalfe Viaduct Kit

Metcalfe Viaduct Kit

Once the sheets were glued in place things looked a lot better. These may only be small steps but at least this project is moving forward. 

Metcalfe Viaduct Kit

Next stage is to get the various parapets and coping stones in place. In my tidying and sorting of the garage (hope you read that Mrs. Woody!) I did uncover these polystyrene sheets which I saved from a delivery of something or other which Mrs. W no doubt ordered! However it should be good to create some landscape around the viaduct when I get to that stage. 

Metcalfe Viaduct Kit

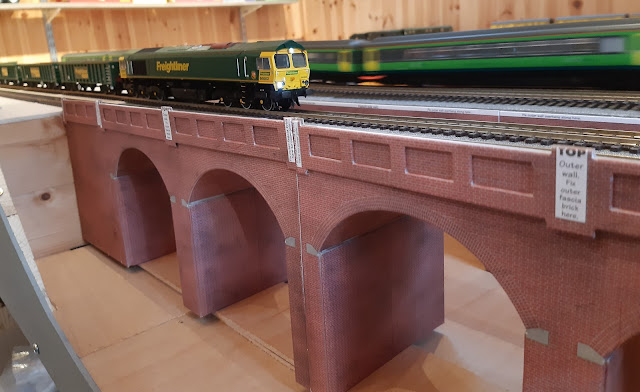
However it was now time to run a few trains! I do like this picture below - somehow I managed to get the impression of speed with the passing DMU in the background. No idea how I did it so it will probably ne a one off picture! The parapets are only temporarily in place.

Metcalfe Viaduct Kit

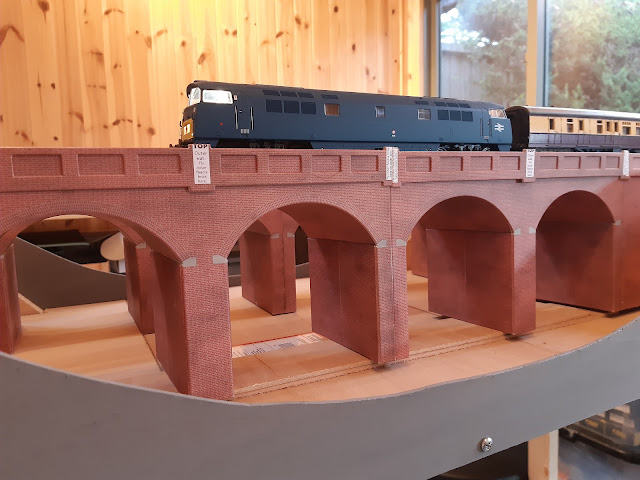
A bit later this class52 Western travels in the opposite direction.

Metcalfe Viaduct Kit

I must admit to feeling shattered today so I will be looking forward to putting myself in bed tonight!


Sunday, November 6, 2022

Cold morning for cycling but I break a record!

It was cold this morning - very cold as my kneecaps can testify as I cycled this morning. However I was warmed by the fact that my total mileage for this year so far has ended up at 5556 miles which is a record for me in my later years of life. Not done that kind of mileage since the times I could get out of bed without creaking! Last years grand total was 5544 so with eight weeks of the year left I may, health and weather allowing, get to 6000 miles which would be a record I would like to get to.

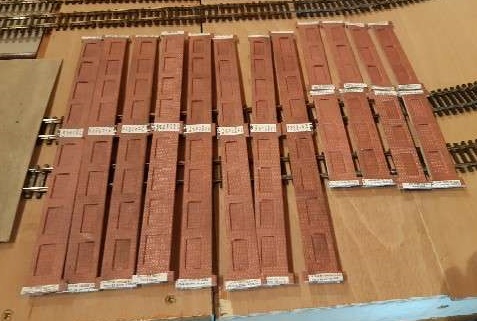
Back in the relative warmth of the WMD HQ I had an hour or so doing some more on the viaducts for my 00 gauge Last Great Project. I have now managed to finish the various parapet wall sections that go either side of the main structure. A bit of a boring and repetitive job but it is now at least done.

Metcalfe Viaduct Kit

I also had a look at the track bases for the viaduct. The track will be ballasted once I get to that stage so there will be diluted PVA glue used. This is great for gluing ballast down but not so good for cardboard which can turn a rather soggy mess. Trying to think ahead, which is alien to me in most cases, I need to seal the surface of the track base. I used the sanding sealer that I used for the balsa canal boats that I built for my 009 narrow gauge layout (which is still undergoing construction). This should at least act as a waterproof coating keeping the viaduct from  ending up as a water infested collapsed cardboard hulk! That is the theory at least.

Metcalfe Viaduct Kit

The various parts awaiting the next stage of construction. I will however have to paint the other side of the track base to ensure they are fully sealed and waterproof.

Metcalfe Viaduct Kit