Search this blog

Saturday, January 6, 2024

Getting a hand on waiting for glue to dry!

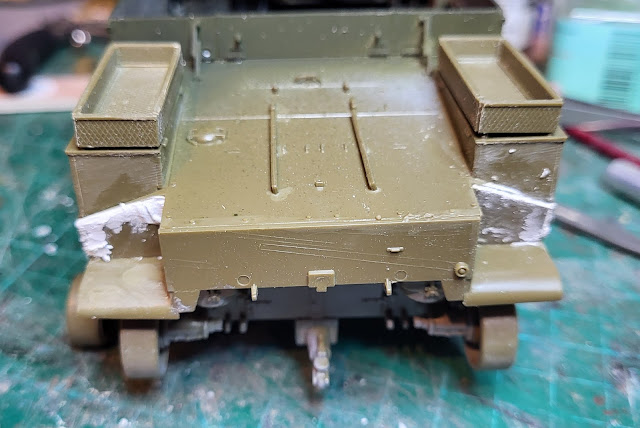
One of those inevitable events in building a model making in that there will be a time when you have to wait for the glue to dry. Usually not a problem as there are always other things to do like the jobs on Mrs. Woody's list for me to do! However, in gluing the upper and lower hull parts together of the Italeri Kangaroo APC, due to the slight bow in the lower hull, I couldn't just glue and leave it to set. I had to actually hold it together with my hands in the right place until the joint was strong enough to allow the two parts to be joined together as they should without resorting to the original bowed shape. The shape of the parts was such that clamps, elastic bands, tape or indeed weighty objects were of no use in holding the parts together so I just had to sit there for an hour or so listened to the radio whilst the glue did its job. 

I must admit that the join was actually better then I thought it would be but I have spatulared some filler over the join which once set and sanded back should provide a seamless join!
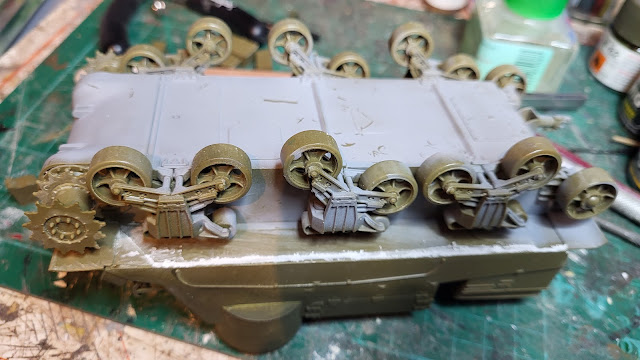
Italeri Kangaroo APC

At the rear of the hull I had to layer on the filler a bit thicker as the join between the two parts was not that great. It could be down to the jit design or more likely my poor abilities! Never the less, once dry and sanded it will all look a lot better.

Italeri Kangaroo APC

Better get my hand in at sanding now!

Friday, January 5, 2024

Weathering or petina?

Much as Mrs. Woody says I am weathered as I grow older, I like to think of it more as gaining a patina as they seem to say on many of the restoration programes on TV these days! In the case of the Italeri Kangaroo APC build the interior didn't have any patina or weathering following my earlier painting so I had to add some before I finally glue the upper and lower hull parts together. I could have done the work with the two halves glued together but it was just easier to access everything with them apart. Working smarter not harder as I get older even if I am weathered!

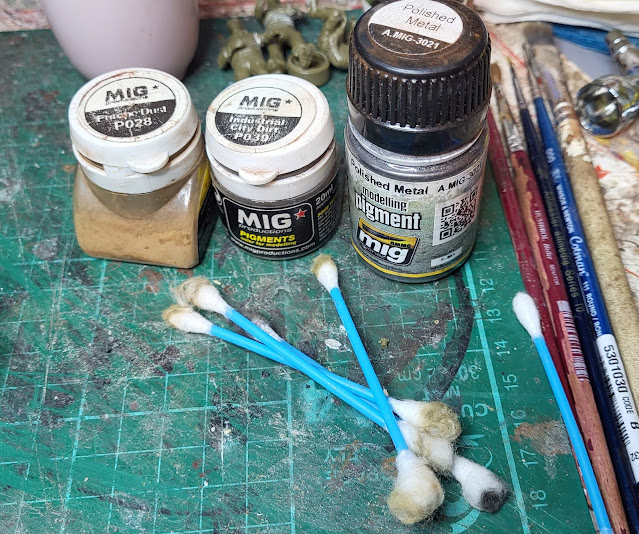
My weathering/patina creating was down to these powders applied with a soft brush and then streaked by using the cotton buds in a downward motion on the vertical surfaces and in  random circular pattern on the floor. The polished metal pigment was used on the floor areas as the material used in the vehicle is a chequered plate. The upper parts of the chequer pattern would have the paint worn off by being walked on and a polished surface would result unless left for a long period when rust would form. However, lets not get too complicated! 

Italeri Kangaroo APC

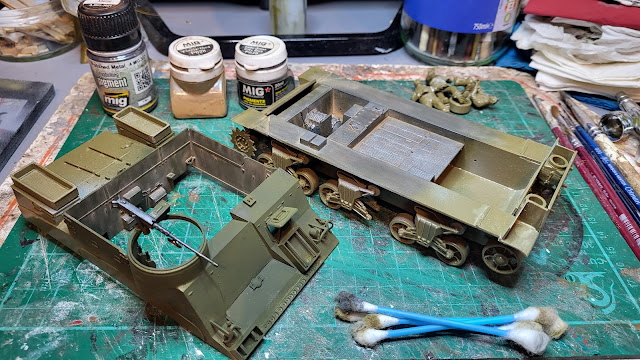
After a couple of hours this is what the two parts looked like.

Italeri Kangaroo APC

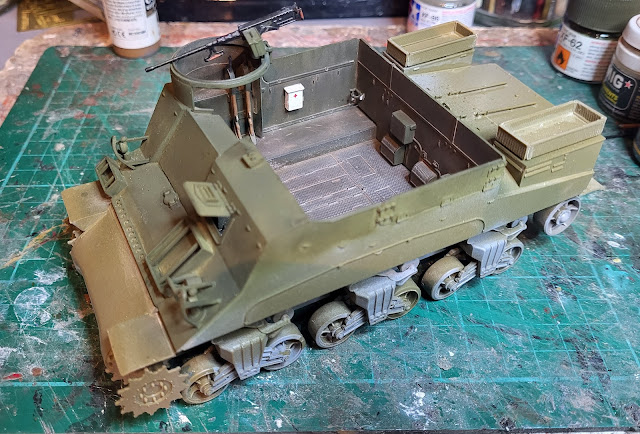
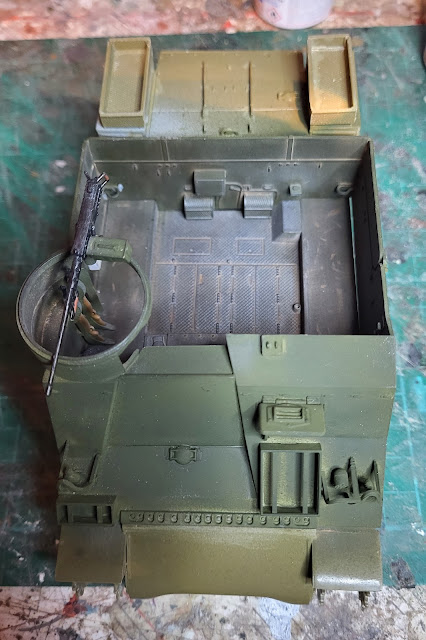
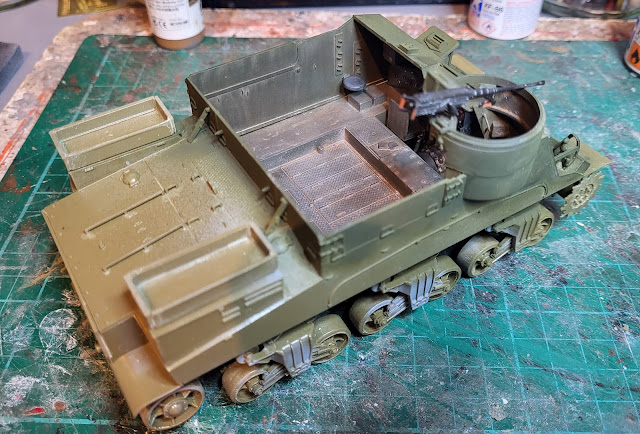
With the application of a coat of matt varnish to seal in the powders the interior is looking ....weathered or patinaed depending on your preference!

Italeri Kangaroo APC

Italeri Kangaroo APC

Italeri Kangaroo APC

Italeri Kangaroo APC

Once permeantly glued together the exterior can be painted, decaled and then weathered/patinaed!

Thursday, January 4, 2024

'Figures not included' or are they?

 After the flooding events of the last few days it was a pleasant relief just t sit in the Man Cave for a couple of hours and loose myself in the Italeri Kangaroo APC. That couple of hours allowed me to paint up a few of the details that are needed for the internal part of the vehicle as well as the two machine guns that are mounted on top of the hull. In addition, despite the kit box stating that 'figures not included', there are in fact three, seven part figures as well as a mortar and various kit bags included on one of the sprues. Not one to look a gift horse, or even a figure or three, in the mouth, I decided that I need to improve (drastically) my abilities to both construct and paint figures so I have started to put them together. If they come out OK they will be of use in some project and if I fail in doing an acceptable job they can go into 'Need to improve' container AKA the recycling bin!

The photos below show the painted internal hull, the figures, the machine guns, the radio and the dashboard for the driver. The dashboard is a decal that came with the kit and probably makes a better job of presenting the dials and switches then my painting of the moulded details could. I smoothed off the raised details to make applying the decal easier which it did. The radio however had no decal so I had to carefully paint the raised details and I think I did a reasonable job.


Italeri Kangaroo APC

The drivers seat is now painted and glued in position - not a comfy looking item though!

Italeri Kangaroo APC

The figures, although reasonably detailed, were not the best fitting in the join of the various limbs. I used acrylic putty to fill the joints. How successful that has been will be shown once I prime them.

Italeri Kangaroo APC

The machine gun is a nice moulding and with some careful painting looks the part mounted on the pulpit.

Italeri Kangaroo APC

Talking of  mounting I had to look a second time when I saw Milly the cat looking as though she had been mounted on the WMD fish tank! You can almost hear her say ' Fish? What fish!' The fish are however safe under the tank cover from any unwanted feline attention!

Wednesday, January 3, 2024

Wet, wet, wet, but some painting is done!

Starting with the painting, the internal parts of the hull of the Italeri Kanagroo APC have been top coated with some Tamiya Olive drab. I ended up having to do several coats as the first was probably a bit too thinned and did not cover well. However, there is now a base layer of paint ready for the application  of further details and weathering. The details include the first aid box, the radio set, the drivers seat and the dashboard for the driver as well as some fire extinguishers.

Italeri Kangaroo APC

Most of these details have been undercoated as well as some of the tools and various boxes of cargo that will eventually go somewhere on the vehicle!

Italeri Kangaroo APC

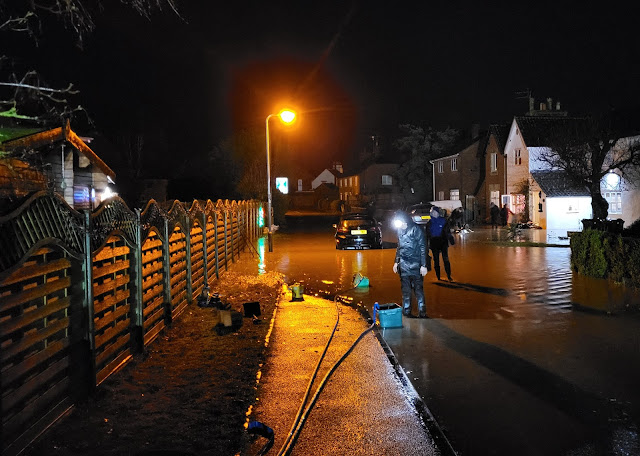
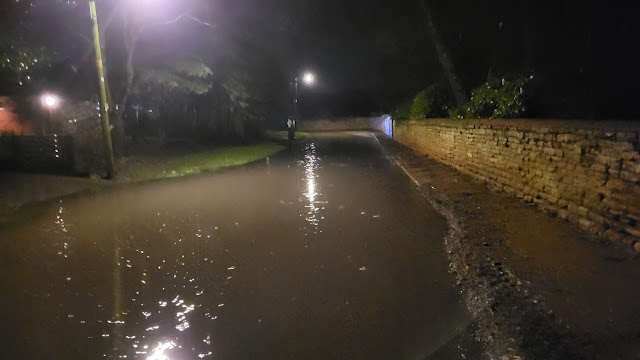
Wet, wet, wet in this case is not the band of the 90s that Mrs. Woody had a soft spot for, but like many places in the UK the wet, wet, wet was the incredible amount of rain falling on saturated ground leading to flooding. The Man Cave escaped luckily but for others near by it was not so good with internal flooding just months after the October flooding.

Flooding 2024

Flooding 2024

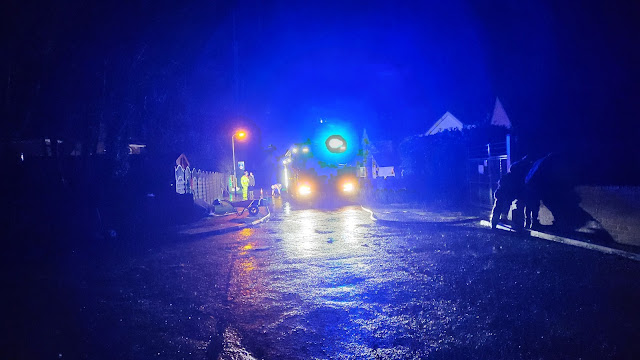
Luckily the Fire Service was able to attend and pump away some of the water. Talking to one of the crew, the pump was sucking out water at the rate of 600lts per minute. Even at that rate it took some time for the water level to go down. Just hope we have some dry weather now.

Flooding 2024


Tuesday, January 2, 2024

A short lived resolution and the cat has been fed!

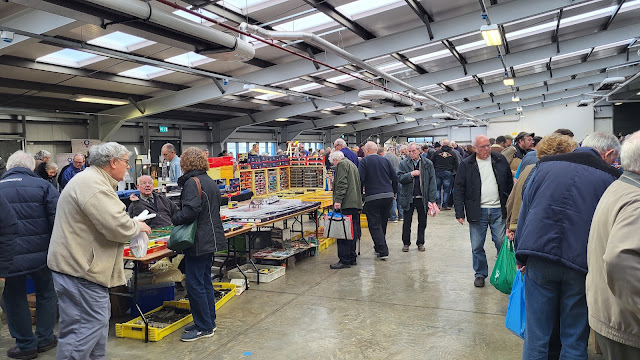
'No more kits or trains' I informed Mrs. Woody as my resolution for 2024 which I decided upon whilst doing my New Year's day bike ride. I then foolishly suggested we have a trip out - to the Newark Toy and Train Fair. Just for a look and a bit of exercise you understand! Having been before on several occassions, this years event seemed much busier when we arrived with large numbers of people carrying bags of purchases. However, as I reassured Mrs. W, that would not be the case for me!

Newark Toy and Train fair Jan 2024

Newark Toy and Train fair Jan 2024

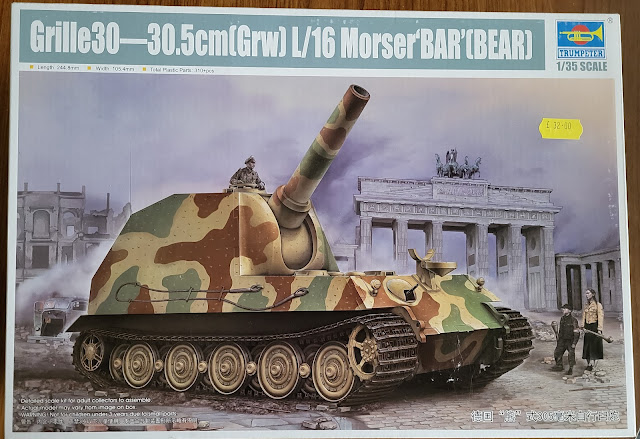
'Famous last words' came to mind regarding my newly and decidedly ill conceived and thought out resolution! There was just too much temptation! Several railway coaches at ridiculously good prices found their way into my bag - why did I take a bag if I wasn't going to buy anything???? Also I found a kit that caught my eye and ended up in the bag along with the coaches!

Trumpeter Grille30 30.5cm(Grw) L/15 Mörser "Bär",

The Grille30 was an anti tank gun with a 305mm cannon developed as a project in 1942. Based upon a modified Tiger 1 chassis and weighing 120 tons, the project never went into production but the work did influence other vehicles that did go into production such as the Sturmtiger assult gun. Should be an interesting build. Meanwhile Mrs. W, not to be out done, found a book to buy and this great sign that sums up the influence of cats at WMD HQ!

The cat has been fed

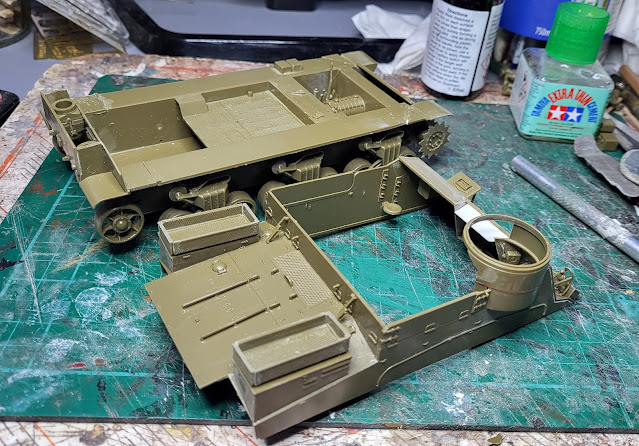
Meanwhile back at WMD HQ work on the Italeri Kangaroo APC has progressed a bit! I did realise at an early point in the build that as an open top vehicle the painting of the interior was going to be interesting! Despite being open, once the upper hull was joined to the lower hull the ability to easily paint the interior was going to be compromised. Therefore I have left the two parts unglued at the moment.

Italeri Kangaroo APC

I have primed the internal surfaces with a light grey and once dry that will get an initial top coat of a suitable green. 

Italeri Kangaroo APC

Now, whilst I wait for the paint to dry, I better go and feed that cat and make another resolution for 2024!

Sunday, December 31, 2023

Kangarooing into a New Year!

Well the Italeri kit of the Kangaroo APC will be going into the New Year still in progress (strange - a lot of my other projects are doing the same!) as 2023 draws to a close. 

Something both sad and happy about the change of year. Sad in that it is another year gone with so much still to do despite promising to get those things done and happy in that another year offers fresh opportunities to get those things done!

There has been building of the Kangaroo APC kit going on today with more of the upper hull having been completed. The lamps are on and the pulpit gun mount - if you look to the right of the vehicle the circular machine gun mount looks like a pulpit in a church. The original tanks from which these Kangaroos were created were called Priests by the British Army for that reason. With that final piece of trivia for 2023 out of the way here are a couple of photographs of where I am with this kit at the moment.

Italeri Kangaroo APC

The pulpit machine gun mount has a joint half way down it where the two parts of the kit join. In real life this would be a welded joint so I used some very fine plastic rod to cover the joint. The rod was then softened by running glue along it. I then used the back of a scalpel blade to create a welded texture in the soft plastic rod as highlighted by the red arrow in the photo below.

Italeri Kangaroo APC

If you are reading this on the 31 December 2023 then I hope you have a good evening and see 2024 in with some comfort and hope!

Saturday, December 30, 2023

Famous last words!

In my last post I did say that 'hopefully there will be no parts to loose or break' as I build the upper hull. These were indeed famous last words to that post as on commencing work again on the inside fitments to the upper hull, I managed to loose a handle that should have been glued to a cabinet near to the drivers position. Oh well! It had to happen! Luckily I had some fine brass wire that was bent to the shape and size that I remembered before the plastic part sailed off into the distant parts of the Man Cave. Two holes drilled into the cabinet and some superglue saw the brass handle in place.

Italeri Kangaroo APC


With this small matter resolved I was able to get the four parts of the upper hull glued together. Not the best fitting parts to each other but nothing that some filler can not cure! I still actually need to glue th upper hull to the lower but as I still have some internal parts to fit I will leave the gluing until those are fitted.

Italeri Kangaroo APC

 Now, as my famous last words appear to become true, I will say 'this kit should be finished by next week'! Then again maybe not!

Friday, December 29, 2023

Wheels on!

After only a few hours of building the wheels and their carriers have been glued to the hull of the Italeri Kangaroo APC. Having carefully assembles the carriers the all the wheels rotate which will make painting much easier. The two box like fittings on the rear of the hull are the sir intakes which is something never knew before building this kit. 

Italeri Kangaroo APC

Not only have I managed to keep the wheels free and rotating I also managed to keep the carriers and suspension full articulated as well. The drive and tensioner wheels also rotate which will help when being painted and also may make fitting the tracks easier. 

Italeri Kangaroo APC

With, in effect, a rolling chassis, it is now time to think about the upper hull which will bring some further life to this model. As the upper hull is open to the elements there are numerous details to add such as the two rifles in their holder on the side piece nearest the wheels. Hopefully there will be nothing too delicate parts wise for me to loose or break! Famous last words!

Italeri Kangaroo APC


Thursday, December 28, 2023

Kangaroo!

The kangaroo that I am talking about it is not the Australian mammal but actually originated in Canada as an armoured troop carrier (or APC - Armoured Personnel Carrier) modified from the M& Priest gun platform. I had an urge to glue plastic together and although I have a few projects needing finishing this kit almost fell out of the loft as I put back some Christmas wrapping paper and unused cards for next year - as I always say to Mrs. Woody, it is good to have things in stock whether it be wrapping paper or unmade kits!

Italeri Kangaroo APC

Although the kit is boxed as an Italeri product, I am sure it is a re-box of another manufactures moulds which is a common practice in the plastic kit industry. Never the less it is a detailed but relatively easy ( only three sprues) to build kit with no etched brass parts - that made me happy!

Italeri Kangaroo APC

As normal the build begins with the wheels. The wheel carriers are from the same design as those found on the more famous Sherman tank and as usual most of the construction time was centred around getting rid of mould lines - especially on those wheels.

Italeri Kangaroo APC

However after only a few hours of Man Cave time progress has been made. 

Italeri Kangaroo APC

Hopefully I won't Kangaroo on to another projevct tomorrow!