Search this blog

Thursday, June 20, 2024

Tacky Wax - A useful product.

Passing a model shop without stopping and visiting is a crime I informed Mrs. Woody as we pulled up outside such an establishment on an unplanned but coincidental diversion to said shop! I did actually want something - some Tacky Wax. I had bought a tub about 10 years ago but in the last 5 years I have been unable to find it in the chaos of the WMD Stores. Always vowing to buy another I always forget but being in the process of reorgansiing the Man Cave means I had this particular item in my mind again. Luckily the shop had one tub left plus I came away with some Evergreen square strip and some matt varnish. A fairly small haul of goodies but all needed!

Tacky Wax

So what is Tacky Wax? Well it is a wax like substance which enables you to place such things as figures on your layout but because unlike a glue it never sets hard you can move the figure easily and relocate it. My crude experiment shows that the wax does indeed hold. 

Tacky Wax

Tacky Wax

Having bought this tub I can almost be certain that the one I have searched for during the last 5 years will turn up shortly! 

Wednesday, June 19, 2024

The final piece!

Well the final piece of the Man Cave reorganisation is built! From the pile of wood in yesterdays post this began to emerge.

Man Cave

Built from scrap timber lying about the sides are two floor boards that have been in the garage for about 25 years and the cross pieces are from some timber a neighbour was putting in a skip before I asked if I could have it! It may look a bit  rough but unfortunately my electric sander  decided it had had enough and with a puff of smoke it ceased to function! I will be sanding it down and like the other two tables/trolleys built over the last few days it will be painted grey. I just needed to prove the overall concepts of what I was building before getting the paint out!

So what is this final piece? Well I inherited a number of diecast cars from my Dad. In fact I had bought him many of them. With the chaos of my Man Cave they were mostly hidden away so this, for want of a better description, display rack will at least get them out in the open where I can see them.

Man Cave

I think it works well! Given that all the things I have built over the last few days are from stock with nothing bought it has also been very economical - just in case Mrs. Woody is reading this!

Now it is time to sort out what is left lying about and have a good clean up and then I might actually get back to some model making!


Tuesday, June 18, 2024

It is coming together!

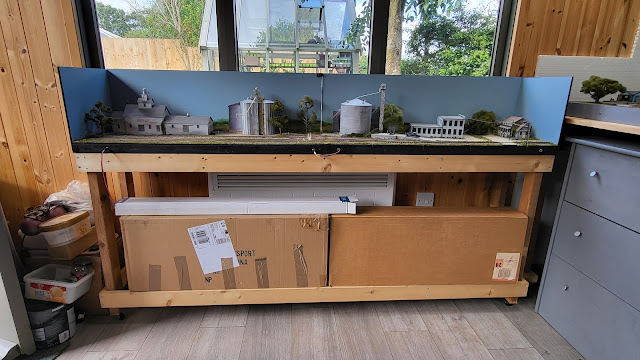
Slowly from the ruins things are taking shape in the Man Cave. Another table/trolley constructed today to place my USA switching layout on.


Man Cave,

 It is on castors so it can be pulled clear of the heater in Winter - if Mrs. Woody allows me to switch it on! 

Man Cave,

With Chalkdon in place as well there is certainly more floor space which is what I am aiming for.

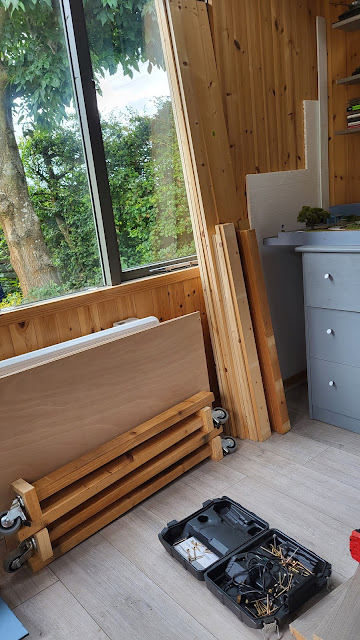
There is a final piece in the jigsaw and this pile of wood will form it.

Man Cave,

Stay tuned to see what I can create out of it and if it really does come together!

Monday, June 17, 2024

Making space!

As work progresses on my Man Cave reorganisation I have rebuilt the former trolley/table holding Chalkdon and my USA switching layouts to a smaller configuration to hold just Chalkdon. Once the whole reorganisation is complete it will make sense - mainly to me I hope - but there should be more space!

First off I dismantled the old trolley/table into its component parts.


Man Cave

With the parts a new trolley/table was constructed and Chalkdon has a new home!

Man Cave

There is a lot more to do but I have created some space!

Sunday, June 16, 2024

3D Printed Crane finished!

Sometimes you just have to take a moment and look in wonder! Yesterdays view was stunning, but no finding that pot of gold at the end of the rainbow even though it looked just a few hundred yards from my vantage point!

Rainbow
 

Maybe if I had a crane I could lift myself to the end! And talking of cranes, despite the continued mess in the reorganisation of the Man Cave, I did manage to finish the 3D printed crane! First off was to colour in the bricks of the plinth using my various coloured pencils.

3D printed crane

Then the crane was treated to a wash of Citadel's Nulin oil which I had found during my reorganisation!

3D printed crane

Once that was dry it was time for some rust and dust weathering powders to be applied with a soft brush to both the crane and plinth.

3D printed crane

Once that was done the plinth and crane were treated to a coat of matt varnish. After that I just highlighted some of the edges of the crane with a dry brushing of gunmetal grey which just makes the detail stand out a bit more. I think it looks good!

3D printed crane

3D printed crane


Saturday, June 15, 2024

I fought the lawn and the lawn almost won!

Thursday at the Rocks by Rail Museum was a day where my battle with the grass was nearly lost with the mower breaking! The front wheels are driven and they pull the mower forward. Well they did until the mower stopped suddenly. Investigating I could turn the wheels 355 degrees in either direction but then they would jam. Time for the tools to come out!

Cover for the drive belt off , wheel off - no going back now!

Rocks by Rail Museum

The ever resourceful John gave me an airline to clean the parts up.

Rocks by Rail Museum

With the muck air blasted out of the way the culprit was discovered. A small stone had got between two of the gear teeth preventing the gear turning. Flicked out with a screwdriver all was well.

Rocks by Rail Museum

A through testing followed and the lawn lost!

Rocks by Rail Museum

Meanwhile these tw wagons had appeared in the platform. Looks interesting and worth a closer look.

Rocks by Rail Museum

What is that poking over the top?


I think that the vegetation is wining here! No I am not going to take the mower in and cut it despite the suggestion that I should!

Rocks by Rail Museum

I later found out that the wagons had been moved to get the tool van out as the track in the platform had subsided slightly and needed packing and jacking.

Rocks by Rail Museum

The track is jacked level with a hydraulic jack and then the ballast is compacted around the sleepers to support it in that level position. Just glad I was battling the lawn and not the track!

Rocks by Rail Museum

Friday, June 14, 2024

Lucky to know Ray!

Leaving the bombsite of my Man Cave in its early stages of being moved around I had a day at the Rocks By Rail Museum. In one of those humbling moments, Ray Bennett, one of the Museums great volunteers brought in something to show us. He is a member of the Saltby Airfield History Group, the airfield being located in Leicestershire and was active as a military base between 1941 and 1948 and is still in use today as a gliding centre. Being built as part of World War 2 it has an extensive history including being the base to America’s 9th Troop Carrier Command during 1944, flying paratroopers of the US 82nd Airborne Division to Normandy as part of the liberation of Europe. With the D Day celebrations last week, members of the American military visited the airfield and in amongst other things presented Ray with a plaque for the Airfield History Group.

Rocks by Rail Museum

Rocks by Rail Museum

Despite his youthful looks, Ray is of an age where he lived through the war years and with so few left who have done that, what better person to accept the plaque. 

I am very lucky to know and volunteer with people like Ray!

There is a full run down on what went on at the airfield last weekend on the South Kesteven Website located here.


Thursday, June 13, 2024

Having a move around!

Playing in the back of my mind for some time has been a certain desire to rearrange the Man Cave. Put simply I have too much stuff but I am sure there is a better way to arrange it! So at the moment the Man Cave looks like a tornado has struck!

Man Cave,

Man Cave,

It is never easy reorganising and there is a few days work but out of the carnage will come some sense of normality - to satisfy me anyway until the next move around!

Wednesday, June 12, 2024

Cabling up!

Getting back to some actual model making and picking up on the 3D printed crane, things have moved on. Having already made a hook I needed to attach that to the crane with a cable. Now you can use cotton or a thread of some kind as the cable but they tend to curl and not look very realistic. Not great seeing your supposed heavy hook being curled upwards by the cable! So , my plan involved real cable - electrical cable!

3D printed crane

Some scrap cable was found and a suitable length cut off. The plastic sheathing was sliced off revealing the several strands of thin wire.

3D printed crane

From the bundle of wires a single strand was extracted and putting against the crane looked right.

3D printed crane

Carefully winding the strand of wire around the winding drum required patience as it needed threading through the cranes structure as well!

3D printed crane

I was going to cover the whole drum width but after 40 minutes I had enough! There was sufficient cable on the drum and enough left to attach the hook to. I had also primed the plinth that I had previously made ready to be painted up.

3D printed crane

With some spots of superglue to hold the cable in place the cable was taken over the pully at the end of the jib and the hook now hangs nice and vertical! It all needs weathering and griming up now but that is a job for another day!

3D printed crane


Tuesday, June 11, 2024

Unexpected task!

Asa with all things that get old, like me, parts occasionally fail! In this case it wasn't me that failed but the 12 volt plug on the lead out of my DCC controller to the track. It quite literally just snapped off but I guess after nearly 20 years of being pulled and bent it was going to happen. However it was an unexpected task to do in my hectic lifestyle - please note Mrs. Woody!

The problem is that these factory supplied leads are not designed to be maintained so the cover to the plug has a plastic shroud welded on. I don't have a spare plug so I was left with having to do a bodge job by slicing the shroud in half. As this is a 12v wire I am not to worried but I would not be doing this as part of a repair on the mains side of the controller.

This is the plug on the right. On the left is the heatshrink that I will used to put around the sliced through shroud.

12v Wiring

Wires soldered onto the now exposed innards to the plug.

12v Wiring

The sliced through shroud back in place but no way will it seal the innerards!

12v Wiring

Heatshrink applied and shrunk. It may not look pretty but it works!
 
12v Wiring

Now I wonder what unexpected tasks Mrs. W has lined up for me?