Search this blog

Wednesday, January 12, 2022

Mr. Muscle - but that's not me!.

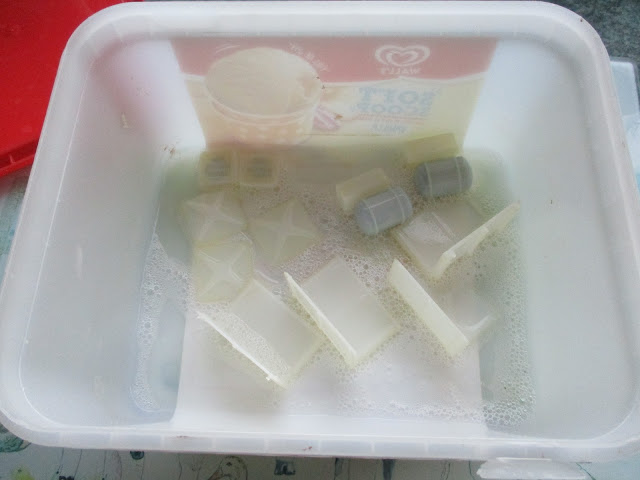
Much as I might like to think that I could be referred to as Mr. Muscle days of being able to wear a muscle T Shirt are unfortunately long gone! However Mr. Muscle Oven Cleaner as referred to in yesterdays post has done its job without me having to raise any muscle myself! The chrome plastic parts of the kit required dechroming so in an old ice cream container they went.

Heller Scania 141 LB

 The Mr. Muscle oven cleaner was then sprayed on.

Heller Scania 141 LB

The lid was then put on and a note left to remind me that the container no longer contained ice cream. I have a short memory!

Heller Scania 141 LB

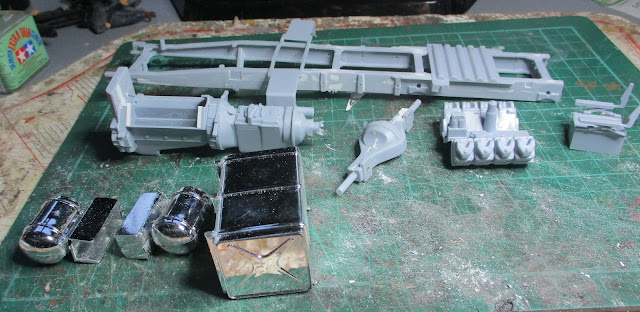
After 4 hours lid off, upset that no ice cream but delighted in that the Mr. Muscle had done its job - does what it says on the tin - and had removed the chrome to reveal the clean plastic parts ready to be assembled. You may notice that the fuel tanks are back in pieces. I decided after doing yesterdays post that it might be easier if I dealt with them as separate parts in the dechroming process so I split them before the glue had set.

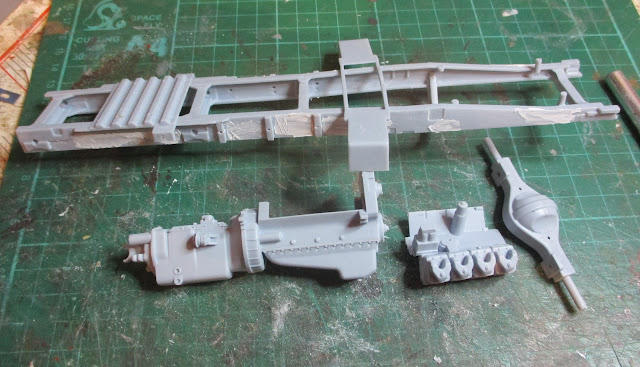
I also had an hour building further parts of the kit. Unlike the Zvezda mustang truck where all the parts fitted perfectly this kit is something of a let down. The mouldings are old and you expect some flash around the parts but when you end up with holes like these in the springs you wonder how they ever got through any quality control. A lot of time is being spent filing and making good.

Heller Scania 141 L

Even where the parts do not require filling the fit is poor. On the engine block I had to add some plastic strip to where the cylinder head on one side of the engine block mounts as there were gaps at either end. Luckily at WMD HQ there are long held stocks of things such as plastic strip which I told Mrs. W when questioning me as to why I had so much junk stock would come in handy one day - just not which day!

Heller Scania 141 L

Progress is slow at the moment but the parts build is slowly growing. I may even have a complete chassis before too long especially as Mr. Muscle has now done his work!

Heller Scania 141 L

Model resin water - showing signs of setting!!!!!


Tuesday, January 11, 2022

Not all that glitters is gold!

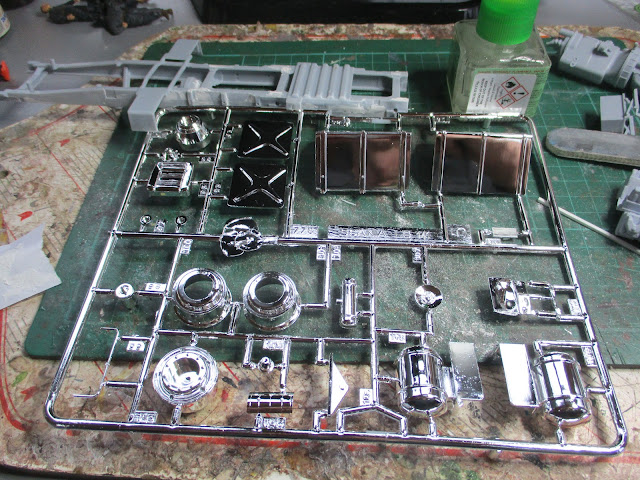
Back in the 1970s and 80s the pronouncement on a kit box that it contained chrome parts was a guaranteed selling point for many kits. The reality was and still is, is that the chrome is a plastic paint that at best is reasonable but usually it is poorly applied and can look simply terrible - just like me! The other thing is that you cannot sand it or abrade it to deal with the inevitable joints in parts which have to be joined. The result is that you either live with parts that have a clear and unrealistic join in them or you do away with the chrome. You can get special chrome paints that you can spray and these can look good but you both need an airbrush and know what you are doing.

For some reason three sprues in the Heller Scania 141 LB kit are chromed. I can understand doing the chrome for the fuel tanks and wheels but the sprues include such things as the seat cushion bases for inside the cab - comfy! This glittering array of kit parts is not gold to me! I am going to be dechroming the parts as it was rare for a 1980s truck to have any such items unless they were a custom truck and back then they were not many of those. Believe it or not i will be using oven cleaner to do the dechroming - but don't tell Mrs. W as she may hope that the oven gets cleaned too! 

Heller Scania 141 LB

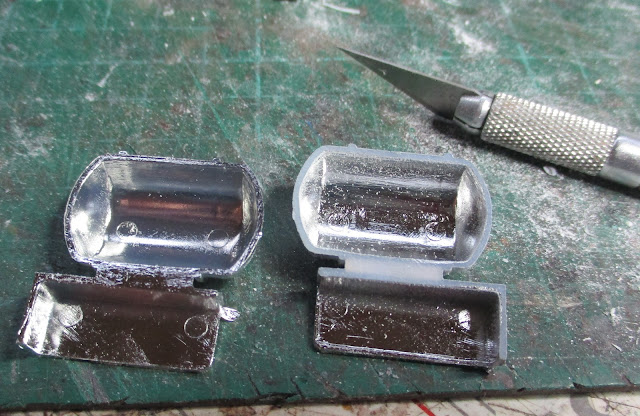
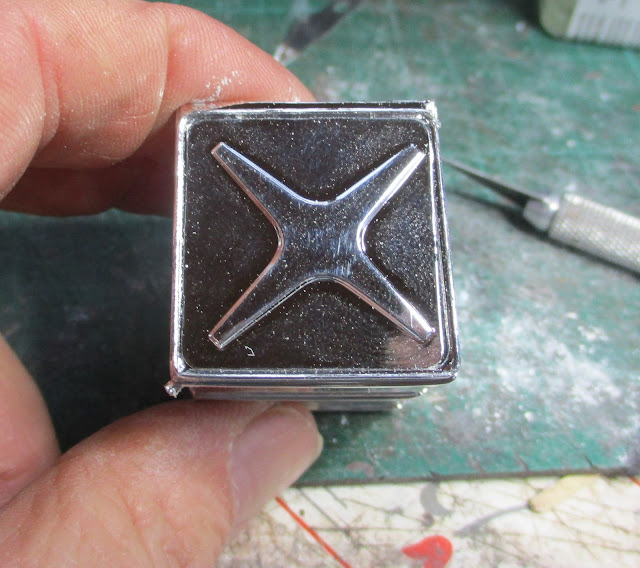
In order to cement the chrome parts together you have to remove the chrome from the surfaces to be cemented.

Heller Scania 141 LB

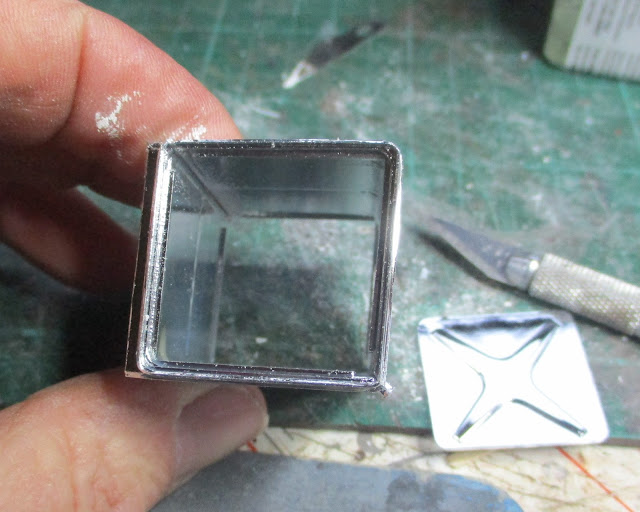
The kit is that old that the parts are warped. This is an end view of one of the fuel tanks.

Heller Scania 141 LB

To try to straighten it up I have tempoarily put the ends in.

Heller Scania 141 LB

The progress for today!

Heller Scania 141 LB

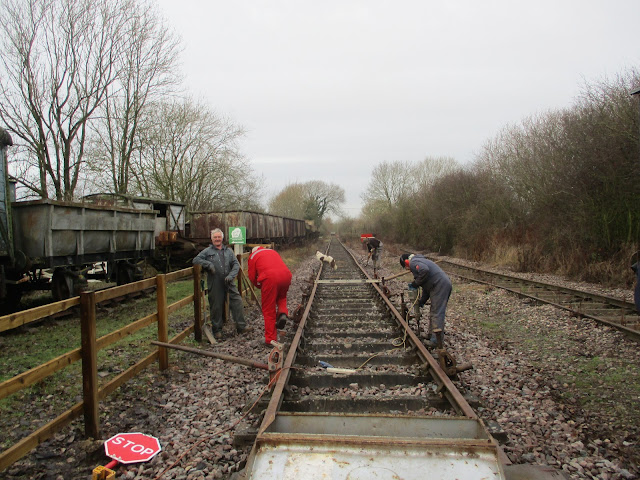
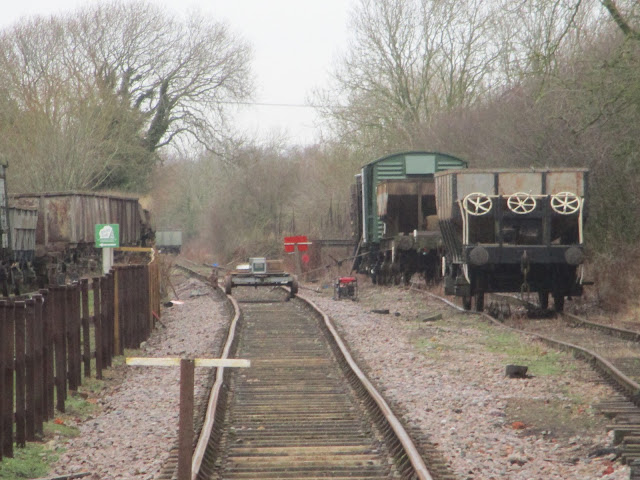
In the morning it was back to the Museum and more track leveling and straightening! Its less than 3 months to opoening so its got to be done!

Rocks by Rail,

Rocks by Rail,

We must be getting somewhere as the photos are taken from the same point but it looks so much further than a few weeks ago!

Monday, January 10, 2022

You can't see the join!

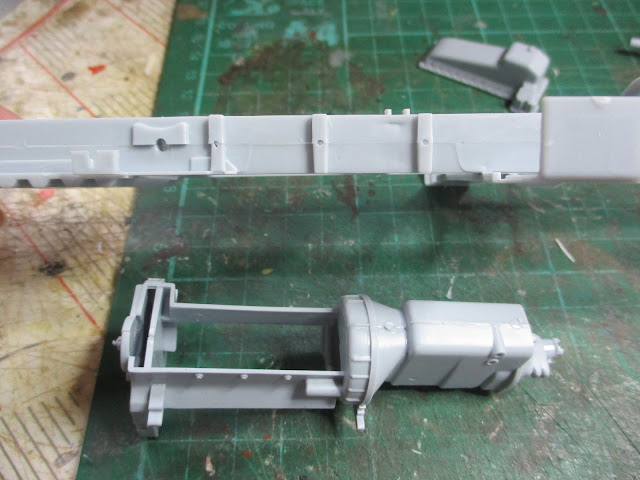
You can't see the join is something that decorators are praised for when they hang wallpaper or if you remember far enough back was Eric Morecambe's classic jibe at Ernie Wise who he thought had a taupe. For me though and most modelers hiding the join between the plastic parts of a kit is essential in achieving a good quality model. As I highlighted in yesterdays post the chassis to this kit is unusual in that it is made up of a lower and upper half. I glued those together yesterday and left them to set with some weights on top to get a nice flat and level chassis. That seems to have worked as I examined it today but I shuddered at the joint line which would need an awful lot of work to disguise. The engine block and rear axle were not much better. 

Heller Scania 141 LB

In between sanding and scraping the various joints, I did fit a few more engine components so that is progressing. Most of the outer joint on the chassis has been eliminated but there are places where some filler is required so a few dabs of Deluxe Material Perfect Plastic Putty were added and have been left to set. 

Heller Scania 141 LB

It may look a bit of a mess at the moment but just like me it will improve in appearance with some further preparation! That is what I tell Mrs. Woody anyway!

Model Water update - Still not set! Doh!

Sunday, January 9, 2022

Let's twist and shout!

No! Not doing a Beatles impression but I did shout and there is a twist involved but more of that later.

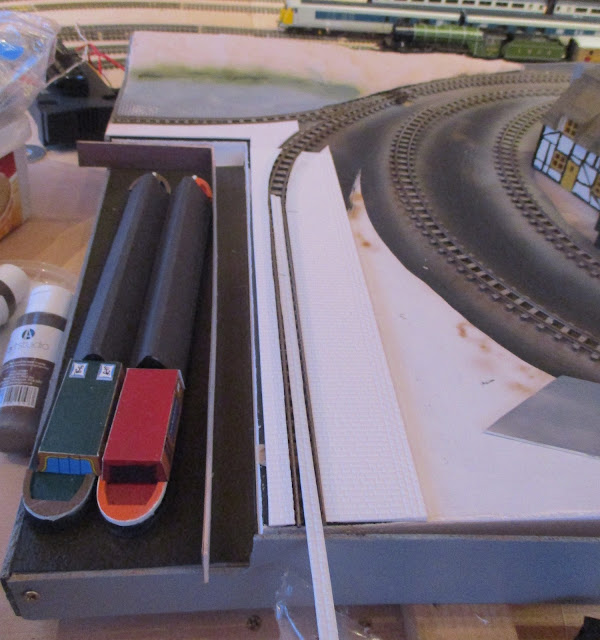
Having had a great time at the Rocks by Rail Museum yesterday, today was more of a 'normal' day - if any thing can be normal at WMD HQ! A couple of hours in the Man cave AKA The Room of Gloom this evening and I can report that the model water resin is still wet! No doubt the very low temperatures have something to do with it not setting but it is causing delays on getting on with things. I could really do with moving the board to get a better access to various parts but that would no doubt end up with a sloping river with dust in it! So for the moment I am just tinkering around the edges . However some progress with the cobble infill by the canal wharf and the open doors on one of the sheds together with its floor having been attached.
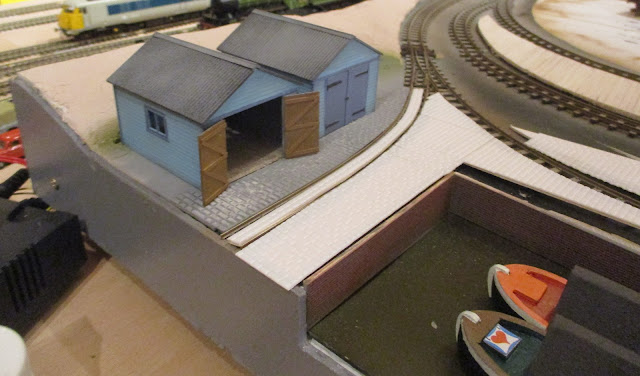
009 gauge layout

Having now got to the 9th January I thought that it might be wise to start on one of my 12 in 22 kit builds that I committed (yes I should be) to at the start of the year. It is the Heller Scania 141 LB as shown a few posts ago. It is an old kit dating back from the 1980's which I recall desiring to build at the time but not having the money to buy the kit. It was one of the first 1/24th scale kits of a European truck to be released - Italeri started the ball rolling with a kit of the Volvo F10 which I did build. Anyway! You expect a kit of this age to show some signs of wear but I was taken aback by the first two parts too assemble which were the two halves of the engine block.
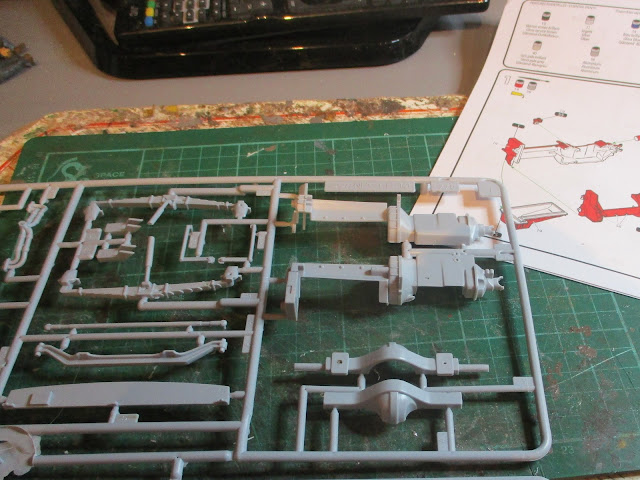
Heller Scania 141 LB,

Heller Scania 141 LB,

As you can see there is a big twist in the parts which caused me to shout! The swear jar now has its first 2022 contribution! Clamps were the order of the day with the back of the two parts being glued and clamped firs and allowed to set before the front halves were twisted back as they should be and glued and clamped. 

Having completed that task it needs to be left to set fully before I dare attach anything else to it so attention turned to the chassis frame. Usually on these kits you get the two chassis rails which are then joined by crossmembers. Heller for some reason have produced the complete chassis in two halves - upper and lower. A new one on me and the joint line is going to need a lot of filling and sanding to make it disappear. 

Heller Scania 141 LB,

With the aid of several clamps and a lot of glue the two halves were joined together. I also glued the two halves of the rear axle together.

Heller Scania 141 LB,

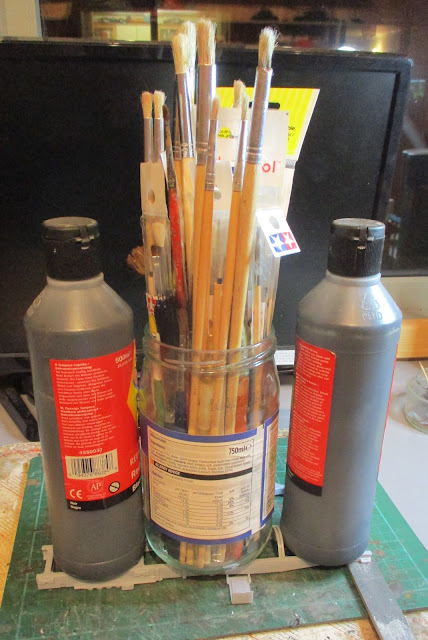
Given that the chassis looks slightly twisted I have left it on the workbench with several weighty paint and brush jars on top to see if that will straighten it up overnight. I will await to see! Maybe the model water may have set too? Maybe that's a twist too far!

Heller Scania 141 LB,


Saturday, January 8, 2022

Steamy Saturday!

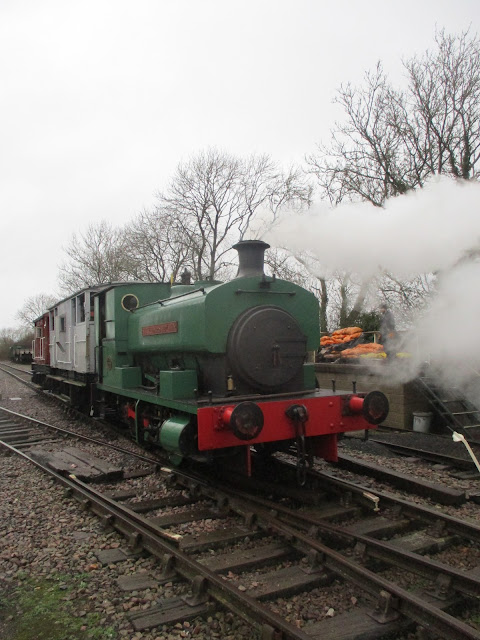
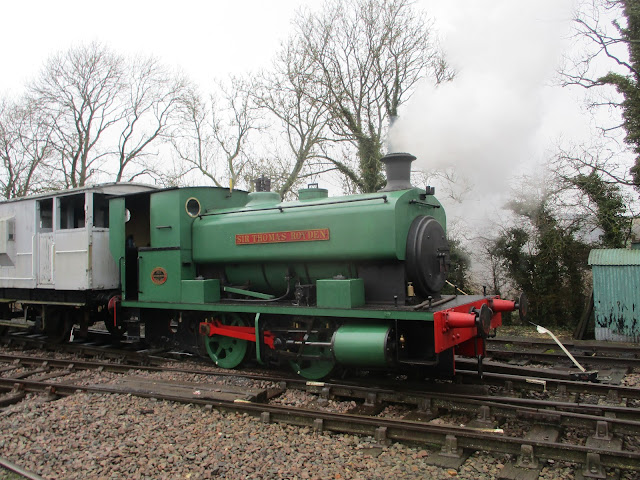
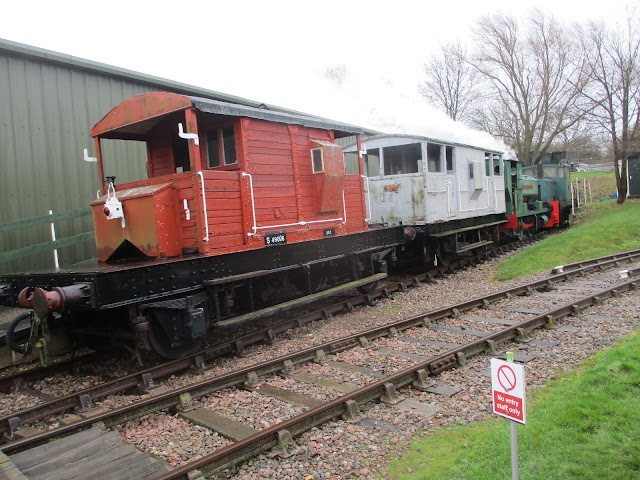
It might have been cold, it might have been windy, it might have been wet, but I had a smile as wide as the track gauge on my face at the Rocks By Rail Museum Members Day today. There was a engine in steam and with attached brake vans I got to ride the section of track where I have been involved in digging out, washing and repacking ballast to level the track. I am told it was a lot smoother than before so suddenly the back aches and creaking joints become even more worth it! 

Not going to say much more other than the photos and a film clip (produced by the WMD HQ Film Crew who still need to hone their art) show what some determination and hard work by the guys at this museum can achieve. The Museum opens to the public at Easter so I hope visitors will come and enjoy everything on offer, hopefully in warmer and drier weather! Have a look what's going on in 2022 by clicking here.
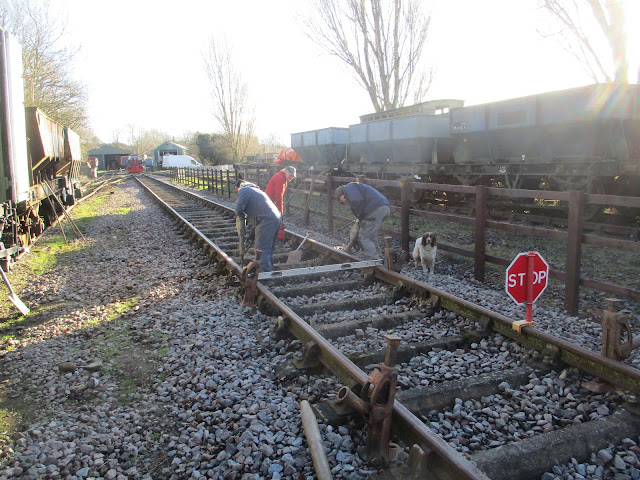


Rocks by Rail, Rocks by Rail Members Day 080122

Rocks by Rail, Rocks by Rail Members Day 080122

Rocks by Rail, Rocks by Rail Members Day 080122

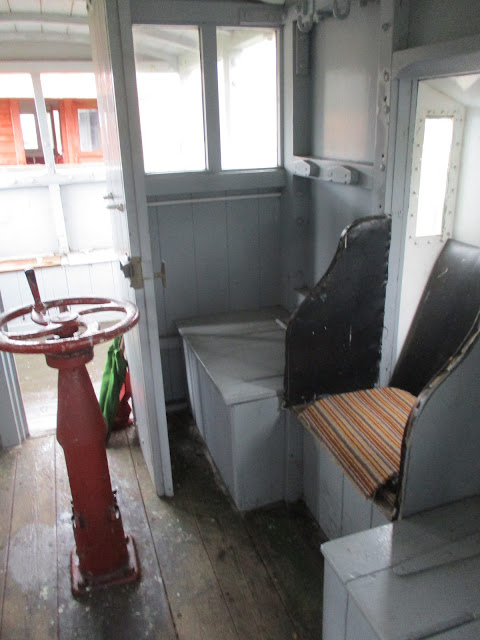
The passenger accomodation!
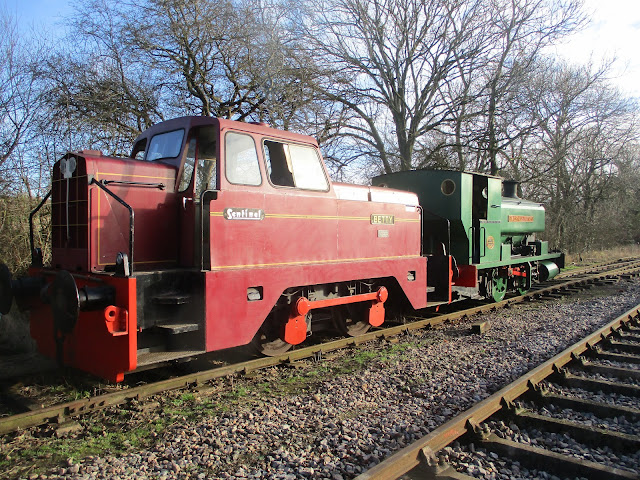

Rocks by Rail, Rocks by Rail Members Day 080122

Can be luxurious for a chosen few!

Rocks by Rail, Rocks by Rail Members Day 080122

Anyone order fog?

Rocks by Rail, Rocks by Rail Members Day 080122


Friday, January 7, 2022

Tidy Friday!


Last nights cooking experiment in enchiladas surprisingly went well with Mrs. Woody enjoying the products of my usually limited culinary skills! A' That was nice' is praise. I will have to see if tonight's pizza hits the same level of endorsement. 

Before creating a Woody HQ fully loaded pizza I did have a chance to finally finish construction of the  platform for my narrow gauge layout. I am getting to the point of think it may well work out. It just needs a few things on top to make it a bit more interesting - just like the pizza I am going to make!

009 gauge layout

009 gauge layout

Next stage is to do some sanding/painting/weathering.

Sitting back to admire the work and consider possible pizza toppings - I understand that in Brazil green peas are a favoured topping together with quail eggs, carrots, beetroot and raisins - that Mrs. W would find appetising, I became aware of just how untidy my workbench was. It was at a stage where you really could no longer see the base so it was time to give it a tidy on a Friday. 

A tidying session usually reveals long lost treasures that had been searched for and given up on. In amongst todays finds was an 00 gauge loco crew, some chain, several files and 58 pence in coins! Well the new found wealth is not going to change my life style but I was looking for the loco crew and chain some time ago so at least they are now uncovered and put safely away in a place that I will remember today and forget tomorrow! However the main point is that I have a relatively clear bench which should make life easier for the short time it remains that way. 

model making workbench

Its almost so clean you could make a pizza on it! Just joking Mrs. W if you are reading this!

Thursday, January 6, 2022

Boy, is it cold today - 1 degree and 1 percent!

A few days ago in the balmy weather of the New Year holiday I was cycling in shorts. Today I was covered all over in several layers but it was so cold cycling. I should have perhaps realised how cold it was by the fact that none of the cats wanted to go out and Tim the postman who delivered another package for Mrs. W looked as though he was going on an Artic trip. It was supposed to be 1 degree Celsius but felt more like -10 with the wind chill.  Even trying to go faster to get warm was not much use with a strong headwind! However now 56 miles into this years target of 5200 so that's just over 1%! 

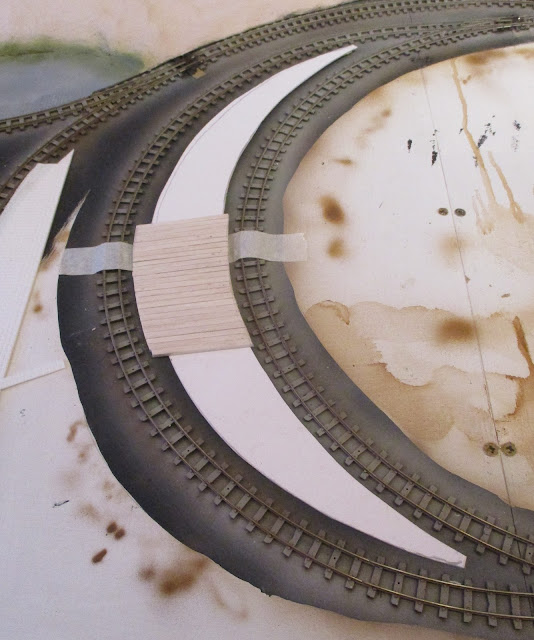
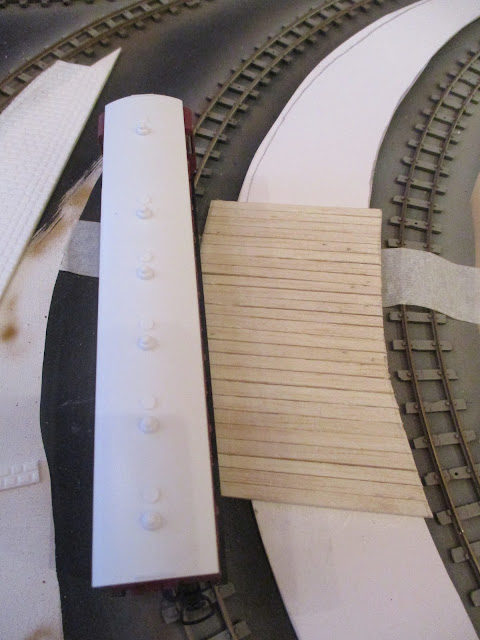
Having got home and warmed up I had an hour in my Man Cave AKA The Room of Gloom and continued with the platform build started yesterday. Luckily there is a heater so I could bask in some warmth whilst working. However it can not be that warm in there as the model water resin has still not dried - yes I poked it again! Some progress on the platform with about three quarters done now. As you can see in the photos the strips of balsa are glued to the card sub-base having been cut to the rough length needed and then cut to shape later. As I said yesterday I am not sure if this will look right but its growing on me. Worked stopped short of finishing it off as with Mrs W's return imminent I had to get onto cooking duties! Enchiladas for dinner if it all goes well or beans on toast if it doesn't! If it is beans on toast I can guarantee a frosty time from Mrs. W!

009 narrow gauge layout

009 narrow gauge layout


Wednesday, January 5, 2022

Mind the gap!

The phrase Mind the Gap is synonymous with the London Underground and you can get T shirts and other items of clothing with that phrase emblazoned over them! However in my case my wardrobe does not boast such attire but I do have a phobia about big gaps between model platforms and the coaches they are supposed to serve. As model railways use curves far tighter than you would find on real railways (most model railway curves would see passengers hurled across the coach with G force as the train went round them) if you have platforms on a curve they tend to end up with a scale 3 foot gap meaning that the passengers would have to make a 3 foot leap to get onto or off the coach. Not good! In the case of my narrow gauge layout the platform is on a leap but because coaches used on such systems tend to be close to the ground platforms are usually close to ground level. This is an advantage I have taken in starting the platform on my layout in that the coach can in effect over ride the platform surface. The platform itself is supposed to represent a wood planked structure. A piece of card to fit in the loop was cut to shape and balsa sheet cut into strips to represent the planks. At the moment progress is slow but we have the beginnings and there is no gap! I am undecided if the wooden platform will look right but sometimes you just have to try! In addition I need something to do whilst I am still waiting for the model water to dry. Prod of finger still shows it has yet to dry!

C
009 gauge layout,

009 gauge layout,

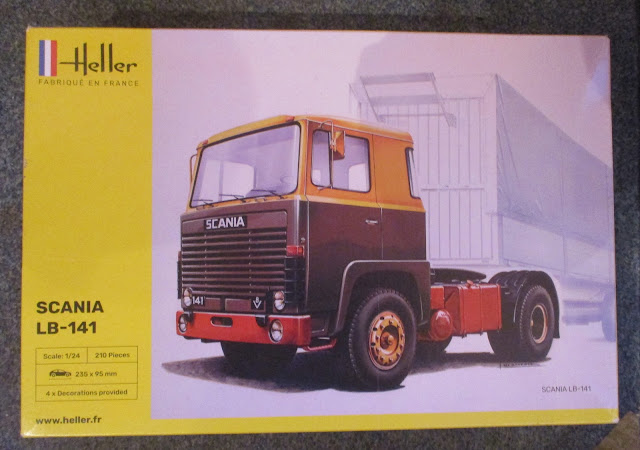
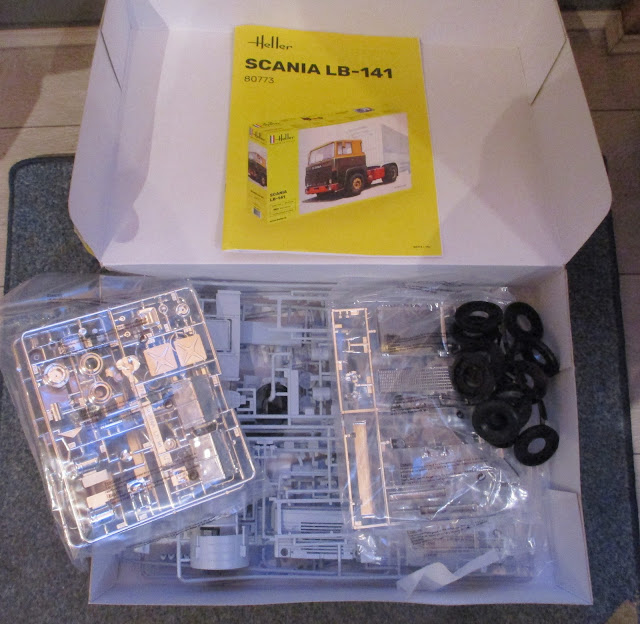
Whilst going through some stores at WMD HQ I unearthed this in my stash of kits and think it could make a good first kit in my 12 in 22 as I am going to call my target of building 12 kits this year.

Heller Scania 141

Heller Scania 141

When will I learn!

Tuesday, January 4, 2022

Steamy Times!

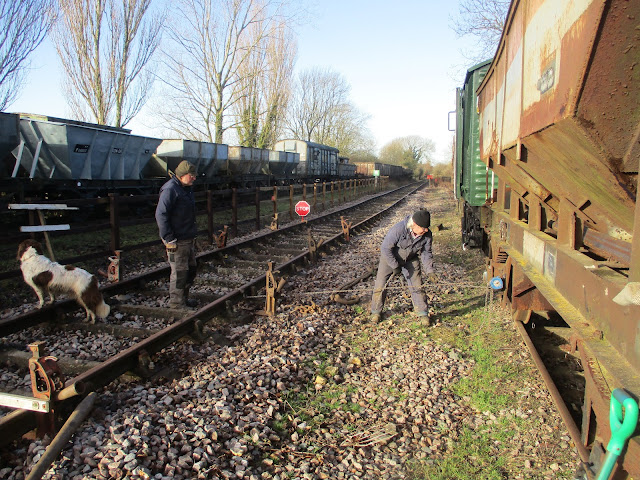
Another day at the Rocks by Rail Museum. The temperature had dropped from about 14 degrees Celsius yesterday to a more chilly 4 degrees today. However the sun was out and further shoveling work kept me warm if not at times steamy! Yes more track leveling and straightening work. There was a slight bend in the track which was straightened by using a block and tackle attached to a conveniently located wagon on the adjacent siding and then using this and pry bars the track was straightened.

Rocks by Rail Museum

After that more shoveling and packing of ballast.

Rocks by Rail Museum

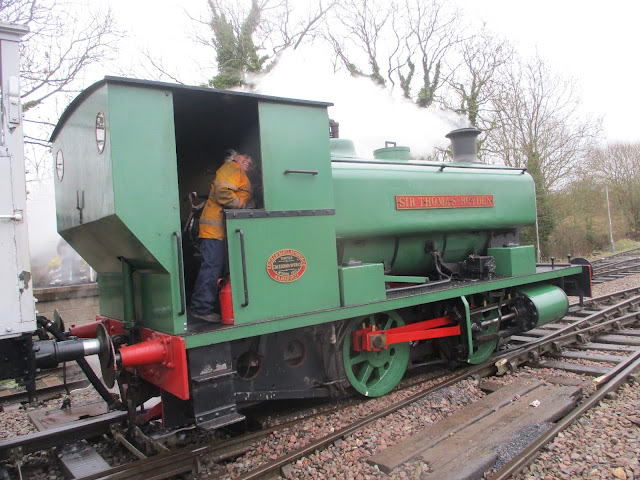
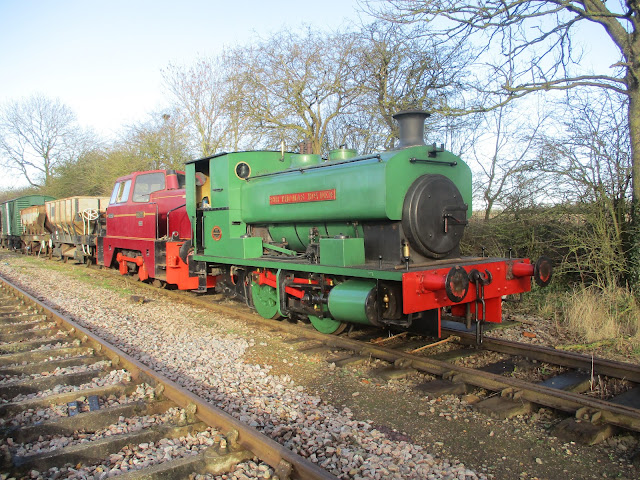
Talking of steamy times, there is a members day soon at the Museum, so one of the Andrew Barclay 0-4-0 steam engines, Sir Thomas Royden, was brought out of the shed by Betty the Sentinel diesel engine to have its water tanks filled ready to be steamed up.

Rocks by Rail Museum

Rocks by Rail Museum

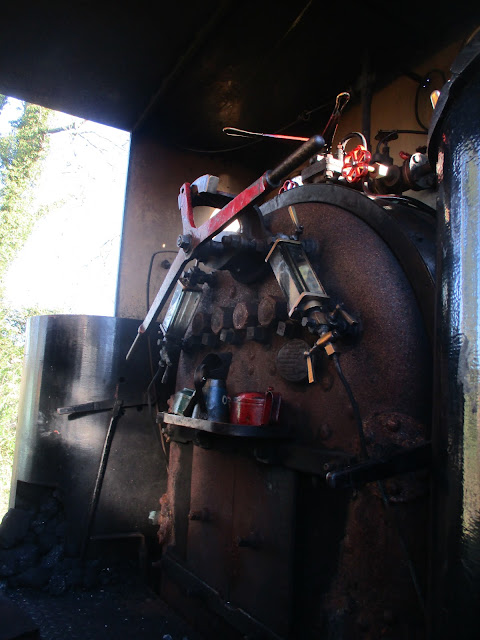
I took the opportunity to look in the cab - every boys dream of a certain age to drive one of these!

Rocks by Rail Museum

Built in Scotland in 1940, it is not that old by steam loco standards.

Rocks by Rail Museum

I will look forward to seeing this loco in steam.

On the model making front I could not resist poking the model water poured yesterday. It was still wet but at least it has stayed in the river and not leaked out - yet! I am amusing myself cutting the infill cobbled areas for the canal wharf area which is a slow and at times frustrating job. However it has to be done so no point in getting steamed up about it!

009 model railway layout


Monday, January 3, 2022

Pour it on!

Pour it on! That us something I would say when the cream comes round at desert time. However in this case it relates to the river on my narrow gauge layout. Having put some more 'greenery' in parts of the river bed and banks to simulate river weed it was time to pour the water or in this case the resin model water - you certainly would not want to drink it. The bottle even has a warning not to drink it but then takeaway coffees warn that the coffee may be hot! A final look around the river bed and banks gave me sufficient confidence that it was time to create water! What can go wrong????

009 gauge layout, Javis - Simulated Countryside Water

The product itself is made by Jarvis and marketed as their Simulated Countryside Water. It comes in a 250mm bottle and the instructions say to pour it in 1mm layers which take 48 to 72 hours to dry. Well the question is going to be how many finger prints will I leave in the surface as my eagerness and curiosity get the better of me? Only time will tell! The water pours but is very thick but should find its own level before it sets. I have been wise enough to seal each end of the river to avoid a recreation of a water fall feature as the resin cascades down either side of the baseboard. Again how successful that will be only time will tell. You may have deduced that I have my concerns and I have to admit apart from a pond on one layout this is the first major water feature that I have modelled. As they say - Never too old to learn! 

The two photos below show that the resin still needs to find its level but then again rivers do not always have a flat calm surface so at the moment I am not too concerned. It also shows that my 'greenery' and river bed appear as I was hoping so I will keep my fingers crossed that it stays that way. I was toying with the idea of adding a fish or two but thought better of it - maybe a shark might have been interesting though! 

I have covered this first pour of the resin with a piece of card to dry to minimise dust settling on the surface but there will be at least one further layer added. Surprisingly I have only used about one third of the bottles contents so far.

009 gauge layout, Javis - Simulated Countryside Water

009 gauge layout, Javis - Simulated Countryside Water

Stay tuned to see if the swear jar gains any contributions over the next few days as I wait for this resin to firstly stay in the river bed and secondly dry without issues.