Search this blog

Saturday, December 10, 2022

What's in the box Woody?

It is still cold here in the UK. I know by some standards -2 or -3C is not that cold but it is comparative. When you have got used to the mild winters that we seem to have had recently this prolonged period of cold is a shock! Given the cost of heating following the increases in energy then it does make it all the more difficult to just turn up the heating! I did go into the man cave tonight for an hour and I did put the heater on for 20 minutes just to try to get some warmth in there but to be honest at the moment there is little point in doing anything in there as glue and paint are not going to dry. I did however have a pleasant, allowing for the cold, time playing operating trains!

I have my inside the house layouts but I also would like to stick some plastic together again. So, I have come up with an alternative plan and this is it!

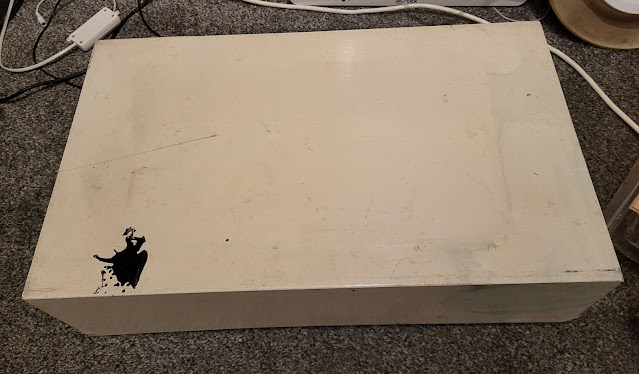
Model making box

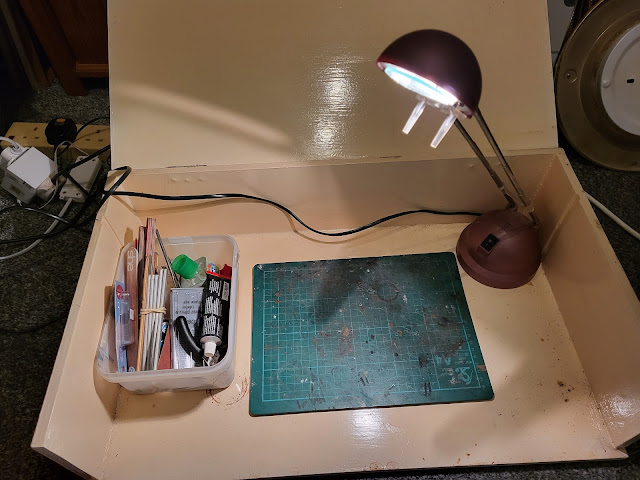
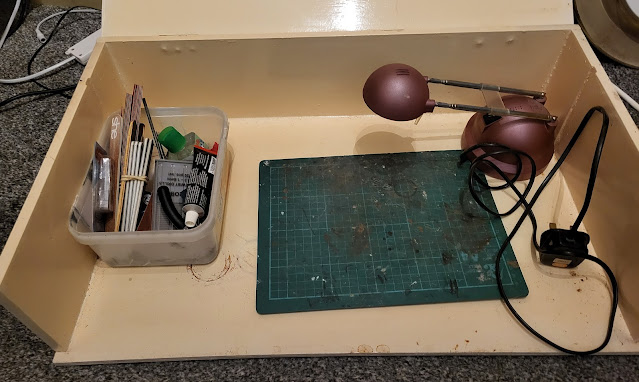
Yes, it is grotty looking box that I made in about 1994 and has been languishing in the conservatory for almost as many years acting as a store for junk! However I have cleared the junk out. So what exactly is in it now? Well opening it up reveals a few model making essentials. A few tools grabbed off the man cave work bench, the cutting mat and a spot light. This just about replicates my full model making set up from that time so this is almost like stepping back in time!

Model making box

The lap is telescopic so is ideal for this set up. Although it would be useful if you could close the lid of the box with the unmade kit in it and then open the box the next morning to find a completed model this is just not going to happen - but I can dream!

Model making box

I did pull out of the man cave the £5 Airfix Dodge 1 1/2 Ton Personnel Carrier that I bought at the Spalding Model Makers Show a few weeks ago. 

Airfix Dodge 1 1/2 Ton Personnel Carrier

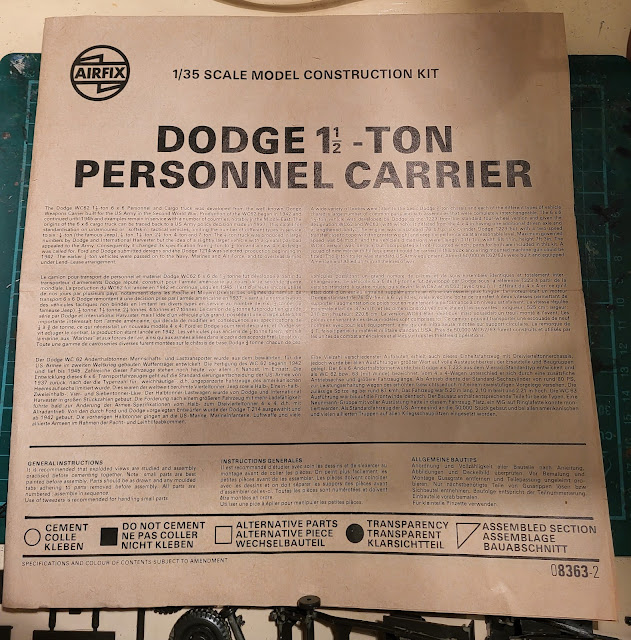
This was the first time I had looked in the bag that the kit came in. The instructions were in there which is a good start!

Airfix Dodge 1 1/2 Ton Personnel Carrier

This kit is 47 years old if the sprue information is to be believed.

Airfix Dodge 1 1/2 Ton Personnel Carrier

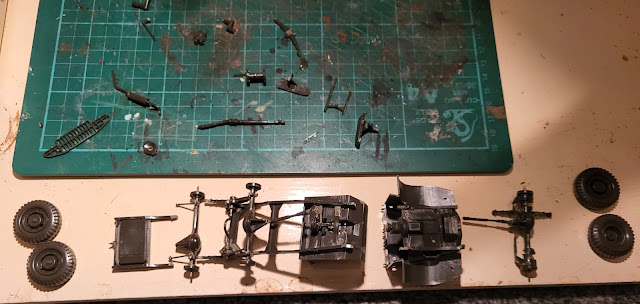
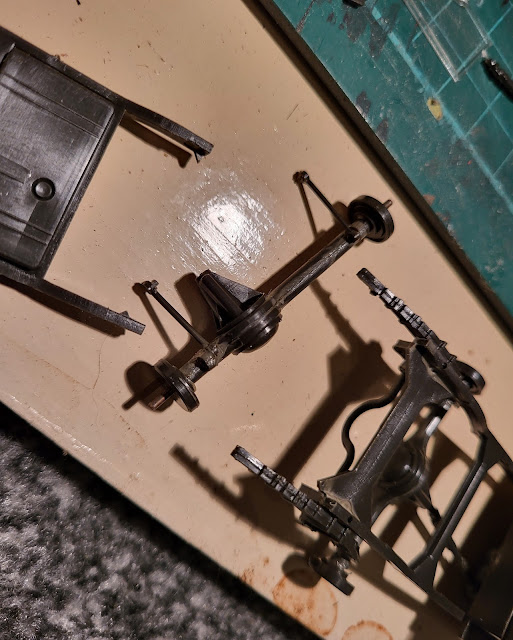
It was at this stage that I found out I had bought a part built kit. There were still a lot of parts left on the sprues but the previous owner had started the chassis. Unfortunately the workmanship is not the best and the chassis is broken into three parts.

Airfix Dodge 1 1/2 Ton Personnel Carrier

Airfix Dodge 1 1/2 Ton Personnel Carrier

Airfix Dodge 1 1/2 Ton Personnel Carrier

Airfix Dodge 1 1/2 Ton Personnel Carrier

From an initial check through I think most of the parts are there. Looking at the broken chassis it is not beyond saving from what I can make out. So hopefully this kit will actually make it out of the box complete or it might end up in another type of container - the bin!

Friday, December 9, 2022

Uncovering a layout.

There is a lot happening at WMD HQ and will be for the next few weeks. For Mrs. Woody this means additions to various chore lists to ensure the things that are planned happen. For me it means doing the items on the lists! Sometimes though you do need an event or deadline to actually do things and get them done. That is what I am telling myself anyway!

However, doing the various tasks does have its rewards. I have talked about several model railway layouts in this blog. There is my long term Last Great Project 00 gauge layout. My narrow gauge 009 layout that is nearly complete and my USA switching layout that is complete only because I bought it from a fellow modeller. There are other layouts though!

I do have an n gauge layout that is supposed to be UK based. I started building this back in 2010 and it really has never got anywhere apart from having track laid. Due to other commitments such as family care responsibilities taking up much of my free time it stagnated although I could run trains. 

The benefit of n gauge is that it is roughly half the size of 00 gauge and takes up a quarter of the footprint. Thus my 6 foot 6 inch by 2 foot 9 inch baseboard is, in terms of comparative size, slightly larger than my Last Great Project layout. Why did I move onto 00 gauge then is a question you may ask. Well I was modelling n gauge for about 25 years prior to 2010 and had built several layouts which were dismantled as they all had problems - I should have planned better! During that time though I did buy the odd 00 gauge item usually replicating something from my childhood. Then Hornby started issuing themed train packs that I thought would be nice to collect. It all escalated and before I knew it I had as much 00 gauge stuff as n gauge. In addition as I have aged so has my eyesight. The days of being able to deal with any model without some magnification aid is long gone. The physical size of 00 gauge just makes it easier to deal with.

However and getting back to the main thrust of this post, during my clearing up chores I uncovered my n gauge layouit that for a number of years has become the resting place for clutter. There were trains on the track and the controller just needed plugging in. Turn the control knobs and all three circuits came alive with trains running - wonderful!

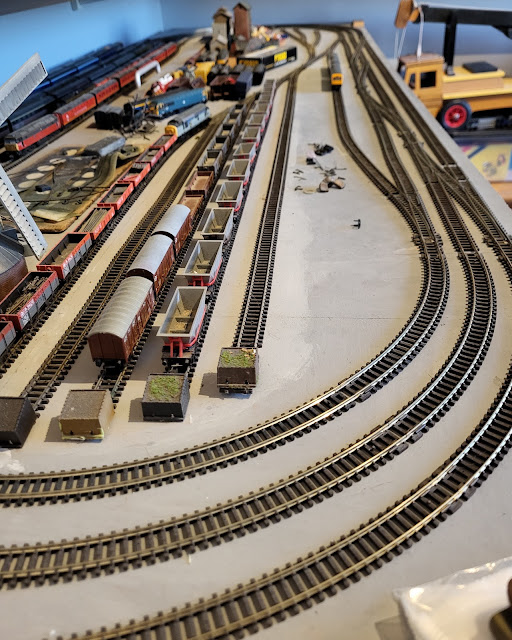
So what is this layout like? Well there are some photos below but basically it is three circuits with storage loops at the rear and a large goods yard at the front. I do have a fair amount of Network Southeast stock so this was going to be a layout semi based in the south east of the UK. Apart from the track and stock there are no other items on the layout apart from a few items that still need to be cleared off. Where I go with this layout I don't really know at the moment. Despite the eyesight issues it would be nice to either finish it or build its successor to be able to run the stock I have. For the moment having uncovered it there is the opportunity to play trains in the warmth of the house where it remained despite moving most of my model related stuff to my man cave a couple of years ago. Playing trains does of course depend on Mrs. W's lists!

An overall view of the front of the layout.

Uk n gauge layout

The storage loops are at the rear and there is a fair amount of storage for wagons in the goods yard.

Uk n gauge layout

A Class 33 in that fantastic 1980s/90s Network South East livery. At the time is strickingly vibrant after the corporate blue of British Rail. Of course with privatisation the railways have become a rainbow of colours.

Uk n gauge layout

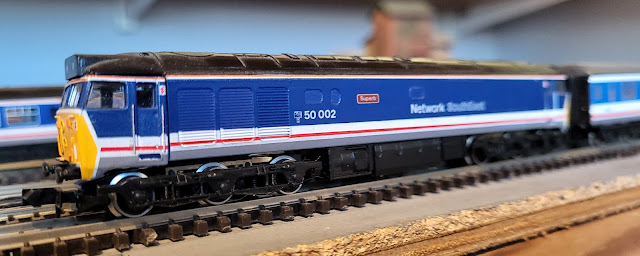
A Class 50 which also looks good in the NSE livery.

Uk n gauge layout

The small size of these models is illustrated by the baseboard side which has a piece of 2 inch/48mm wood.

Uk n gauge layout

Wonder what other gems Mrs. W's chore lists will have me uncover. Almost makes doing the chores a treat but don't tell her!
Thursday, December 8, 2022

It is cold but Woody takes on the freezer test in the Man Cave!

It is cold! The Man Cave is less then inviting. In fact it feels more like a freezer in there but I did spend an hour or so in there testing my cold weather tolerance before calling it a day. I did actually make some visual progress on my Last Great Project 00 gauge layout. Doing anything in there requiring glue or paint to dry at the moment is just not going to work. So I have been fitting some underlay to the track. 

This has two purposes. Firstly it should raise the track slightly above the baseboard level allowing the ballast when eventually applied to have a shoulder to it. This replicates real life where the purpose of ballast is to provide a firm base but also to facilitate drainage so it has to stand proud of the surrounding ground. Secondly as the baseboard is sheet ply on a wooden frame it acts like a speaker enhancing the rumble of trains travelling over the track. By using an underlay this deadens the sound - well that is the theory!

You can buy propriety underlays for track and Hornby and Peco do a foam underlay with indents for the sleepers to fit into making it all look like ballast. I have tried these in the past and although they look OKish the foam does break down into dust after about 10 years or so. I prefer laying model ballast which looks better and lasts better. So my underlay just needs to be long lasting as it will be covered. Over the years I have laid various laminate flooring at the behest of Mrs. Woody. Part of the process is to lay an underlay on the floor which is a foam sheet about 3mm thick onto which the laminate is placed. I know it lasts to as I used some off cuts as underlay on another layout and it is still solid. As I have some spare sheets of this foam in stock that is what I am using.

My Last Great Project

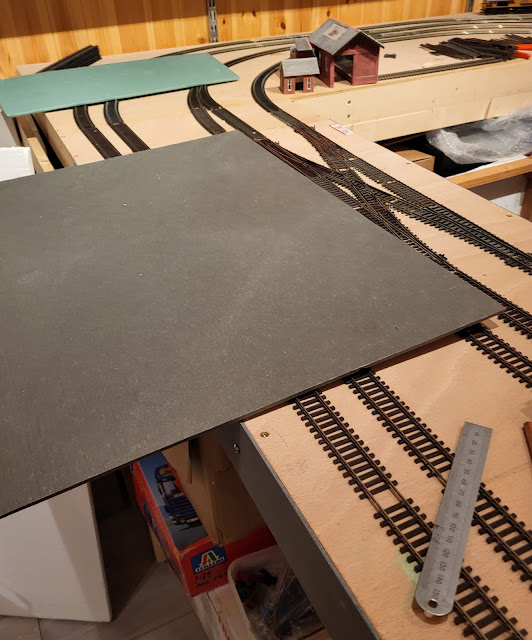
I cut it into suitably wide strips.

My Last Great Project

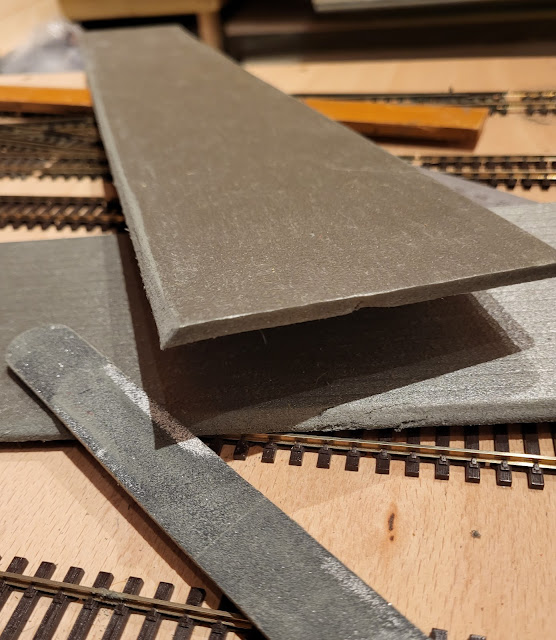
Then to simulate the shoulder to the ballast the edge of the foam strips was filed to an approximate 45 degree angle with an emery board. It was nice and easy to file which was good!

My Last Great Project

Loosely putting it in place it adds to the overall scene.

My Last Great Project

Of course it required 'testing' which was just my excuse to run some trains! Not for long though as by this stage I decided I had enough of the freezer like conditions!

My Last Great Project

My Last Great Project

Hope that it gets a bit warmer in the next few days!


Wednesday, December 7, 2022

There's a Tiger in my loft!

For those of a certain age you may recall that ESSO used to have adverts stating that if you used their petrol you would get a tiger in your tank. Not sure if the tiger was happy but here is a YouTube link to an advert from the 50's or 60's click here and the more refined 1990's version click here. However on the limited motoring budget that WMD has my fuel is sourced from the cheapest sources so I ma more likely to end up with a snail in my tank! However I digress! Following through on one of Mrs. Woody's Christmas chore list items (yes there are seasonal ones too!) I went into the loft to retrieve some Christmas stuff - hopefully some of it to wrap my presents! 

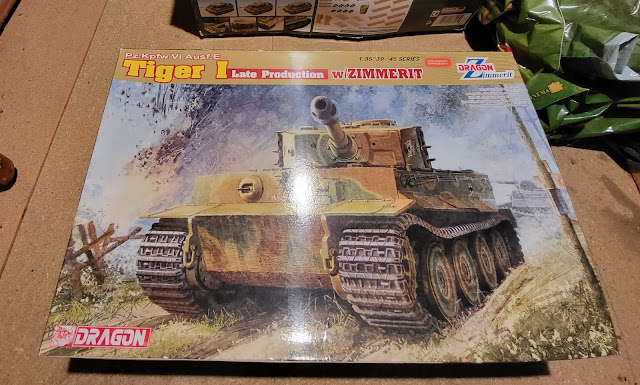
Going into the WMD loft is always a mixed emotion. Firstly is the amount of stuff in it which brings about an emotion of despair and thoughts that I really need to sort it out and get rid of some stuff. Secondly the emotion of discovery as long forgotten items become unearthed. Getting t o the required Christmas items required things to be moved. Doing this I discovered the Tiger. Well actually three Tigers. I can confirm that rather than the lovable feline version these were three 1/35th kits for the massive Tiger tank from WW2.

Dragon Tiger tank

I recall buying these on New Years Day 2019 at the Newark Toy Fair. A guy dealing in Beanie Bears had a few kits on his stall including these three. Having a browse one of the boxes felt very heavy although they were sealed. The price of £25 each or two for £40 and being the Dragon brand encouraged me to open my wallet and surprisingly I got all three for £60 which for these kits is a bargain.

Getting them home I had these three.

Dragon Tiger tank

Dragon Tiger tank

Dragon Tiger tank

The heavy box has parts for two Tigers in it which is a bonus and the bargain nature of these kits was further highlighted when I found all this quality etched and turned brass in one of the boxes. £60 well spent I think! 

I just need to get round to building them to have my own fleet of Tigers.

Dragon Tiger tank

Also found in my loft maneuvers were these.

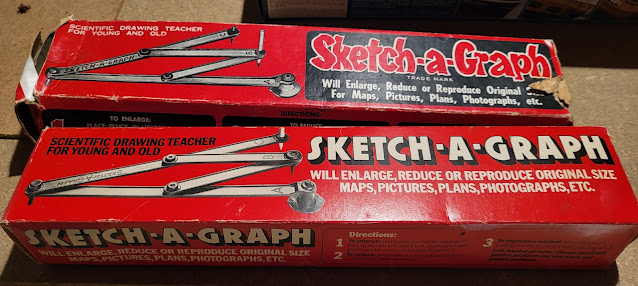
Sketch a Graph

Both Mrs. W and me had these as kids - hers is the one with the quality box. Based on a draughts board instrument the toy allowed you to trace items by inserting a pen in one part and then tracing the item to be replicated with th plastic point. It was never particularly successful as the rubber suction pad fastening it to a table never really was strong enough but we both had fun with ours. What do I do with them now? Have to wait until I clear out the loft but that is something for next year and no doubt will be on Mrs. W's Spring Cleaning Chore list - roll on 2023!


Tuesday, December 6, 2022

Siding up!

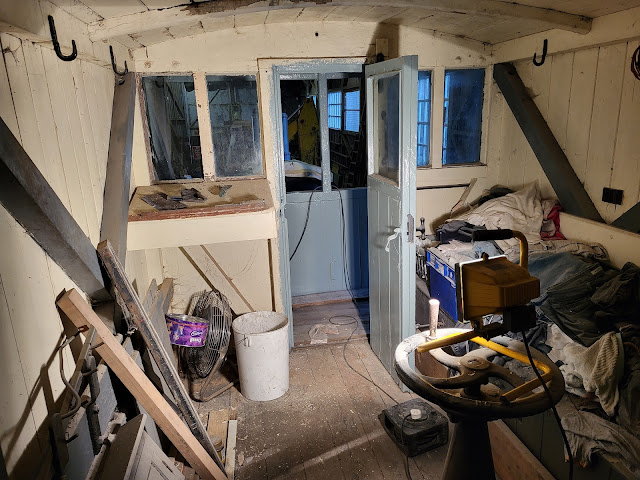
My mind was brought to reality today. From yesterday when it was in the warmth of Arizona today saw it in the cold of the outside at the Rocks by Rail Museum. In the relative warmth of the workshop John was scraping paint off the inside of the LMS brake van ready for a repaint which should complete that project. It is a messy job and there are literally layers of old paint to remove.

Rocks by Rail Museum

Meanwhile Rob is fettling parts of the interior of the cab of Sundew which is the last remaining part of the huge walkling dragline excavator that operated in a local quarry.

Rocks by Rail Museum

this original picture shows what the interior looked like fresh out of the factory.

Rocks by Rail Museum

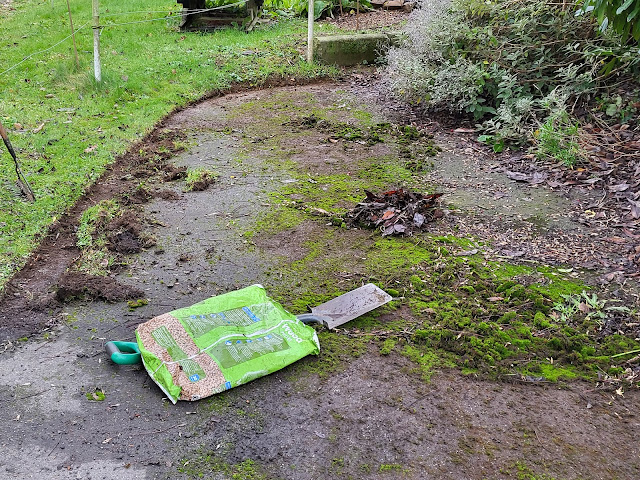
Back in the cold outside I did some siding up - cutting back the moss and grass that has over the years overgrown the hard standing areas. A nice rewarding job as you get a big visual hit from your efforts.

THis is what I started out with.

Rocks by Rail Museum

Some of what I was doing.

Rocks by Rail Museum

The finished result - I like that!

Rocks by Rail Museum

Back at WMD HQ I also like this video of my Last Great Project 00 gauge layout. At least the landscaping on my layout wont need siding up!


Monday, December 5, 2022

Route 66 - Back in the USA!

Unfortunately Woody is not actually physically back in the USA but my mind is! A strange place my mind as Mrs. Woody keeps saying! Actually it has gone back to about 2004 or 2005 when visiting Arizona on our way to see good friends who lived in Oregon at the time - Yep! That is you Casey and Steve if you are reading this! Being the designated driver gave me the opportunity to make unscheduled stops such as at the model shop in I think Kingman on Route 66! A wonderful hour spent by me perusing and a boring hour for Mrs. W although she enjoyed the air con in the shop!

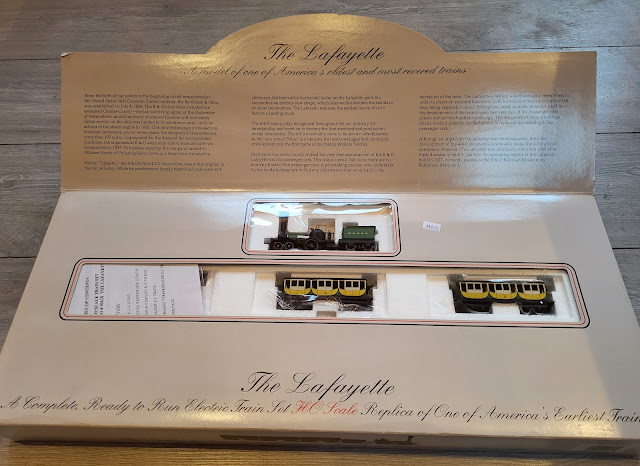
Anyway no way was I coming out of the shop with nothing. Most people would buy a wagon or maybe a loco. Not me! I bought an entire train set! The Layfette historic train set by Bachmann was the princely sum of $89.75 which at the time when the pound sterling was worth nearly $2 made it just over £45. Absolute bargain and how I would fit it in the luggage on the flight home was something that I would cross later but Mrs. W's luggage might have to be a bit cramped! 

It did safely get back to the UK and Mrs. W's luggage was not unduly crammed. Since it's arrival it has unfortunately stayed in its box safely stored away. However in my never ending quest to fulfill Mrs. W's desires as highlighted in her chore list for me to do (hope she reads that!) I was sorting through some stuff and uncovered it and memories came flooding back!

It is beautifully packaged which probably was what attracted me to it in the first place.

Bachmann La Feyette

It comes with all those warnings about the dangers of electricity and so on! I obviously will not be plugging that 110v controller into the UK 220V system! 

Bachmann La Feyette

There is some history to the train.

Bachmann La Feyette

Then into the set itself - stunning!

Bachmann La Feyette

The locomotive is tiny but full of detail.

Bachmann La Feyette

Bachmann La Feyette

The carriages even have seats.

Bachmann La Feyette

Another of those models I need to run. It will look interesting running with my model of Rocket!

In the meantime my mind is still back in the USA - especially the heat of Arizona which I could do with at the moment as the UK weather heads towards the Beast from the East 2!

Sunday, December 4, 2022

The destructive abilities of cats and kittens!

Three weeks today it will be Christmas so I thought I would make an effort and introduce the cats and kittens to the WMD HQ gesture to Christmas decorations. Those with cats and kittens will know the futility of putting up a Christmas tree and accompanying decorations. All that happens is that it becomes an enormous cat play toy. Eventually the tree is felled, the lights trailed across the room through furniture and the decorations are scattered throughout the house still being discovered in their new locations during the following summer. However a few weeks ago I did spot the Racing Santas decoration whilst accompanying Mrs. Woody on one of her wallet stressing shopping trips (that post is here). At the time I was taken by it and I went back a week later to pick up the last one in stock. I thought that at least it can be easily put out of the reach of cats and kittens. Today it came out and was assembled. You can't help by being amused by the kittens antics ( the older cats were asleep)  and you can understand why they are banned from the Man Cave! Nothing would be left which Mrs. Woody would no doubt find as amusing as the destruction of the Racing Santas as highlighted in this short video!!

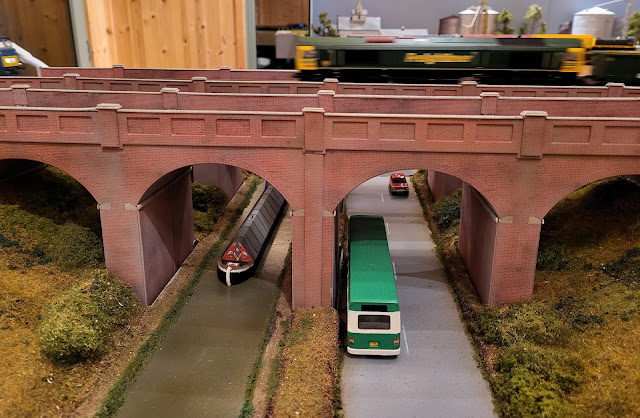
Talking of the Man Cave I did some more finishing off on the landscaping with the road and canal glued down and their edges given some greenery to blend them in. I have also put two of the track circuits back in temporarily and today saw some trains run - YAY!!!!!!!

My Last Great Project

My Last Great Project

My Last Great Project


Saturday, December 3, 2022

White lines and more swans!

I am putting finishing touches to various parts of the landscaping around the viaducts on my 00 gauge layout. Small things that make all the difference such as the white center line on the road. We all see these everyday and probably take them for granted but there are specifications for how they should be set out. As someone who was involved in highway maintenance in my time I could clear out even the most wild  party in less then two minutes by talking about the intricacies of Chapter 5 of The Traffic Signs Manual which covered lining! It is also a subject that Mrs. Woody has banned me talking about at home unless she is suffering from insomnia! 

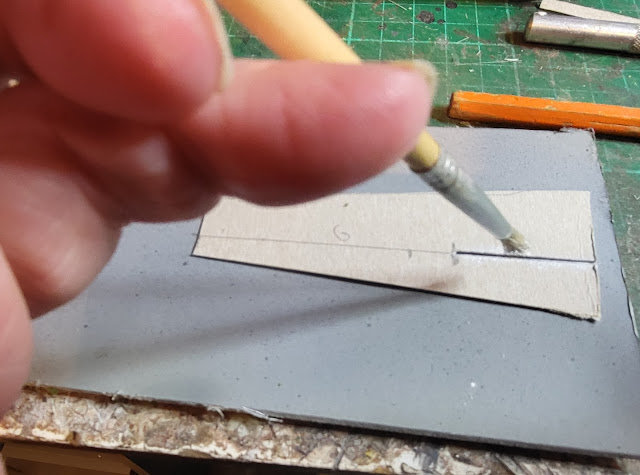
However for those with a thirst for such knowledge the center line on a road with a 60mph speed limit in the UK is set out with a 3m long line spaced at 6m intervals. If it were a 40mph limit the lines would be 2m long set out with a spacing of 4m between them. The line is also between 100 and 150mm wide. For 4mm scale this means a line about 1mm wide and for the 3m line about 4cm long. To replicate this I cut a stencil from a scrap piece of card. Apart from when fresh laid white lines ware and fade. To replicate this i used a dry brushing technique where most of the white paint was wiped off the brush on some paper towel. As the brush was fairly stiff I could then use a stippling action on the stencil to replicate that worn look. The photos below probably illustrate it better than I can describe.

My Last Great Project

My Last Great Project

At last some lane discipline for the 4mm scale vehicles!

My Last Great Project

I was subject to a swan road block a few days ago as described in my post at the time - available here. Luckily I have not been subject to more swan activity whilst out and about but strangely enough today saw the arrival of this that I ordered a few days before the swan road closure incident.

My Last Great Project

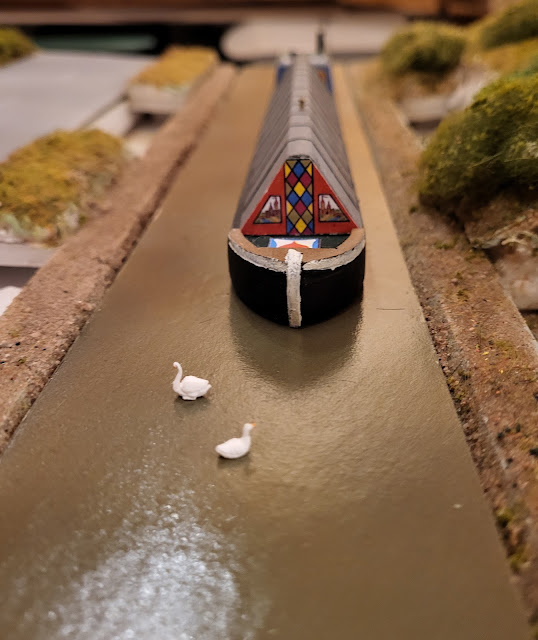
They are small but well formed and painted and when I ordered them I thought they would bring a bit of interest to the canal. I tried a couple out just to see - I like that!

My Last Great Project

Given the various random directions that they appear to be floating in they could perhaps benefit from some lane discipline on the water especially with that approaching narrow boat! 

Now I wonder if Mrs. Woody is interested in hearing about the detail of setting out a give way marking at a junction? Oh! I think she is asleep!

Friday, December 2, 2022

Nearly there!

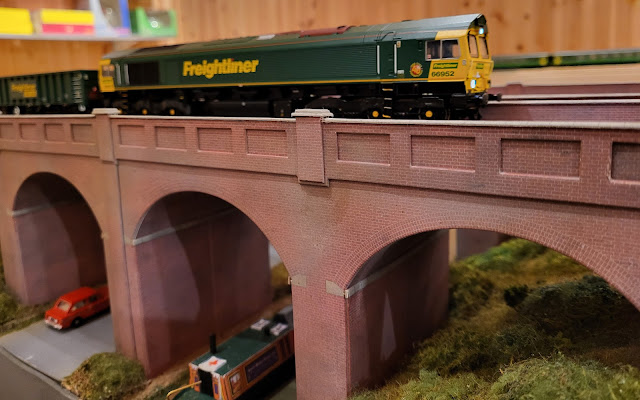
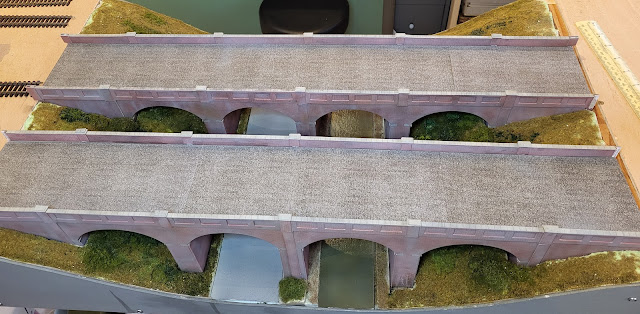
Yes! Nearly there with the two viaducts on my 00 gauge layout. everything is built apart from the end parapet supports which will have to wait until the viaducts are finally ion position as I think they will need altering to fit. The viaducts have also received a dose of weathering to make them look less like they were built last month and more like they have suffered decades of hard life - just like me! Only thing is I have done it naturally over the years as Mrs. Woody highlights as she smiles with no wrinkles!

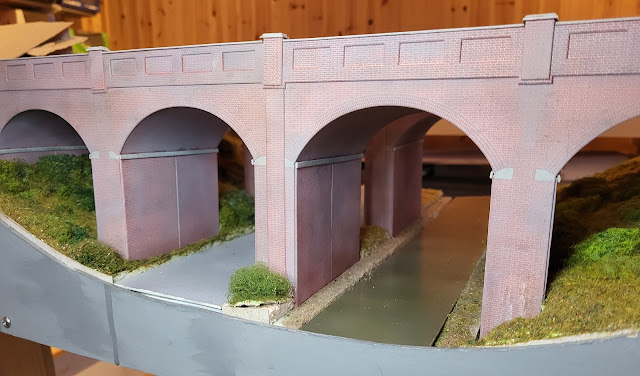
The weathering has been done with an airbrush to highlight various areas where dirt would make itself known. Firstly I used a very dilute light grey and then a dilute earth brown. No real art to it although the experts would be able to do a far better job but for me I am happy that both structures now look somewhat more aged than before I graffitied them! 

This is what it looked like in mid October.

Metcalfe Viaduct Kit,

Six weeks later (is it that long???)

Metcalfe Viaduct Kit,

Metcalfe Viaduct Kit,

Metcalfe Viaduct Kit,


Metcalfe Viaduct Kit,

Still more to do with the weathering using some weathering powders and a few parts of the landscape to tidy up as well as fastening the road and canal down but certainly getting towards putting the track back!