Search this blog

Thursday, May 23, 2024

Lemon yellow!

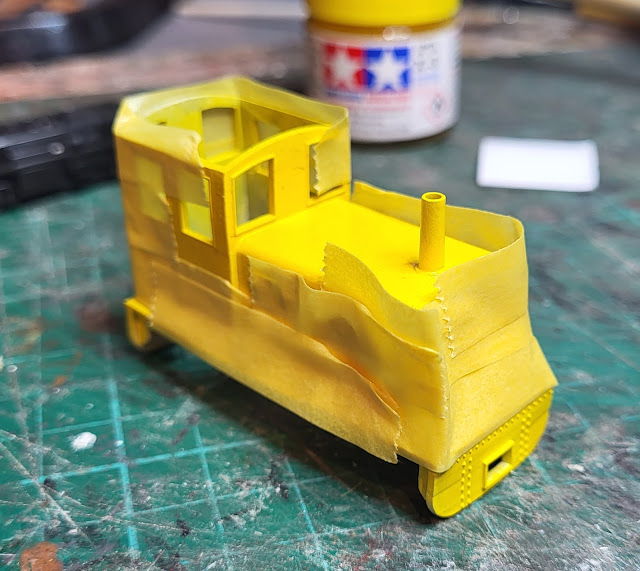
I made my mind up! I was not going to risk the orange paint again so went for Tamiya's Lemon Yellow. As you can see it went on through the airbrush much better than the orange. The 3D print still has a couple of defects in it but I can live with that and with an eventual matt finish they will be less visible.

Whilst the yellow is a nice colour it does need some contrast so the buffer beams were masked up.

3D printed diesel loco

3D printed diesel loco

Then Tamiya red was airbrushed on.

3D printed diesel loco

3D printed diesel loco

With the masking removed, cab roof temporarily on and placed on the chassis it looks all very different and in my view looks good!

3D printed diesel loco

There was still some red paint in the airbrush so I got the 3D printed telephone box out.

3D printed telephone box

and gave that a quick blast of paint - nice!

3D printed telephone box


Wednesday, May 22, 2024

Whose toothbrush????

Following on from the splattered orange paintwork disaster as posted about yesterday, I did try to see if I could sand the paintwork smooth but gave up on that idea after a short while. It just did not work! So Plan B, strip the paint and start again. I have described using Mr Muscle Oven cleaner before when stripping the chrome finish off model parts and it works on paint as well. So out came the aerosol, and it was sprayed. Leaving it for a while to do its job I thought that I needed a brush to get into the various parts of the model and a toothbrush was the answer. Handily Mrs. Woody's tooth brush was about so that came in useful! Hope she doesn't read this!

3D printed diesel loco

With the paint removed it was time to reapply some white undercoat.

3D printed diesel loco

With the loco body attached to a piece of wood using some masking tape airbrushing could begin.

3D printed diesel loco

The finished job!

3D printed diesel loco

3D printed diesel loco

Next up is the top coat. Do I attempt the orange again or something different?

For those of you worried about Mrs. W's well being toothbrush wise I can reveal that it had been thrown out before I got my hands on it - but she does now have a nice electric tooth brush which would be good at cleaning up model parts!

Tuesday, May 21, 2024

Splattered!

Just like most people who build models things can go wrong for me, probably more than most other modellers! Take the 3D printed diesel loco for example. I managed to smooth out the print lines and then applied a white under coat through my airbrush for what I hoped would be an eventual orange top coat. The under coat went on well and I left it a day to dry. I also found the Kato Pocketline chassis that the body would be mounted onto. Things were looking good!

3D printed diesel loco


3D printed diesel loco

However things were going to go down hill! Having mixed up some Vallejo orange paint and thinned it with Tamiya thinners. I loaded up the airbrush and applied what can only be described as a splattered coat of paint that ended up looking more like a pebble dashed finish! 

What went wrong? To be honest I am not sure. Possibly the different brand of paint and thinners did not mix as they might have. Iit was a warm day so that may have been a factor or it may have been operator error! Not sure but I cannot leave the loco looking like this. I can have a go at sanding it down to see if that smooths off the surface but with so many different levels to the moulding that may be difficult. I have a feeling I may need to find a way to strip the paint off and start again. Stay tuned!

3D printed diesel loco


Monday, May 20, 2024

3D printed diesel loco

For my 1001 post I have in my usual way picked up another project! This time the 009 3D printed loco body that I picked up at the Market Deeping Model Railway Show last week. Like many 3D prints this required a little fettling to smooth the ridge lines left by the printing process. 

3D printed diesel loco

A mix of sanding sticks, wet and dry paper and a scalpel blade slowly created a smooth surface. It took a couple of hours but was worth the effort for a smooth paint job - I hope!

3D printed diesel loco

Sunday, May 19, 2024

One Thousand!

ONE THOUSAND POSTS!

Believe it or not this is my 1000th post on this blog! I was amazed when I got to 100 a few years ago so this takes me into a whole new arena! Think I will have some celebratory cheese of which I seem to have rather a lot of after my exploits as posted about yesterday!

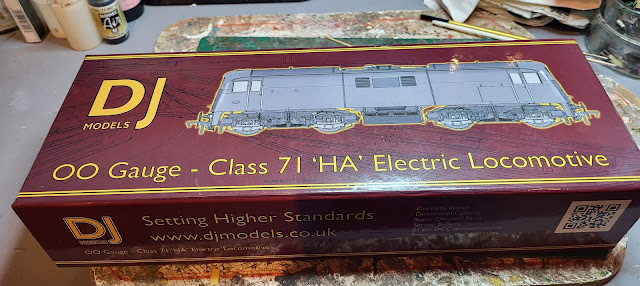
However, back to the here and now as my delayed DCC chipping of the DJ Class 71 loco has now been completed.

As with most of these chipping jobs, the body had to come off the chassis first. Not to bad with just four clips to find and release. 

DJ Class 71,

This loco uses a 21 pin decoder and I was lucky that WMD Stores had some in stock, that is one of them beside the pack with the others.

DJ Class 71,

With the blanking plate removed from the circuit board, and it was twice the size of the chip that went in its place, the chip was plugged in.

DJ Class 71,

Following programming the body was put back on and the loco is now ready to go. Nice and simple - just like me as Mrs. Woody says!

Wonder what my 2000th post will be about? Will I actually get to 2000?

DJ Class 71,

DJ Class 71,


Saturday, May 18, 2024

Say cheese!

DJ Class 71

I do take a few photos of model trains but no matter how life like I think they are I have never said 'Say cheese' to any of them! Well the DJ Class 71 that I recently bought was due to be DCC chipped today but having dragged the ever suffering Mrs. Woody around various model railway shows I thought it was time to delay that task and take her out to something that she was really interested in - The Melton Mowbray Cheese Fest! There was enough cheese there from all over the UK and further afield for everyone who attended to find at least one they liked from the many tasting samples on offer. I had to taste a lot of samples though - and say cheese! 

Melton Mowbray Cheese Fest 2024

It was not all cheese, there were all manner of drinks....

Melton Mowbray Cheese Fest 2024

Melton Mowbray Cheese Fest 2024

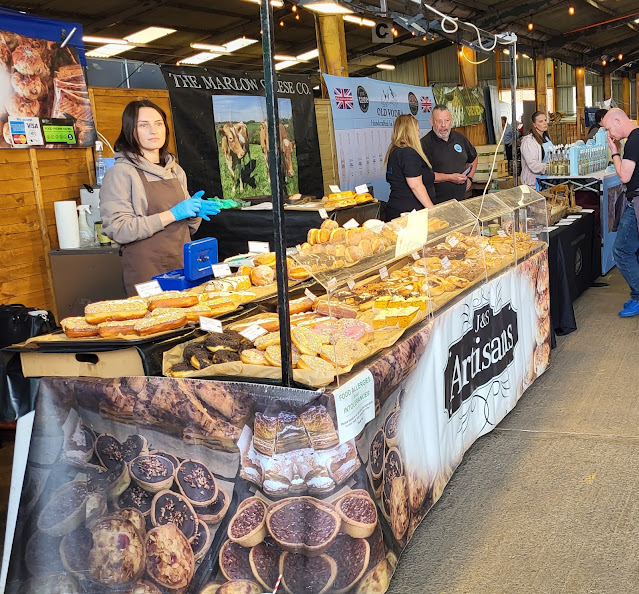
...breads, cakes, pies.....

Melton Mowbray Cheese Fest 2024

...sweets

Melton Mowbray Cheese Fest 2024

...this lemon and lime tart I bought never even made it out of the hall where I bought it before I consumed it!...

Melton Mowbray Cheese Fest 2024

...and lots of people enjoying a great day!

Melton Mowbray Cheese Fest 2024

It was inevitable that we would buy some cheese as well as a few other goodies, but it would be rude not too!

On the way home with car now like a mobile branch of  Ye Olde Cheese Shoppe, I took the long way in order to put out the Rocks By Rail banners for the next events which are next Bank Holiday weekend! Time flies as they say!

Rocks by Rail Museum,

Whilst putting one set of banners out I heard a rather strange skyward emanating sound and looking up say this rather incredible site of 19 similar airplanes flying in formations. They looked like Chipmunk trainers but I am no real expert but no doubt Mr. Beecham will be able to put me right with his vast aircraft knowledge. No where is that cheese????

Friday, May 17, 2024

Wrenching Woody!

Wrenching Woody? A strange title but given that yesterday when I was at the Museum it was somewhat wet outside, a job under cover and in the dry was a preferable option!

Rocks by Rail Museum

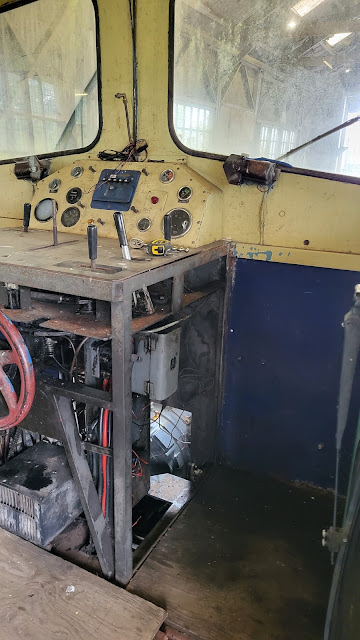
That job centred around Mr. D the latest loco now in the restoration shed.

Rocks by Rail Museum

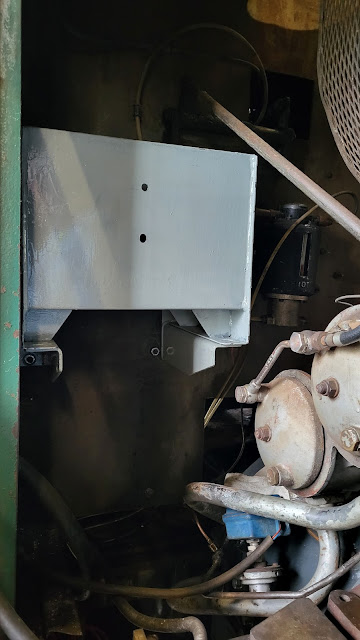
The ever knowledgeable John had a oil tank to relocate under the bonnet and a hydraulic tank to fit in the vacated space. This is the tank!

Rocks by Rail Museum

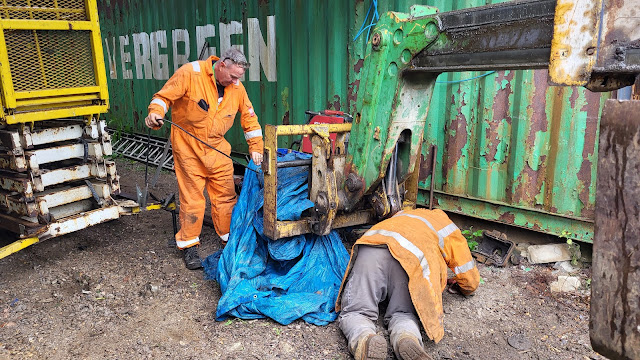
Luckily John is nimble and could get under the bonnet.

Rocks by Rail Museum

Nicely nestled under the bonnet John could identify what needed to be done . 

Rocks by Rail Museum

My job was to be in the relative comfort of the cab to wrench, or as we say in the UK, spanner (but spanner doesn't rhyme with Woody!) the nuts off and on the old and new bolts.

Rocks by Rail Museum

Some holes also needed drilling so I had to keep an eye on making sure the drill didn't hit any of the wires or pipes on the bulkhead. of which there are a few!

Rocks by Rail Museum

Anyway after a few hours and several holes, nuts, bolts and washers the job was done!

Rocks by Rail Museum

And I was dry - unlike Rob and Richard who were trying to keep the welding gear dry!

Rocks by Rail Museum

Meanwhile, Harriot the JCB, looks good outside with the rain adding some shine to her new paintwork!

Rocks by Rail Museum

Next week, if it is dry, It will be back to Lawn Mowing Woody!

Thursday, May 16, 2024

The WMD Film Squad have been out again!

Another WMD YouTube production featuring how I added the cables to the platform sides in moving form rather than the pictures from the last few days.


Wednesday, May 15, 2024

Weathering the platform.

Having glued the platform surface to the base it was time to weather the base. The bricks and cables just looked too bright and new, not dirty and old as such a platform would be. Not only that but a bit of weathering does hide the odd glue smear and similar! The airbrush was loaded up with some very thinned earth coloured paint and randomly sprayed on the base until the desired effect had been achieved.

My Last Great Project

Putting it on the layout it turned from this....

My Last Great Project

....to this. Still more to do to the platform itself but it is coming on.

My Last Great Project


Tuesday, May 14, 2024

Back to model making!

 Time to get back to some modelling as it did rain today! Still didn't get much done as there were indoor jobs to do on Mrs. woody's list! However, I did get some more done on the platform for my 00 gauge layout. Something that you see attached to most platform sides are electrical cables but rarely modelled so that was my challenge today. I had some thin black cable salvaged from a defunct electrical appliance and although not long enough to go the full length of the platform I had a plan!
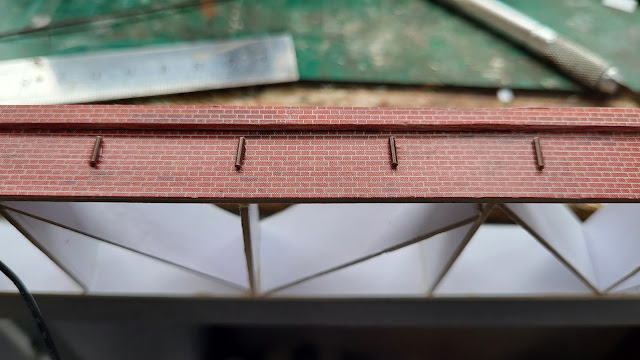
First off I needed some supports to attach the cables to - just like the real thing! I cut 5mm lengths of sme plastic rod from the WMD stock of such things and super glued these at 25mm gaps - roughly 6 feet in old money,

My Last Great Project

My plan to cover the joints in the wires was to make a dummy joint box. Some angled plastic strip did the job.
My Last Great Project

Painted balck they blended in.

My Last Great Project

Tempoarily putting the platform in place it looks good - in my view anyway!

My Last Great Project

My Last Great Project

My Last Great Project

Just needs the top surafce gluing on and some weathering - I wonder if it will rain tomorrow!