Search this blog

Saturday, January 29, 2022

Held in suspension!

This evenings session on the Scania 143 was centered on building the rear suspension. The truck is what is termed as a 6 x 2 that is there are 6 wheels of which 2 are powered. In this particular case the last pair of wheels at the rear of the truck are unpowered and are located on what is termed as an air lift axle. By law trucks are limited in the maximum weight that they can be but there are also limits on the weight that individual axles can carry. Therefore most UK trucks which can weigh up to 44 tonnes gross have 6 axles spread over the tractor unit and trailer in order to be legal. However once partly or fully unloaded they don't need as many axles to legally carry the weight they have left. With 4 tyres on an axle costing in the region of £1000, if you can save wear on them you save money. Therefore over the years truck manufactures have developed what are termed as Air Lift Axles. These usually are usually air operated but can be manual and pistons lift the axle and tyres up off the road. The tyres don't wear saving money, there is reduced rolling resistance saving fuel and with fewer axles the truck is more maneuverable when making tight turns in restricted areas. All in all a win, win situation. 

In building the model form of this set up you have to try to make sure everything lines up so that once the chassis is on its wheels they all sit level on the ground. Not as easy as it sounds but I have managed to assemble the suspension unit and attach that to the chassis and the powered rear axel is also now glued in place. The rear air lift axel is only partly glued in and I am hoping that will give me enough wiggle room should I need to move anything to get the wheels all sitting on the ground - it is literally held in suspension!

Italeri Scania Streamline 143H

Italeri Scania Streamline 143H

Italeri Scania Streamline 143H

The next job is to get the front axle constructed and in place so that I can temporarily get the wheels on and see just how skillful I have been or more probably just how much bodging and brute force I will need to get the chassis level!

Friday, January 28, 2022

Friday is pizza day!

A long time tradition at WMD HQ is that Friday is pizza day. Not many Fridays when pizza does not pass my lips and today was no different with a very nice pizza in the company of some wonderful relatives and a time to talk and observe! Strangely enough with all the things going on in the World much of the chat was about Mrs. Woody's interest in watching and reading murder mysteries and how this may affect my long term future and pizza consumption! However, in my favour is the long list of jobs that Mrs. W has for me to do and at the glacial rate I complete them I should be safe for a while yet!

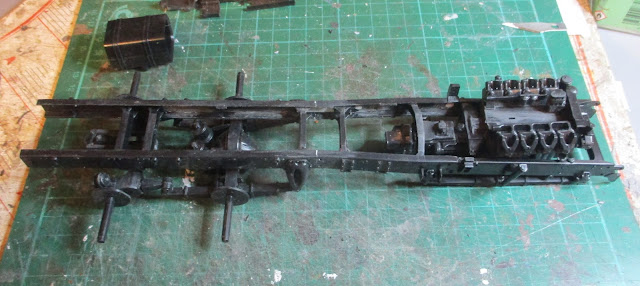
On that assumption and while Mrs. W was watching another episode of Vera I pottered out to the man cave AKA The Room of Gloom and had an hour or so doing a bit more on the chassis and engine of the Italeri Scania Streamline 143H. After yesterdays cut and shut job by the expert bodgers engineers here at WMD HQ I am pleased to report that the shortened and rejoined chassis rails look reasonably straight and level. I won't fully know until I get to the stage of putting the wheels on it to see if it has all worked out. Most of the chassis cross members are in place and the front suspension springs have been attached. I have to admit the springs are truck kits are the worse part of the kit for me. They have a very prominent mould line along the whole of the casting and this needs to be removed. Because of all the way that the springs are made up of individual leafs the whole process is time consuming and fiddly  but it has to be done.

Italeri Scania Streamline 143H

It is interesting to compare the chassis for this truck with the Scania 141 LB that I also have on the go at the moment. You can certainly see the brand similarities. 

Italeri Scania Streamline 143H

Italeri Scania Streamline 143H

Hopefully by next Friday's pizza this chassis may be finished or then again I may be finished! 

Thursday, January 27, 2022

Cut and shut job!

For those of a certain age the phrase 'cut and shut' will bring about memories of unscrupulous backstreet garages welding the undamaged halves of accident damaged cars together to make a good one. Done well this is safe. However many of these garages didn't know what they were doing or just didn't care resulting in some lethal death traps being driven on the road by innocent owners who had been conned.

At WMD HQ we like to think we know what we are doing and if we do a cut and shut job we do it well! After yesterdays escapades with the chassis for the Italeri Scania 143H the need for the cut and shut job on the chassis rails manifested itself so today the cut and shut equipment was located - one miter cutting block to ensure a right angle cut and one razor saw to cut the plastic.

Italeri Scania Streamline 143H

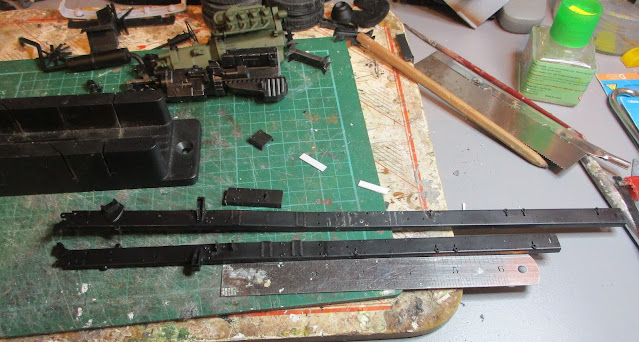
Conveniently, Italeri had marked the inside faces of the chassis rails with three lines to denote where the cuts should be made for different models. In this case the two outer most marks were the ones I needed. Cut one, fine. Cut two, Doh! Yes I got the wrong one but luckily it made no difference to the final result as the one I should have cut was  to the outside of the cut so it worked out. I did learn from all of this and the second rail was cut as it should be in two not three cuts!

The rails are reduced by 44mm which is a fair chunk of chassis in this scale. You can see to the top of the chassis rails the first major part of the chassis I removed and then above that the smaller piece subsequently removed once I realised my mistake!

Italeri Scania Streamline 143H

Joining the two parts is a bit fraught as the chassis rails themselves are not flat as they bow out as they reach where the engine is mounted. That together with various protrusions from the chassis rails means it is just about impossible to set the rails down on a flat surface to ensure they are straight and flat. A lot of eyeballing the alignment, the reinforcement of the joint with some plasticard and using a small straight edge was all that I could do but hopefully both rails are as they should be. I will certainly find out as the build progresses! A bit of progress on the engine block too. Luckily that is not a cut and shut job or we might end up with something very strange knowing the skill set here at WMD HQ!

Italeri Scania Streamline 143H


Wednesday, January 26, 2022

Two steps forward, one step back!

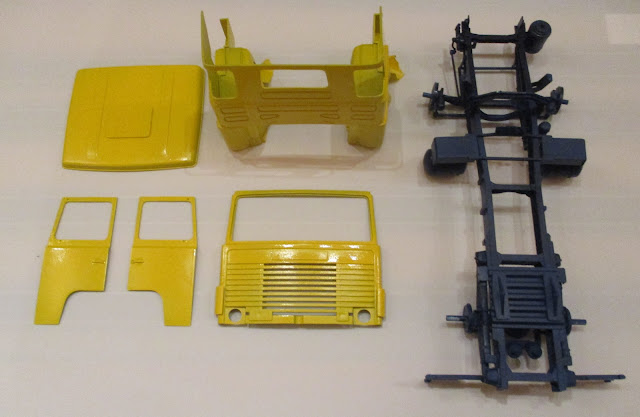
Step one forward. As it was a bright sunny dry day with increased temperatures it was almost ideal to try to spray the Heller Scania 141LB cab in gloss yellow. Following Mondays disaster which I was pleased that the paint went on well and dried to a gloss finish as you can see with the reflected light in the photo below.

Heller Scania 141 LB

It just needs to harden off for a few days before I started get my hands on it otherwise I risk putting finger marks in softish paint. Guess how I know that!

Step two forward. Flush with the success of painting I thought I would have an hour on the other Scania model. Having started the engine yesterday I decided I would get the chassis started just to see what it would be like. I have actually built this chassis before for another model Scania back in 2008. This is the bonneted Scania that is popular in Scandinavia and this model represents a wrecker.

Italeri 142M Scania Wrecker

It is a beast of a model and the chassis is exactly the same as the one I am building apart from the fact that the truck I am now building is a flat fronted cab over engine rather than a bonneted truck. To cut costs I guess, Italeri use the same chassis kit for both kits. However the one I am building now needs to be cut down in length by taking a 44mm section out of the middle to suit the rest of the truck. It says so in the instructions. Guess who thought he knew it all and missed that part? I was reminded that back in July I wrote about the importance of sticking to the instructions when I was building the Kamaz Russian truck and if you want to see the problems I stepped into then click here. 

I only thought about the fact that the chassis did look very long once I leaned back to admire the basic chassis on my workbench having put the cross members in and joined the chassis rails thinking that looks just like the one I built back in 2008 for the bonneted Scania. DOH!

Italeri Scania Streamline 143H

One step back! Luckily the glued joints were not set so I had the opportunity to pull it all apart.

Italeri Scania Streamline 143H

I was going to say you live and learn but obviously I have not but hey ho its only a hobby!


Tuesday, January 25, 2022

A tale of two engines - twice!

Almost sounds like something from Thomas the Tank Engine but it is not so I will explain. First off it was another day at the Rocks by Rail Museum with yet more ballast washing on the agenda. With the temperature just above freezing and water flying about it was always going to be a tough job. However we were not expecting the screen over which the ballast passes when it comes out of the mixer drum to partially collapse nor for Harriot the JCB to develop an oil leak. So whilst we did not get much ballast cleaned we did get cold! Despite these set backs things are repaired and its the knowledge, dedication and determination of the guys at the museum that makes this all possible. Now moving onto the engine reference. It was the turn of Betty's sister loco, Jean to come out for some exercise today. They both look like twins apart from the nameplate as you can see in the photos below, but it was nice to see the other half out in the open air even if it is only the nameplate which shows the difference.

Rocks by Rail

Rocks by Rail

Back at WMD HQ I had time for an hour of model building. As I cannot do anything on the narrow gauge layout or the Heller Scania 141 LB at the moment I had to do what all modelers do and start another project. I have started the Italeri Scania Streamline 143 H and the beginning for me is the engine. Now this is interesting as the Heller kit engine is still not in the chassis so I can compare the two kits interpretation of what is more or less the same engine. The additional level of detail with the Italeri engine even though it is the early stages of construction, is obvious looking at the two together and the part count for the Heller engine is only about half that of the other engine which sort of confirms that observation. Whilst there may be more parts to assemble in the Italeri kit hopefully they will not have the twisted, warped and mis-moulded issues that the Heller kit has and the time taken to fix those. 

Italeri Scania Streamline 143H

A tale of two engines - twice! What more could you want! Well a nice warmish day to finish spraying the Heller kit, the model water on the narrow gauge layout to dry, finish Mrs. Woody's job list, a lottery win...............and off to the land of fantasy I go!

Monday, January 24, 2022

Taking a risk!

I took a risk today! Nothing drastic just that I tried to spray the top gloss coat on the Heller Scania 141LB. Unfortunately its was cold in the WMD HQ spray room and there was damp in the air so the paint has not dried to a gloss which is the risk of spraying in these conditions. Looking at the weather forecast it is not getting better for a few days so I could take another risk by spraying in the kitchen but that is a risk far to far if Mrs. Woody found out! Anyway there is at least some more paint on the parts so they can dry and await a warmer drier day. If they the paint application had been successful then there should be a nice sheen coming off the parts instead of looking as matt as a dark hole!

Heller Scania 141 LB

As I am still waiting for the model water on the narrow gauge layout to fully dry - it is almost there but still needs to be left alone - I have looked for my next project and this is it.

Italeri Scania Streamline 143H

Italeri Scania Streamline 143H

The 143 and its associated derivatives was the next stage in the development of Scania line of trucks and will make a nice comparison with the 141 LB - when they both get finished! Now if I put a lot of newspaper down in the kitchen would I get away with spraying in there? I don't learn do I!

Sunday, January 23, 2022

Sunday Sprays.

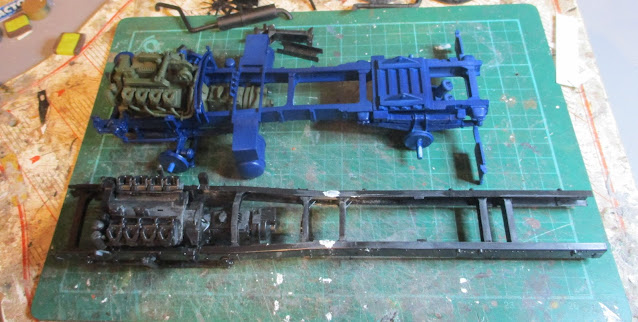
It is Sunday. It is slightly warmer. Mrs Woody is upstairs playing a computer game. That means it is ideal to do some paint spraying which is useful as I have a model to paint! The Heller Scania 141 LB got some serious attention from my airbrush today and although there is still more painting to do it is really beginning to come together - even if I have to balance parts on top of each other to see what the cab will look like! Tamiya dark blue and yellow were the paints of choice for my airbrush - well actually the paint stores at WMD HQ are beginning to look somewhat bare so there was not much choice even if I had wanted different colours! More supplies will have to be ordered soon!

Spraying takes time, especially with a chassis where there are so many less than accessible areas to paint and each need two or three coats. All in all the parts below needed about three hours spent on them just to get to this stage. The chassis needs a coat of semi-gloss varnish which I think is in stock. The cab is in an undercoat yellow so needs a gloss top coat followed by a gloss varnish both of which are in stock as I have already found them and secured them in a safe easily forgotten place!

In the meantime as I rack my brain as to where I put those paints this is what the model looks like at the moment in the warmth of the kitchen.

Heller Scania 141 LB

Heller Scania 141 LB

Heller Scania 141 LB

Heller Scania 141 LB

Heller Scania 141 LB

As a final note and just in case Mrs. W reads this, no kitchens were harmed in the painting of this model!

Saturday, January 22, 2022

Nappy brown!

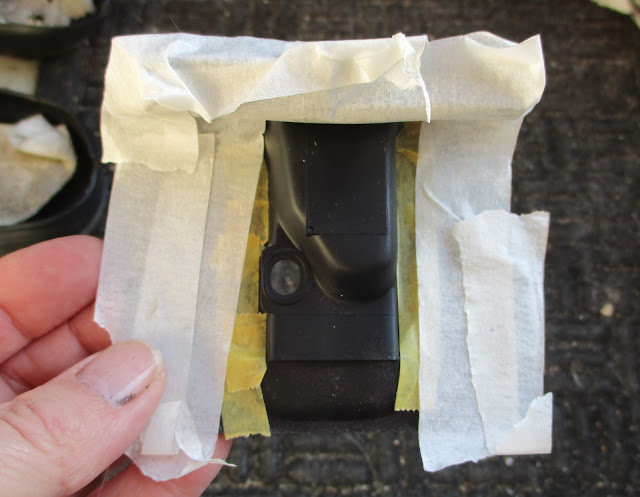
Back in the 1980's vehicle interiors had a certain look to them. A lot of beige, browns and blacks with the odd bold colour thrown in for good measure. Truck interiors followed this trend to be fashionable and at the time it looked good - honest! The interior of my Heller Scania 141 LB is a recreation of that fashion with a generally black and nappy brown interior broken up with some yellow for seats and beds. It will look great to the 1/24th scale driver - he is in the 1980s so knows no better - just like me! The floor coverings and dashboard are black and I had sprayed this on yesterday. Having had 24 hours to dry I masked the floor of floor pan to spray the engine hump brown as this would have been a carpeted area. 

Heller Scania 141 LB

I never made it inside a 141 but I did get into a lot of the Series 3 Scanias, especially the 91 and 113 models that came later on with similar interior décor so I was getting nostalgic with this paint scheme. Anyway, the brown was sprayed onto the engine hump, seats back of cab and cab roof and left to dry. Pulling the masking tape off shortly after applying the paint means that you will usually get a clean line to the paint. Waiting until it fully dry means that there is a risk of pulling the newly applied paint away with the masking tape. In my case the opposite happened with yesterdays black coming partly away with the masking tape. 

Heller Scania 141 LB

Not sure why but no use in holding a full scale investigation when I could actually use the time to rectify the matter with a brush and some black paint. The beauty of matt black paint is that it can be brushed relatively easily which in this case was good for me. With the time I had available a few interior parts were added to the floor pan and the seats given a couple of coats of yellow.

Heller Scania 141 LB

I also had time to fettle a few other parts and to knock up a suzie rack which is where the air lines for the trailer brakes connect to the trucks air system. The kit has a small single outlet mount which is wrong as the system in use at the time of this truck. There would be a red air line as the emergency brake, a yellow line as the service brake and a blue line as the auxiliary brake. In addition there would also be the electrical connection for the lights. 

Heller Scania 141 LB

Hopefully I might get some paint on the chassis over the next few days but that certainly will not be nappy brown!


Friday, January 21, 2022

Hush, Hush, lets do some more painting!

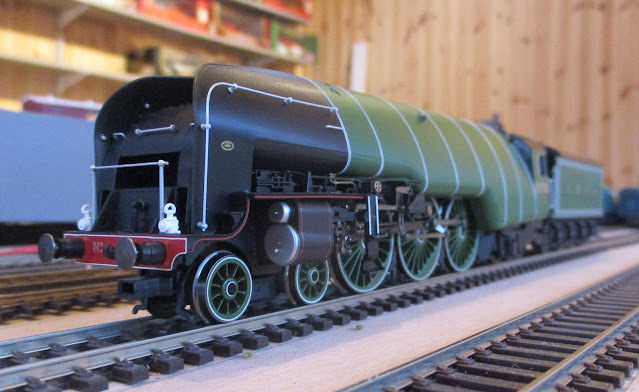
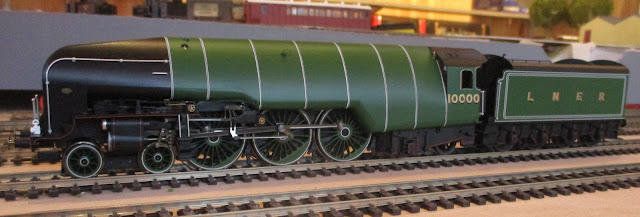
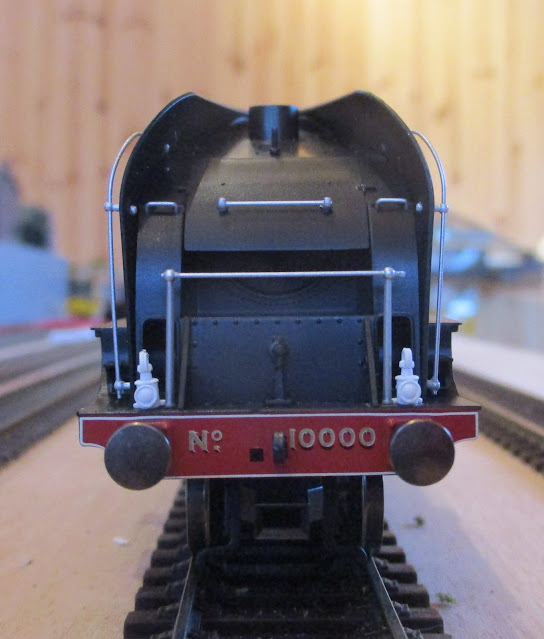
A bit more time to have a look at the Hornby LNER Class W1 Hush Hush today and it is a real stunning model. I just need to put a DCC chip in it and then it will be hauling trains. In the mean time I will just enjoy the beauty of this model.

Hornby Class W1 Hush Hush

Hornby Class W1 Hush Hush

Hornby Class W1 Hush Hush

Hornby Class W1 Hush Hush

Hornby Class W1 Hush Hush

Having spent far too much time admiring the Hush Hush I made a bit more progress on the Heller Scania 141 LB priming some more parts having fettled a few of them. The wheels in particular needed some attention. The ventilation holes were not actually holes! They were just small depressions in the moulding so some time with a pin vice and drill had these opened up to proper holes which looked a whole (pun intended) better!

Heller Scania 141 LB

Heller Scania 141 LB

My usual method of fastening small parts to be painted onto a board with masking tape folded over itself followed.

Heller Scania 141 LB

Once one side is painted and dry the parts are turned over so that all the exposed surfaces get a coat of primer. After a couple of hours I have this pile of parts on my workbench.

Heller Scania 141 LB

Almost looks like a truck assembly plant but I will stay hush, hush about that!

Thursday, January 20, 2022

The painting begins!

This is where the build of the Heller Scania 141 LB slows down a lot as the paint begins to go on. You need to prepare parts, undercoat them, top coat and then wait to dry. Some parts have to be painted before being assembled further and it can all become a little like a chess board as you plan what parts need painting and when. Despite my scatter gun brain I do have a plan - almost - and I have started with the engine and a few other parts. The engines on Scania trucks are generally painted in green when they are assembled in the factory and so that is what I went with despite the instructions telling me it should be red.

First off the engine was primed in my favorite Vallejo black primer after which it was then painted in green - in this case a bottle of Vallejo Russian Green was to hand so that is what I used.

Heller Scania 141 LB

Heller Scania 141 LB

The engine still needs some detailed painting with the exhaust pipes, inlet manifolds and turbo needing attention as well as the fan blades needing to be added.

I have also primed the exhaust pipe, the fan blades and the underside of the floor pan. All this will dry over night and hopefully tomorrow a bit more painting will take place.

Heller Scania 141 LB